The post Chicken Paprika Recipe appeared first on AddictedToSaving.com.
]]>

![]()
I originally posted this recipe back in 2013. It is still one of my favorite chicken recipes to make! I love to make it when the weather starts cooling a little. It’s a nice warm comfort meal. I made this last week and for the first time did not bread the chicken. I simply sauteed the chiken in olive oil with salt, pepper and paprika. Once the chicken was cooked through, I removed it, added onions to the pan and cooked them through. Then I added the milk mixture with extra paprika and some flour to thicken the sauce. I baked the dish as normal and it turned out so good. It’s a fun switch if you prefer not to bread and fry the chicken!
Chicken Paprika is a comfort meal my mom prepared for our family growing up. My brother loved the chicken so much that sometimes my mom would make this recipe without the sauce. She would give him the browned chicken and he would eat them like chicken nuggets. (So if you have picky kiddos, you might want to make this recipe without the sauce!) About four years ago, I started craving this meal and my mom gave me the recipe. I was shocked at how easy it is to make and at the same time how tasty it is. I always plate this dish with a fresh veggie (usually broccoli, asparagus or green beans) and brown rice.
Frugal Tips:
To make this recipe affordable, purchase boneless, skinless chicken breasts in bulk when on sale for $1.99/lb or less. Freeze your chicken and thaw when needed versus paying full price when needed. Zaycon Foods is a way to save on meat & seafood.
Healthy Tips:
I make this recipe using whole wheat flour (in lieu of white flour) and skim milk (in lieu of whole milk). The sauce thickens nicely with skim. Also – my mom’s recipe includes canned mushrooms and shredded cheese. I don’t use either when I make it.
Recipe: Chicken Paprika
Ingredients
- 3/4 cup Flour
- 3 t Paprika
- 2 t Salt
- Dash Pepper
- 2 lbs Boneless, Skinless, Chicken Breast cut in pieces
- Extra Virgin Olive Oil
- 1/4 Large Onion (use more if you prefer)
- 2 cups Milk
- 1 can Sliced Mushrooms 3 oz (drained) (optional)
- 2 T Lemon Juice
- 2 oz shredded Swiss or Cheddar Cheese (optional)
Instructions
1) Preheat oven to 350
2) In plastic bag combine flour, paprika, salt and pepper.
3) Add a few pieces of chicken to the bag at a time. Coat the chicken.
4) Brown chicken on both sides in a large skillet with EVOO. Only use enough EVOO to coat pan and prevent sticking.
5) Transfer browned chicken to plate with paper towel on it to drain excess oil. Reserve drippings in pan.
6) Add onion to drippings in pan and cook until tender.
7) Stir in 4 T flour mixture to pan.
8) Add milk. Cook and stir until sauce bubbles and thickens.
9) Add lemon juice and mushrooms (if desired).
10) Spray PAM in a casserole dish. Pour sauce over chicken. Top with cheese (if desired)
11) Cover with Foil.
12) Bake 30 minutes.
13) Serve with a fresh veggies and rice
Enjoy!
- To see additional recipes posted on Addicted to Saving, go HERE
The post Chicken Paprika Recipe appeared first on AddictedToSaving.com.
]]>The post Keto Taco Bake Recipe (Low Carb) appeared first on AddictedToSaving.com.
]]>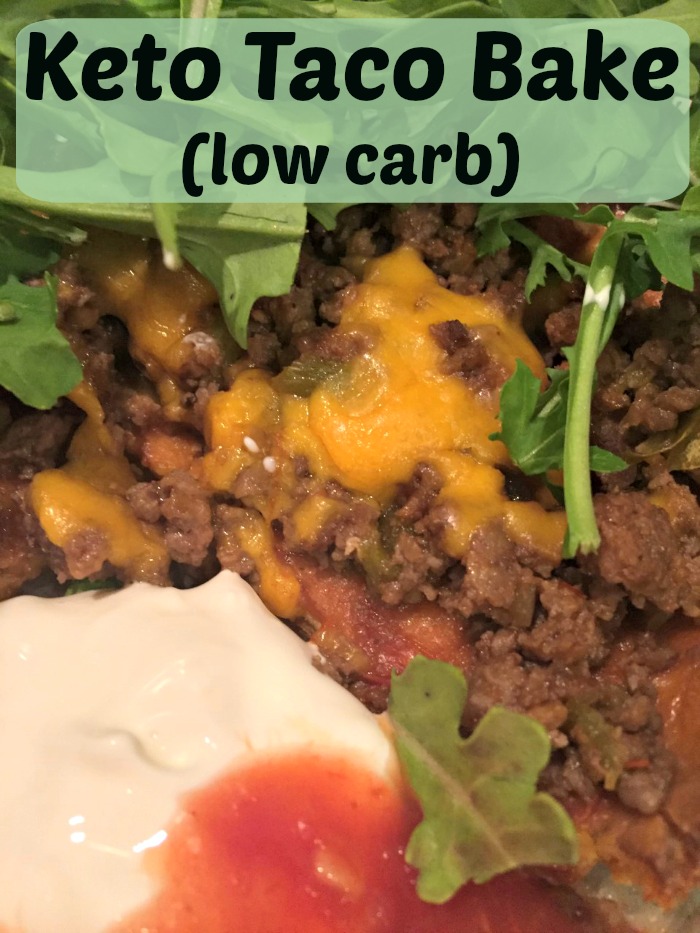
Update! I first published this recipe back in 2017 and since then I’ve made it quite a few times! It’s hearty, tasty and so good! Even if you aren’t eating low carb, this recipe makes for an awesome dinner. You could stuff tortillas with the taco back or top tortilla chips with it. Sooo good!
I’ve been loosely following the Keto diet since last winter. If you haven’t heard of it, it’s really interesting. It focuses on consuming high fat, moderate protein and low carb each day. Many people who follow the Keto diet track their macros keeping track of the exact amount of protein, fat, calories and carbs they consume each day. They usually have great success. I’ve found that I don’t have the time to track the numbers so I’ve just focused on what I’m eating.
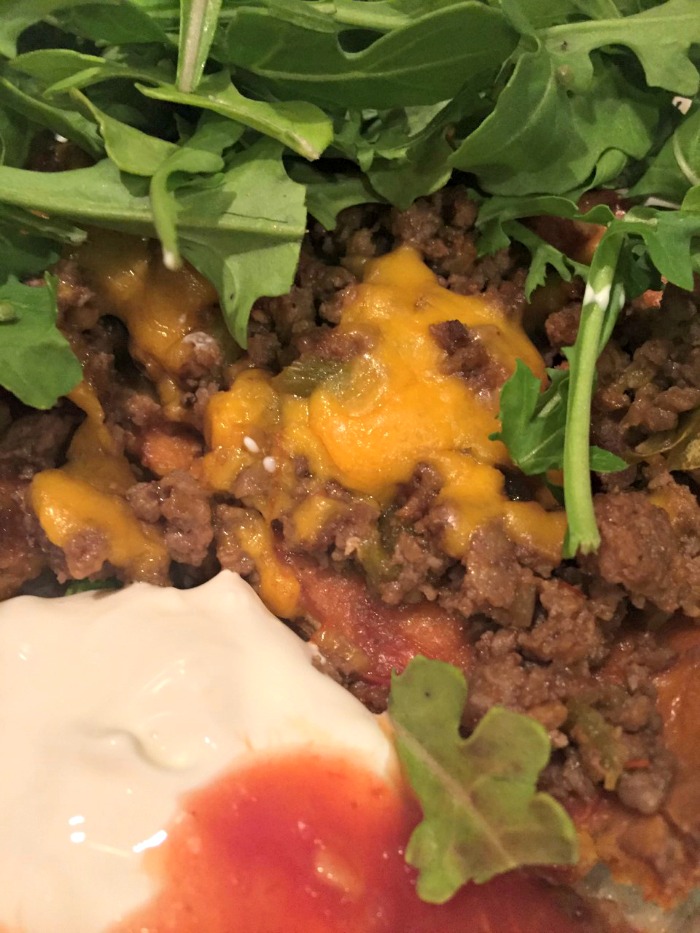
One of the Keto groups I’m in posted this awesome Keto Taco Bake recipe. I made it last night and my entire family loved it – even my picky son who eats dinner about 50% of the time. I doctored my meal up with tons of arugula, a dollop of sour cream (remember – with Keto fat is good) and a little salsa. I didn’t add much salsa because of the carb and sugar content in it.
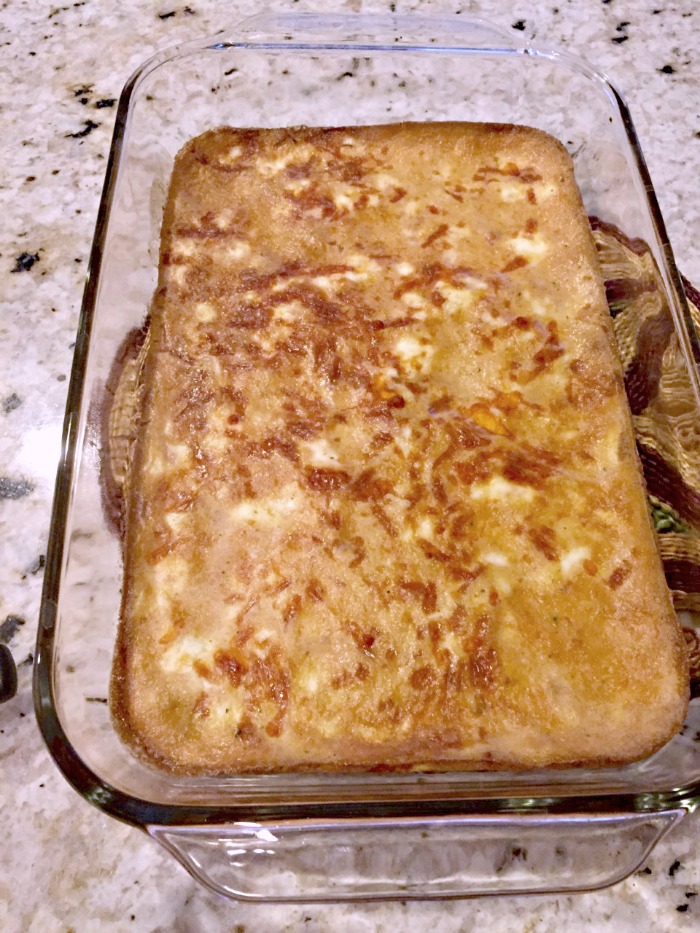
This recipe is really easy to make. And it satisfied my desire to have a meal with a crust. This is the first meal I made with a crust. There are many recipes for Keto Bread, Keto Pancakes, Keto desserts, etc etc. I haven’t made any of them until this meal. The bottom, crust-like layer is simply Cream Cheese, Eggs, Heavy Cream, Seasoning and Cheddar cheese! You bake this layer for 25 minutes and then top it with the meat mixture.
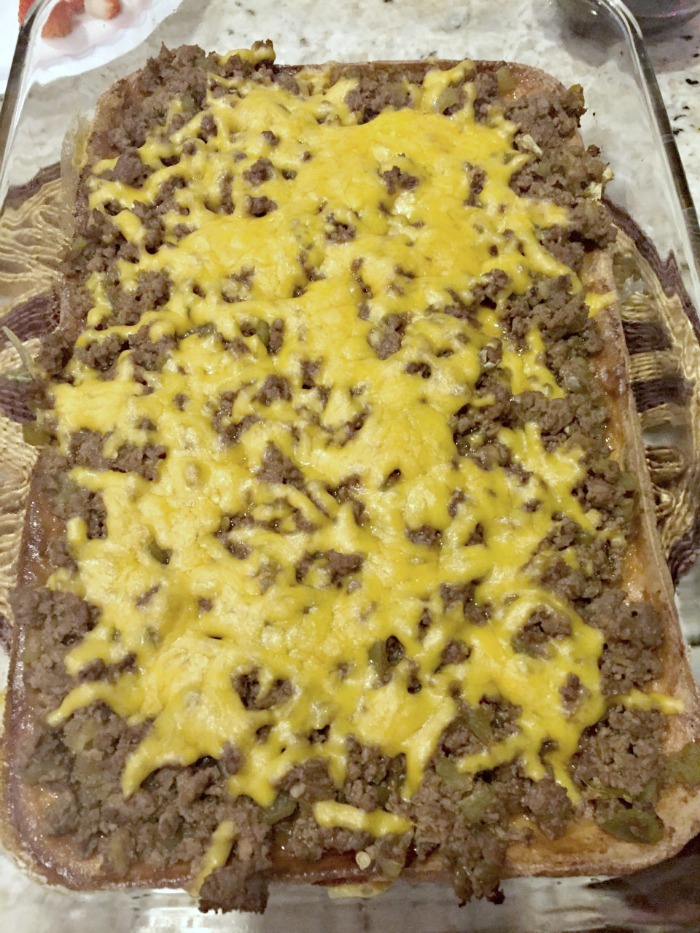
The top, meat layer is just as simple to make as the bottom layer. This layer has ground beef, salsa (or taco seasoning) – I opted for salsa although you do have to pay attention to the carb & sugar content in your salsa, green chilis and cheddar cheese. You bake this layer for 20 minutes and the finished product will look like my picture above.
Keto Taco Bake Recipe
Crust Layer Ingredients
4 oz Cream Cheese, softened
3 Eggs
1/3 cup Heavy Cream
1/2 teaspoon Taco Seasoning
8 oz Shredded Cheddar Cheese
Beef Topping Layer Ingredients
1 lb Ground Beef
1/2 cup Salsa (or if you want to avoid using salsa add 3 teaspoons Taco Seasoning & 1/4 cup Tomato Sauce)
4 oz Chopped Green Chilies
8 oz Shredded Cheddar Cheese
Directions
1) Grease the 9×13 baking dish and preheat the oven to 375.
2) For the crust layer, beat the softened cream cheese, eggs, heavy cream and taco seasoning. Once mixed, mix in the cheddar cheese.
3) Pour the crust layer into the dish and spread evenly throughout.
4) Bake at 375 for 25-30 minutes. Once baked, let stand for approximately 5 minutes.
5) Brown the hamburger & drain fat. Stir in salsa (or seasoning & tomato sauce) and green chilies.
6) Spread the beef topping layer over the baked crust. Top evenly with shredded cheese.
7) Bake in oven with reduced heat of 350 degrees for 20 minutes.
Serve with fresh lettuce, sour cream, olives, etc etc etc.
If you make this recipe, I would love to hear your thoughts!
Recipe adapted from Food.com
The post Keto Taco Bake Recipe (Low Carb) appeared first on AddictedToSaving.com.
]]>The post Comfort Foods Recipes: Homemade White Cheddar Macaroni & Cheese appeared first on AddictedToSaving.com.
]]>

This is another holiday dish I love to make each year. We love it so much that I make it year round. I’ve made an update to this recipe. I now use 1 block of sharp white cheddar cheese and 1 block of pepper jack cheese. The pepper jack adds a fun spiciness that we love. If you don’t like spicy cheese, you could stick with just white cheddar or add other types of cheese you enjoy as well. This dish is customizable as long as you follow the recipe for the roux (aka sauce).
A favorite side dish in my house is macaroni & cheese. Homemade macaroni & cheese. It is the perfect comfort food and I love making it from scratch because I can control the ingredients in it. (Versus using a box with the powdered cheese ;)) With very little effort, it is easy to make a creamy side dish that is sure to please a crowd. I typically make this for Thanksgiving, Christmas and Easter as a side dish Then a couple of times throughout the year when me or hubby are craving it, I will make it to go along with grilled chicken or burgers or soup. I always make this with two bars of Cabot White Cheddar Cheese. You do not have to use Cabot, in fact you don’t have to use white cheddar or even block cheddar. Shredded cheese would work perfectly as well!
Frugal Tips
- Always purchase pasta when it is on sale and stockpile it away. I try to purchase pasta when it is on sale BOGO and there is a coupon to use with the sale. Typically regular pasta is around $0.50/box or less shopping like this.
Healthy Tips
- Macaroni & Cheese does not have to be as calorie filled as you would think. I use skim milk. (In fact, I always cook with skim milk.) I also use two different blocks of Cabot cheese. One block is 50% Reduced Fat and the other block is Sharp. And I will also use either whole wheat pasta or for this recipe, pictured below, I used brown rice, gluten-free pasta! Hubby didn’t even realize the difference! I would not recommend substituting the white flower in this recipe with whole wheat flower. (You all know that I love to substitute whole wheat flower whenever possible.) Whole wheat flour changes the color of the sauce and gives it a murky color. And the flavor of the whole wheat flower comes out in the sauce and it isn’t the most pleasant.

Homemade White Cheddar Macaroni & Cheese
Ingredients
3 c Macaroni (cooked & drained)
2 blocks Cheddar Cheese – shred our cut into cubes (I prefer Cabot and use one block 50% less fat and one block extra sharp)
1/4 c Butter or Margarine
1/4 c Flour
2 c Milk
1 t Salt
pepper
Instructions
1) Preheat oven 350 degrees. Spray 1.5 qt casserole dish with non-stick spray
2) Cook macaroni & drain
3) Shred or cube cheese
4) Alternate layers of pasta and cheese in casserole dish
Sauce Instructions
1) Melt butter in medium sauce pan
2) Remove from heat and blend in flour
3) Return to stove and gradually stir in milk and seasonings.
4) Bring to a boil, stir, and boil for one minute until sauce thickens (Keep stirring to prevent sticking)
5) Pour sauce over pasta and cheese in casserole dish. Stir everything to insure sauce is spread throughout entire dish.
6) Bake at 350 for 15-20 minutes until golden brown.
Enjoy!
To see additional recipes posted on Addicted to Saving, go HERE
The post Comfort Foods Recipes: Homemade White Cheddar Macaroni & Cheese appeared first on AddictedToSaving.com.
]]>The post Holiday Side Dish Recipes: Tangy Broccoli Salad appeared first on AddictedToSaving.com.
]]>
I haven’t made this recipe in a long time. I love having it as a side dish for holiday meals because the fresh broccoli is a nice change from all of the heavy casseroles. (Don’t get me wrong, I love a good carb filled casserole.) For me, Thanksgiving and Christmas are all about the side dishes. I’m not a huge meat eater in general and truthfully, I’m not a fan of turkey, so I use Thanksgiving and Christmas as an excuse to indulge in carb laden side dishes.  Whether it is my Homemade White Cheddar Mac & Cheese or my Corn Pudding, I am perfectly happy eating one side dish after another and skipping out on the turkey. The recipe below is a favorite of mine because it is a cold salad. It is easy to prepare and I tell myself that it is as “healthy” as a garden salad that I might prepare for dinner.
My hubby’s aunt first introduced me to this recipe. She prepared it for a family gathering and I immediately fell in love with the tangy sweetness of the dressing mixed in with the bacon and peanuts. The broccoli is so crunchy and absorbs the dressing nicely. And, the vibrant colors of this dish really stand out.


![]()
To see additional recipes posted on Addicted to Saving, go HERE
Tangy Broccoli Salad
Salad Ingredients
1 Head of Broccoli (cleaned and cut into small, bite size pieces)
1 c Raisins
1 c Salted Peanuts
12 Strips Bacon (cooked & crumbled)
Dressing Ingredients
1 c Mayonnaise
3 T vinegar
1/2 c Sugar
Instructions
1) In a mixing bowl, mix broccoli, raisins, peanuts and bacon.
2) In a small bowl, mix dressing ingredients.
3) Pour dressing ingredients over salad ingredients. Mix well.
4) Pour into serving bowl. Chill. Stir before serving as dressing will settle to bottom.
Enjoy!
Check: Takealot Specials, Pick n Pay Specials in Catalogue Specials.
To see additional recipes posted on Addicted to Saving, go HERE
The post Holiday Side Dish Recipes: Tangy Broccoli Salad appeared first on AddictedToSaving.com.
]]>The post Holiday Side Dish Recipes: Sweet Potato Casserole appeared first on AddictedToSaving.com.
]]>

Sweet Potato Casserole. It seems that there are two different version of this sweet casserole. One involves marshmallows. The other involves lots of brown sugar. This recipe was passed on to me from my hubby’s family and it involves lots of brown sugar. They make this dish for Thanksgiving and Christmas. To me, this is more of a “dessert-like” dish. It’s my husband’s favorite dish over the holidays. He actually has me double to brown sugar topping to make it extra sweet. It is a great companion to ham and Paula’s Loaded Mashed Potatoes.
Frugal Tips
- Potatoes go on sale over the holiday season because stores know that most of us are stocking up on them. So you should be able to find Sweet potatoes priced at or under $0.49/lb.
Healthy Tips
- Sweet potatoes are a very healthy carbohydrate. They are a great source of dietary fiber, they are low in sodium and very low in saturated fat & cholesterol.
- If you are looking to limit your sugar intake, you can omit the 1/2 c white sugar that is mixed into the mashed sweet potatoes. Sweet potatoes are naturally sweet so you don’t have to add more sweetness.
Sweet Potato Casserole
Ingredients
4 c Sweet Potatoes (whipped)
1 stick Butter
1/2 c White Sugar
2 eggs
Topping Ingredients
3/4 stick Butter (melted)
1/2 c Flour
1 c Brown Sugar
1/2 c Pecan Pieces (optional)
Directions
1) Preheat oven to 350 degrees. Spray 9×11 dish with non-stick cooking spray
2) Combine already whipped potatoes, butter, white sugar and 2 eggs in mixing bowl. Mix together well.
3) Pour sweet potato mixture into baking dish
4) Combine topping ingredients in a small bowl.
5) Spread topping over sweet potatoes
6) Bake for 45 minutes.
Enjoy
The post Holiday Side Dish Recipes: Sweet Potato Casserole appeared first on AddictedToSaving.com.
]]>The post Holiday Side Dish Recipes: Paula’s Loaded Mashed Potatoes appeared first on AddictedToSaving.com.
]]>
Make sure you don’t miss ANY deals on toys, games, electronics and more! Join Addicted to Saving’s Holiday Deals Facebook group and stay on top of all of the latest deals! And, don’t miss my 2015 Holiday Gift Guide to see all of the gift ideas I am loving this year!
This is my favorite Thanksgiving side dish to make each you. This recipe is creamy, tangy, tasty and so easy to prepare. Honestly, I don’t think I will ever make plain mashed potatoes again after trying this recipe. If you make it, let me know your thoughts – I would love to hear what you think!
Frugal Tips
- Potatoes go on sale over the holiday season because stores know that most of us are stocking up on them. So you should be able to find Idaho potatoes priced at or under $0.49/lb.
- Sour cream also typically goes on sale the week before holidays so stock up and get enough for Thanksgiving and Christmas – watch the expiration dates because it doesn’t usually expire for a month or so.
Healthy Tips
- I so wish I had a healthy tip for you in this recipe. But I don’t. Well, I guess you could substitute turkey bacon for pork bacon? Besides that, this recipe is all about flavor. And comfort. And creaminess.

To see additional recipes posted on Addicted to Saving, go HERE
Check: Publix Weekly Ad and Kroger Weekly Ad.
Paula’s Loaded Mashed Potatoes
Ingredients
2 heads garlic
6 pounds Idaho potatoes, peeled and quartered
Salt
2 teaspoons freshly ground black pepper
1/2 cup butter
1 12 oz carton sour cream
1 8 oz block sharp white Cheddar, grated (my favorite brand to use is Cabot)
1 1/2 pounds bacon
Green onion (for topping) if desired
Instructions
1) Preheat oven to 350 degrees.
2) Cook bacon on stovetop. Once crispy, cut into small pieces. Set aside.
3) Cut the tops off 2 garlic heads. Wrap in foil and bake for 30 minutes. Let cool. Remove garlic from skins.
4) Cook potatoes in boiling water until tender. Drain. Return to pot.
5) Mash potatoes until smooth (I used a hand mixer), add salt, pepper, butter, sour cream, garlic
6) Add cheddar cheese and bacon.
7) Spoon mashed potatoes into serving bowl.
8) Top with green onions (if desired)
Enjoy!
Head HERE to see all Holiday Gift Deals on Addicted to Saving
Go HERE to see all Amazon and HERE to see all Kohl’s Deals
The post Holiday Side Dish Recipes: Paula’s Loaded Mashed Potatoes appeared first on AddictedToSaving.com.
]]>The post Holiday Side Dish Recipes: Corn Pudding appeared first on AddictedToSaving.com.
]]>
Every year I make the same side dishes to go along with our Thanksgiving turkey and ham. If I’m honest with you, I don’t care for turkey at all. I like ham… but I LOVE side dishes. The more decadent and tasty they are, the better! These are tried and true recipes and all very easy to make. I will admit that I usually make all of the recipes simultaneously at once so my kitchen tends to be a bit chaotic as I multi-task to the max. But these are hearty recipes and very hard to mess up so they always come out marvelously!


![]()
To see additional recipes posted on Addicted to Saving, go HERE
This is another Thanksgiving recipe that my family enjoys year after year. I first ate Corn Pudding for the first time over 20 years ago at my in-law’s house when I met them for the first time. They made this as a side dish to go along with ham. It was SO good. My hubby’s family makes this dish for most major holidays and I’ve started making this dish for major holidays even if we don’t spend it with my in-laws. They call this dish Corn Pudding which doesn’t make a ton of sense to me, but the name doesn’t matter, the taste does! This corn pudding has the perfect combination of sweet and salty. It is SIMPLE to make and you really only need one ingredient – canned corn! The rest of the ingredients you should have in your in your fridge!
Check: Publix Weekly Ad and Kroger Weekly Ad.
Frugal Tips
- Canned vegetables typically go on sale over the holidays. When you find a sale, see if there is a corresponding coupon to use on the sale. Even without a coupon, if you can purchase canned vegetables for $0.75 or less, stock up on it. That way you have it available to use throughout the year and you don’t have to pay full price next time you need it.
Healthy Tips
- I don’t have a ton of tips for you for this recipe! This is a decadent side dish. Enjoy it! You can use low sodium canned corn if sodium is a concern.

Corn Pudding
Ingredients
1 can Corn Kernels, drained
1 egg
3 T sugar
Milk
Butter (approx 1/8 c or more as desired)
Salt (approx 1/4 t or more as desired)
Pepper (approx 1/4 t or more as desired)
Instructions
**Tip – if you are cooking for a crowd, just double, triple, quadruple the ingredients. I’ve made this recipe with as many as 6 cans of corn
1) Preheat oven to 350 degrees and spray no-stick spray on casserole dish
2) Mix Corn, egg and sugar together. Pour mixture into casserole dish
3) Pour Milk over corn so that it barely covers the top of the corn.
4) Dot corn with butter, sprinkle with salt and pepper
5) Bake for 45-60 minutes or until liquid has disappeared. When you see that the “pudding” has firmed, you have cooked it long enough!
To see additional recipes posted on Addicted to Saving, go HERE
The post Holiday Side Dish Recipes: Corn Pudding appeared first on AddictedToSaving.com.
]]>The post Holiday Side Dish Recipes: Crispy Veggie Casserole appeared first on AddictedToSaving.com.
]]>

![]()
This recipe is a holiday favorite. It’s a fun alternative to green bean casserole. This year I’m making it with frozen broccoli and cauliflower. I’ve grown up having this Crispy Veggie Casserole on every Christmas and every Thanksgiving. The picture above is a bit different from my mom’s recipe. Mainly because I didn’t plan ahead and have the correct frozen veggies to use. But even with my alternate take, it is still SO good. (I used frozen cauliflower and frozen corn. The recipe calls from frozen cauliflower, broccoli and carrots – it is much prettier with the green broccoli and orange carrots.)
Frugal Tips
- Over the holiday seasons (Thanksgiving, Christmas, Easter) we will find Campbell’s Condensed Great for Cooking Soups on sale 10/$10 or less. If you match the sale with a coupon, you can very easily get canned Cream of Mushroom soup for under $0.50/can.
- Frozen veggies go on sale quite often. Compare store brands with major brands like Birds Eye and Green Giant. Often the larger brands have better sales than store brands pricing. And, if you use a coupon on a sale, you will get an even better deal.
Healthy Tips
- This is not the healthiest casserole in the world. You can use low fat sour cream and not notice the difference.
- You can also use low sodium cream of mushroom soup. The French’s onions will give plenty of flavor and saltiness.
- You can also use low fat shredded cheese.
Check: Publix Weekly Ad and Kroger Weekly Ad.
Crispy Veggie Casserole
Ingredients
1 16 oz bag Frozen Broccoli, Cauliflower & Carrots (you are welcome to substitute alternate veggies)
1 can Condensed Cream of Mushroom Soup
1 cup Shredded Swiss Cheese (I very seldom have swiss so I usually use cheddar)
1/3 c. Sour Cream
1 can French Fried Onions (I usually use one full large container of French’s Fried Onions.)
Dash Black Pepper
1 jar, 4 oz, Chopped Pimientos (these add a beautiful red color to your casserole)
Directions
1) Thaw frozen vegetables
2) Preheat oven to 350. Spray a 2 qt casserole dish with non-stick spray
3) Mix cream of mushroom soup, cheese, sour cream, pepper and half of can/container Fried Onions
4) Combine soup mixture with frozen veggies. Pour into casserole dish.
5) Bake for 40 minutes. Add remaining fried onions to top of casserole.
6) Bake an additional 5 minutes until onions are lightly browned.
Serve & Enjoy
The post Holiday Side Dish Recipes: Crispy Veggie Casserole appeared first on AddictedToSaving.com.
]]>The post Leftover Halloween Candy Recipe: Peanut Butter Cup Cookie Dough Cheesecake Bars appeared first on AddictedToSaving.com.
]]>

![]()
I post this recipe every fall right after Halloween. If you are looking for a way to use up leftover Halloween candy, this recipe is awesome!!
If you have leftover Halloween candy you want to use up, this is a fun recipe to try. It reminds me a little of Adam’s Peanut Butter Cup Fudge Ripple Cheesecake at Cheesecake Factory and is OH SO GOOD
Every year hubby and I purchase a ton of Halloween candy to give to our neighborhood trick-or-treaters. And every year, we have leftover candy. Usually I try to give the candy away to neighbors or I put the candy in a place that is hidden from site in an attempt to refrain from eating all of it in 24 hours. This recipe is a great way to use some of your leftover candy or candy you steal from you kiddos. I made it with Reece’s Peanut Butter Cups. You can make it with a different candy or a mixture of chocolates. There are no rules as to what candy would go good in these bars.
Frugal Tips:
- I used Nestle Tollhouse Cookie Dough that I got free matching a coupon with a sale (see my Photo Show & Tell HERE). To find cookie dough and candy coupons, check out Addicted to Saving’s Coupon Database.
- Cream cheese often goes on sale over the holiday season since many people bake desserts with it. Stock up on cream cheese over the holidays and freeze it. It will bake fine and you won’t have to pay full price.
Healthy Tips:
Honestly, I have no tips for you on how to make this recipe healthy. This is a deadly, oooh it is so good recipe that entails calories, sweetness and candy.
Peanut Butter Cup Cookie Dough Cheesecake Bars
Ingredients
Cookie Layer
1 package Chocolate Chip Cookie Dough (I used Nestle Tollhouse ULTIMATES Cookie Dough Chocolate Chip Lovers), softened at room temperature
Candy Layer
8 Reece’s Peanut Butter Cups (cut into halves) (I used regular size PB cups, not the minis. You could easily make this with minis – just use enough to cover the cookie dough layer!)
Cheesecake Layer
8 ounces Cream Cheese, softened at room temperature
1/3 c Sugar
1 egg
1 teaspoon Vanilla
Instructions
1) Preheat oven to 375 degrees. Spray 8×8 baking dish with non-stick spray
2) With a rolling pin, gently roll cookie dough until it is slightly larger than 8×8. Trim excess dough (save for topping). Place dough in baking dish and spread until it covers the bottom.
3) Place 16 peanut butter cup halves side-by-side on top of the cookie dough. (Or substitute other candy bars for the PB cups. You make the rules and you can choose the flavors you like!)
4) Pour and spread cheesecake layer over the candy.
5) Sprinkle bars with remaining cookie dough
6) Bake 30 – 40 minutes until top turns slightly brown
Enjoy!
- To see additional recipes posted on Addicted to Saving, go HERE
I was inspired to make this recipe after reading Bakers Royale
The post Leftover Halloween Candy Recipe: Peanut Butter Cup Cookie Dough Cheesecake Bars appeared first on AddictedToSaving.com.
]]>The post Quinoa Summer Salad Recipe appeared first on AddictedToSaving.com.
]]>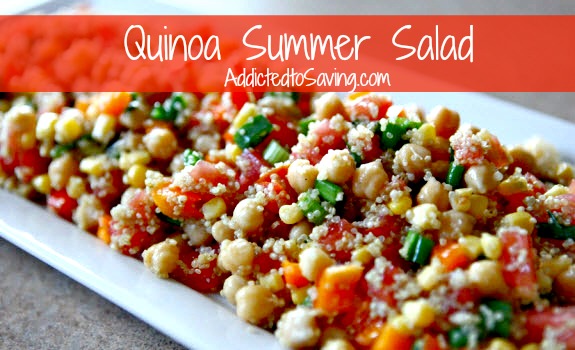

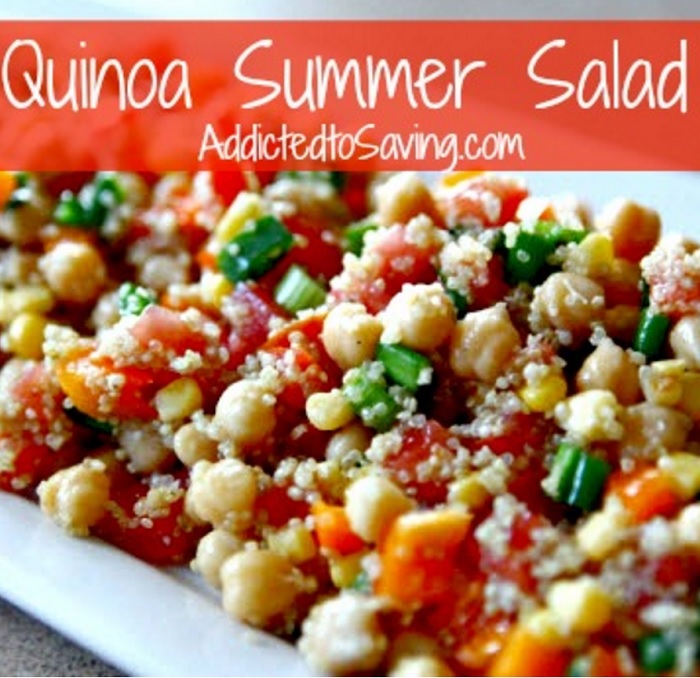
I originally published this Quinoa Summer Salad Recipe a few years ago. It is still a family favorite and I especially love making it in the summer when veggies are freshest and have the most flavor. It’s so easy to make and looks so good!
This Quinoa Summer Salad recipe carries on my love for all things Quinoa. Quinoa is a grain that is high in protein, iron, magnesium and potassium. A one cup serving of quinoa has 222 calories, 8 g of protein, 39 g of carbohydrates and 5 grams of fiber! (One cup equals one serving of protein!) When I make quinoa, typically I will make more than one meal’s worth of quinoa. I will then refrigerate the cooked quinoa and use it in additional recipes.
Many of you have asked me where I get my quinoa. I usually order it on Amazon or Vitacost. I will often compare the prices on both websites and order wherever I can get the best deal!
This salad below is perfect for summer (or all year round eating). It is light and relies on fresh flavors like basil, lemon, tomatoes and green onions! If you make any variations to the recipe below, I would love to hear what you made and how it turns out!
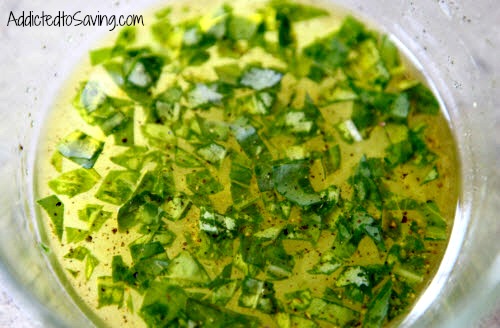
Below is the homemade dressing for this salad (recipe is below)
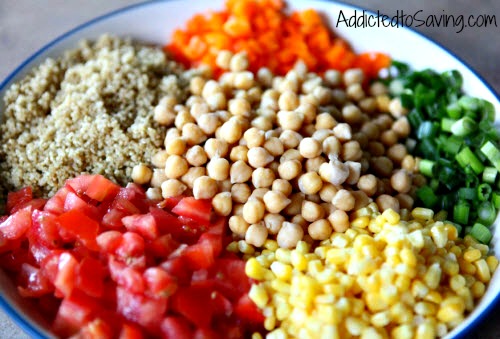
How amazing do these salad ingredients look? (recipe is below)
Quinoa Summer Salad
Salad Ingredients 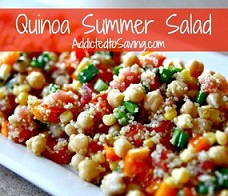
1 cup uncooked quinoa
12 oz. of garbanzo beans, cooked according to directions (or use 1 can rinsed and drained)**
3 roma tomatoes
1 bell pepper (I used orange, you could use yellow or red or a combination of all 3)
1 ½ cups of corn (I used frozen and thawed it)
3-4 green onions, chopped
Dressing Ingredients
2 T Extra Virgin Olive Oil
Juice from one lemon
3-5 fresh basil leaves chopped (or use dried if you don’t have fresh)
Salt & Pepper to Taste
Directions
1. Cook your quinoa (2 parts water to 1 part quinoa), then set aside in a LARGE bowl and let cool. I like to cook my quinoa in my rice cooker – just make sure to watch it towards the end so it doesn’t burn.
2. While quinoa is cooking, cook garbanzo beans if needed, chop tomatoes green onions and peppers.
3. Mix up dressing in a small bowl and set aside.
4. Place all ingredients into the bowl with the quinoa and mix well. Pour over dressing, mix again, and chill in the fridge for about 30 minutes – 1 hours.
5. Serve with a side of bread or crackers and enjoy!
**You can substitute garbanzo beans with different beans or edamame if you prefer
Go HERE to see my Apple Quinoa Bites Recipe
Go HERE to see my Quinoa with Roasted Brussels Sprouts & Red Onion Recipe (Gluten-Free)
Go HERE to see additional Recipes posted on Addicted to Saving
The recipe has been adapted from The Garden Grazer
The post Quinoa Summer Salad Recipe appeared first on AddictedToSaving.com.
]]>The post Caprese Salad Recipe appeared first on AddictedToSaving.com.
]]>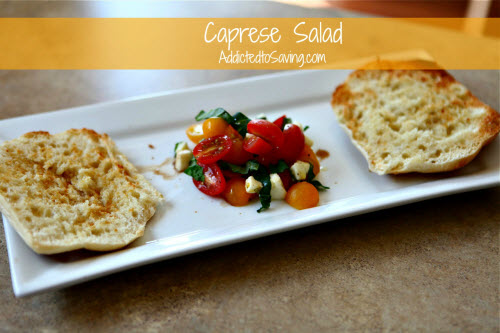

*update – May 15, 2018* I had to repost this recipe from a few years ago because it is SO good and it reminds me of summer! This is a light and fresh recipe that is perfect for hot summer nights!
One of my favorite things about belonging to a coop is that every week, I receive a bounty of fruits and veggies that I get to cook and juice with. I like the challenge of finding new recipes like this Caprese Salad recipe. “Insalata Caprese” – literally, the salad from Capri – is a no-brainer if you have tomatoes you want to use up. You can use the cute cherry and orange tomatoes I have in this recipe or you can even use Roma or Plum or even Tomatoes on the Vine. If you use larger tomatoes, just cut them down to bite size chunks! With tomato season coming up, this is an excellent Caprese Salad recipe to keep handy!
Caprese Salad is a dish that stands perfectly by itself or you can pair it with garlic bread or even use it as a side dish for grilled salmon or chicken. Or, toss in cooked pasta that has been refrigerated and you will have a pasta salad! Whatever you preference, use this Caprese Salad recipe as a template and personalize it to make it your own.

Caprese Salad
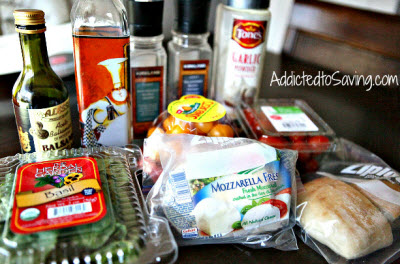
Ingredients 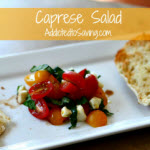
1 pint red cherry/grape tomatoes
1 pint sweet orange tomatoes
5-6 oz fresh mozzarella
5-6 fresh basil leaves
EVOO
Balsamic Vinegar
Salt
Pepper
Instructions
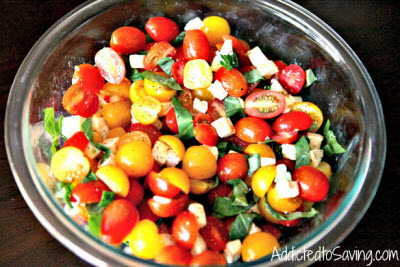
1. Slice the tomatoes in half and place in a mixing bowl
2. To the mixing bowl, add in sliced mozzarella
3. Add in sliced basil
4. Sprinkle a dash of salt and pepper
5. Stir all the ingredients together and then top off with a drizzle of EVOO and Balsamic Vinegar
Garlic Bread Instructions
1. Spread a thin layer of butter on sliced bread.
2. Sprinkle bread with garlic powder
3. Toast and then broil bread (for around 5 – 7 minutes until bread is just slightly browned)
The post Caprese Salad Recipe appeared first on AddictedToSaving.com.
]]>The post Edible Raw Cookie Dough Recipe appeared first on AddictedToSaving.com.
]]>
**Pin this Recipe to Pinterest**
This morning I was remembering this Edible Raw Cookie Dough Recipe and I had to repost it for you if you are like me and craving a sweet treat!
Every now and then I have an intense cookie dough craving. I’m not craving the result of the cookie dough (baked cookies) but I’m craving that wonderful raw cookie dough stage where you just want to swim around cookie batter. Sometimes, when I bake cookies, I will prepare the cookie recipe minus the egg(s), eat the raw dough and then add the eggs at the entirely last second. This recipe, however, is devoted entirely to the raw dough. There are no eggs needed for this recipe so you don’t have to worry about salmonella. Instead, you can prepare this recipe with the intent of NOT baking cookies!
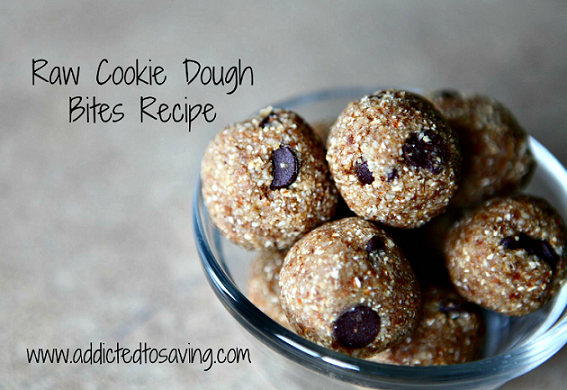
If you are interested in making a healthier version of Raw Cookie Dough, make sure you check out my Raw Cookie Dough Bites Recipe which uses NO flour! Instead, it uses dates, oats and almonds as its base! Go HERE to view my recipe.

I also have fun Chocolate Chip Cookie Dough Ice Cream recipe you should check out. It’s oh so good!
The recipe below involves regular flour. However, now that I am gluten-free, I would try this recipe with almond flour or maybe coconut flour. Once your cookie dough is mixed together, you can eat it with a spoon, or you can dip apple slices or chocolate bars in it! OR, you can copy what the ice cream shop Cookie Dough Creations located in Naperville, Illinois does. (I went there numerous times when I was in college.) At Cookie Dough Creations, they will give you a generous serving of your favorite ice cream and then top it off with a heaping mound of raw cookie dough. It was decadent and amazing.
Check: Publix Weekly Ad and Kroger Weekly Ad.
Edible Raw Cookie Dough Recipe
Ingredients
¼ cup of butter, softened
¾ cup of brown sugar
¼ tsp. of vanilla extract
¼ cup of milk
1 cup of flour
A dash of salt
1/3 cup of chocolate chips
Directions
1. Mix together butter, brown sugar, vanilla and milk
2. Mix in flour and salt
3. Mix in chocolate chips
4. Eat with a spoon or serve with apple slices, chocolate bars, vanilla ice cream or graham crackers!
Go HERE to see additional Recipes posted on Addicted to Saving
This recipe was adapted from Baskers Fun Foods
The post Edible Raw Cookie Dough Recipe appeared first on AddictedToSaving.com.
]]>The post SNICKERS and Skittles Big Game Cake Recipe appeared first on AddictedToSaving.com.
]]>
A few years ago I created this yummy Super Bowl cake using Snickers and Skittles. With the big game coming up on Sunday, you might want to make a football cake of your own!
When it comes to the Big Game, do you have any family favorite recipes that you make? Do you make chili? Chips & Dip? Wings? We make all of the above. While I will admit that I’m not a huge football fan, my hubby is. And he is so enthusiastic when it comes to watching football – especially if his favorite teams are playing. During the Big Game, I always get excited because I love watching the commercials! Since hubby (and even our two-year old son) are big into football, I try to make fun desserts that really highlight football! I was given the task of creating a Big Game recipe using SNICKERS® or Skittles®. I decided to go all out and highlight both of these yummy sweets!
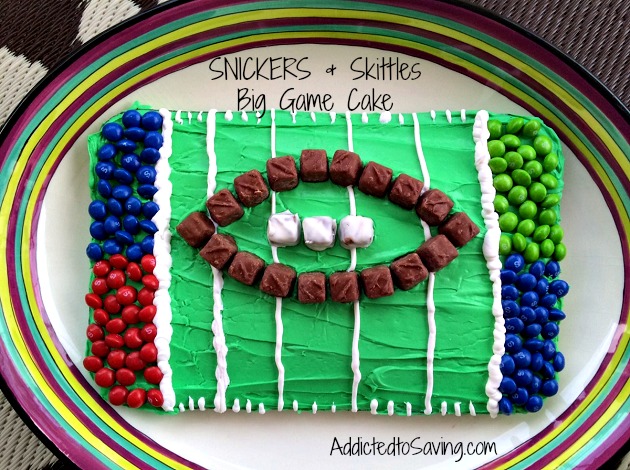
This football cake is the perfect dessert to indulge in as you watch the big game. And, it is ALL THINGS football and tastes just as good and sweet as it looks!

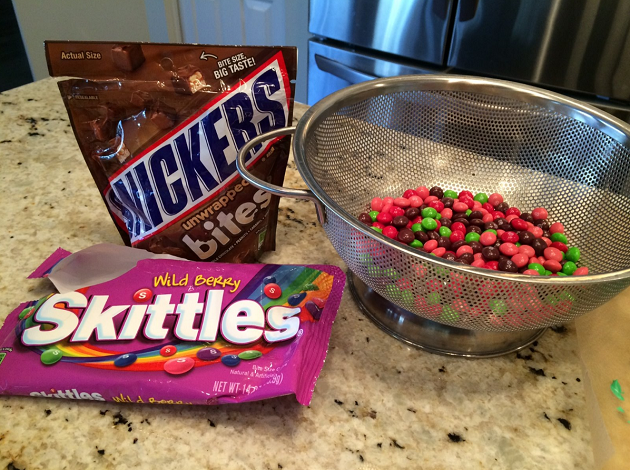
I headed to Walmart to pick up my SNICKERS and Skittles. My local Walmart had them located on different aisles. The picture above to the left shows where the SNICKERS was and the picture above to the right shows where the Skittles was.
If you purchase these two candies because from January 21-31, when you purchase 1 (one) qualifying MARS Chocolate product and 1 (one) qualifying Wrigley product at Walmart, you will be entered to win a $250 Walmart gift card! All you have to do is snap a photo of the receipt to show proof of purchase and text or email to biggame@drvsusa.com . 14 winners will be drawn randomly at the end of the contest period (1 for each day of the contest), and will receive a $250 Walmart gift card! For more information on the contest, go HERE.
For this tasty dessert, hubby really really wanted to help draw the field lines. (He LOVES desserts and also LOVES football. So he felt he would be an “expert” when it comes to creating a football field.)
We started out by taking the SNICKERS Bites out of the bag and taste testing a few to make sure they tasted ok. They did.  Then, we placed them on parchment paper and made them into the shape of a football. For the seams of the football, we frosted a few of the SNICKERS Bites with vanilla frosting.

I made a chocolate cake. I wanted the cake portion of my cake to be brown to look like dirt once the cake was cut. To be honest, I had a boxed chocolate cupcake mix in my pantry. In retrospect, I would have bought a box of actual chocolate cake mix. The cake tastes great (just like normal chocolate cake), but it did not rise like normal cake mix. So I highly recommend you purchase chocolate cake (instead of taking a short cut like me)
I added green food coloring to the vanilla icing and frosted the cake with green frosting. (for the grass – get it? Ha) Then, we used Skittles on the end zones in the colors of the competing football teams.
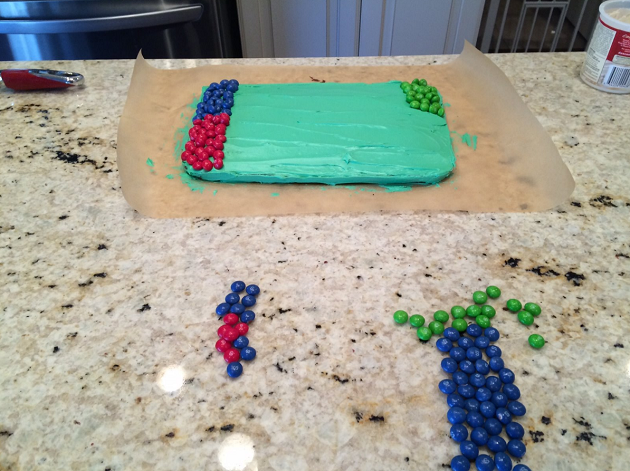
With hubby’s smooth and steady hands (mine aren’t), he used white icing to create the football field’s yard lines. He did want me to inform you that you don’t have to be a perfectionist. I think he realized that drawing a perfectly straight line is easier said than done.

This was the finished product. What do you think?

I’ve shared my my game day dessert recipe with you! I’d love to hear what you plan on making for the Big Game! Leave a comment below!
Go HERE to see all Recipes on Addicted to Saving
The post SNICKERS and Skittles Big Game Cake Recipe appeared first on AddictedToSaving.com.
]]>The post OREO Cookie Balls Recipe appeared first on AddictedToSaving.com.
]]>
It’s not too late to make this yummy treat for Super Bowl Sunday!Don’t miss this easy recipe for OREO Cookie Balls that I posted a few years ago!
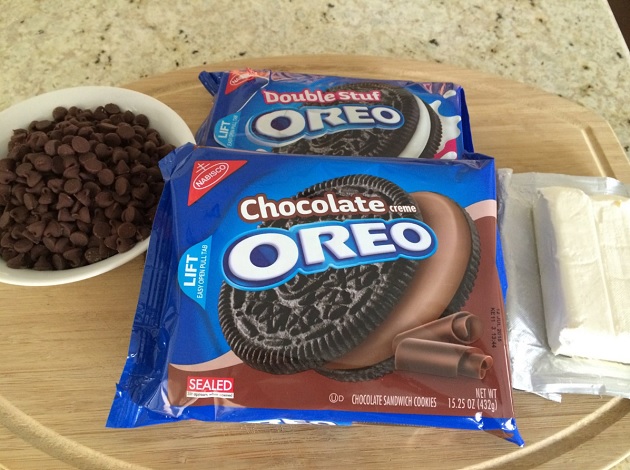
These are the three ingredients you need for the OREO Cookie Balls. I made half of the balls with Chocolate Creme OREOS and the other half with DOUBLE Stuff OREOS. The fourth ingredient that I needed and do not have pictured was icing to make my OREO Cookie Balls into footballs.
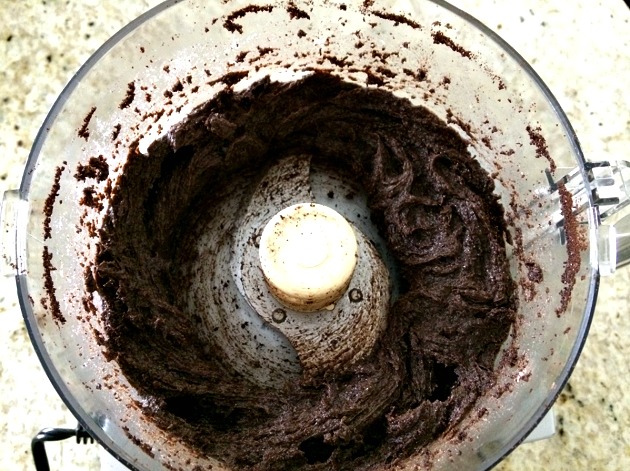
There are many ways you can crush the OREO cookies but I went the easy route I used my food processor. I would recommend you process the cookies until they are crumbled. And then, add the cream cheese and process them together until the cream cheese is mixed in.
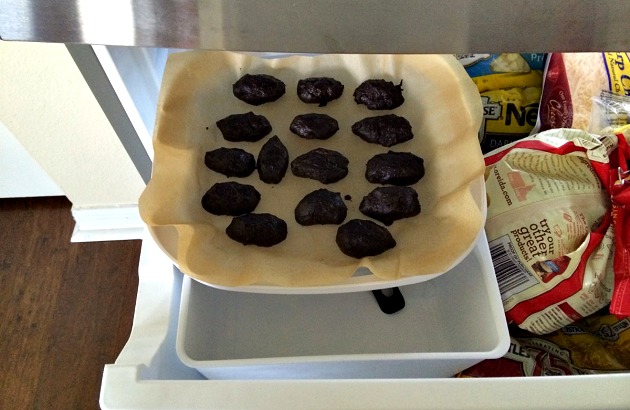
Roll the OREO & cream cheese mixture into balls. In our case, I rolled them into ovals with the attempt of making them into footballs Then, put in freezer for at least 10 minutes to harden them.
Dip the frozen balls into melted chocolate. Then, place in refrigerator until hardened.
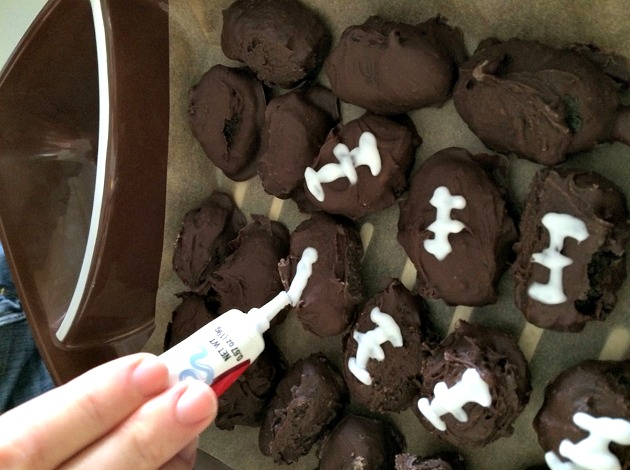
Once your OREO Cookie balls are hardened, they are ready to serve. OR, you can go another step and add some white icing to make them into footballs. Above is a pic of hubbies’ fingers as he helped me ice them. (He has a steadier hand than I!)

The finished product. Let me tell you something.. these are amazing. This was the first time I made OREO Cookie Balls and it will not be the last! I can’t wait to hear what you think of them once you make this recipe!
OREO Cookie Balls Recipe
Ingredients:
- 1 pkg (8 oz.) brick cream cheese, softened
- 36 OREO Cookies, finely crushed (about 3 cups)
- 4 pkg. (4 oz. each) semi-sweet baking chocolate, melted
**I ended up using 12 ounces of semi-sweet chocolate chips since I had them in my freezer.
Make it!
- MIX cream cheese and cookie crumbs until blended.
- SHAPE into 48 (1-inch) balls. Freeze 10 min. Dip balls in melted chocolate; place in single layer in shallow waxed paper-lined pan.
- CUSTOMIZE it with your own ingredient additions or decorative skills.
- REFRIGERATE 1 hour or until firm.
** I crushed and mixed the cream cheese and cookie crumbs in the food processor. Tip – make sure you crush the cookies first. Then, add the cream cheese.
Share and enjoy!
Have you made OREO Cookie Balls? Have you switched up the recipe at all? I would love to hear what you did to make these balls extra tasty!
The post OREO Cookie Balls Recipe appeared first on AddictedToSaving.com.
]]>The post Mexican Cheese Boat Recipe appeared first on AddictedToSaving.com.
]]>
When I was given the task to create a Super Bowl recipe, I jumped at it. We love all things Mexican in this house. My son and daughter, while they love food, are picky when it comes to dinner. Fortunately, we’ve found that they (our son especially) share our love for Mexican food so I always know that I can make a Mexican themed dinner and that they will eat it!
I came up with this Mexican Cheese Boat recipe. Why is it called a “boat”? Because you take a fresh loaf of Italian bread and hollow it out making it shaped like a boat. Then you fill it with yummy, cheesy goodness.
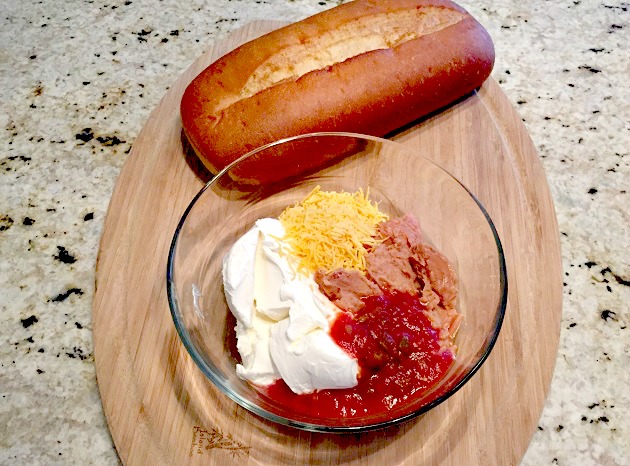
There are not many ingredients in this recipe! Just buy a loaf of fresh Italian bread, and make sure you have cream cheese, salsa, refried beans and of course cheddar cheese!
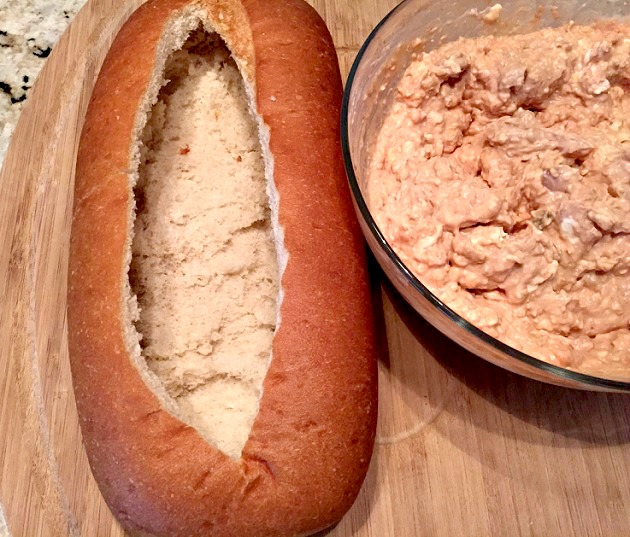 Hollow the loaf of Italian Bread and mix the cheese ingredients together in a separate mixing bowl.
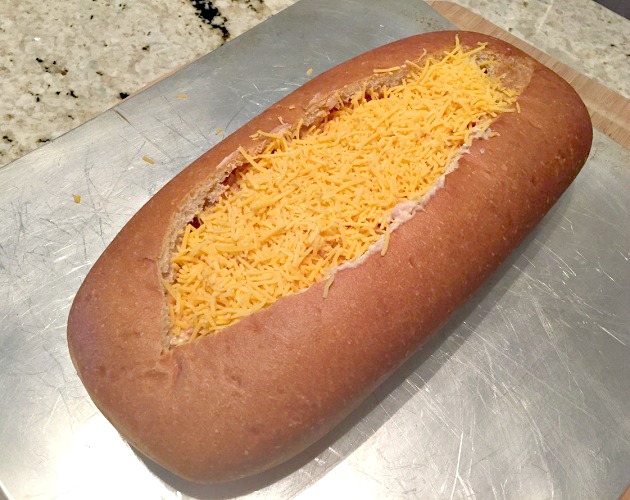
Fill the loaf with the cheese ingredients and top with cheddar cheese! Cover with tin foil. Bake for 35 minutes. Take the tin foil off and bake for an additional 10 minutes or until shredded cheese is melted.

The finished product is so yummy. Warm, smooth, flavorful cheese dip just waiting to be dipped into! We dipped Delimex Taquitos and Delimex Tacos into our Mexican Cheese Boat but this Mexican Cheese Boat would also go perfectly with tortilla chips! Yum!

Dip right into your cheese boat or spoon some of the cheese onto a plate.
Mexican Cheese Boat Recipe
Ingredients
1 Loaf Fresh Italian Bread
Two 8 ounce packages of Cream Cheese (at room temp)
1 16 oz can Refried Beans
2 cups Salsa
2 cups Cheddar Cheese
Directions
1) Preheat oven at 350
2) Cut and hollow out a loaf of Italian Bread
3) In a mixing bowl, mix cream cheese, refried beans, salsa and 1 cup cheddar cheese.
4) Spoon the cheese mixture into the loaf of bread. Top with remaining cheddar cheese.
5) Wrap with tin foil. Bake for 35 minutes. Remove foil and bake an additional 10 minutes until cheese is melted.
Enjoy!
The post Mexican Cheese Boat Recipe appeared first on AddictedToSaving.com.
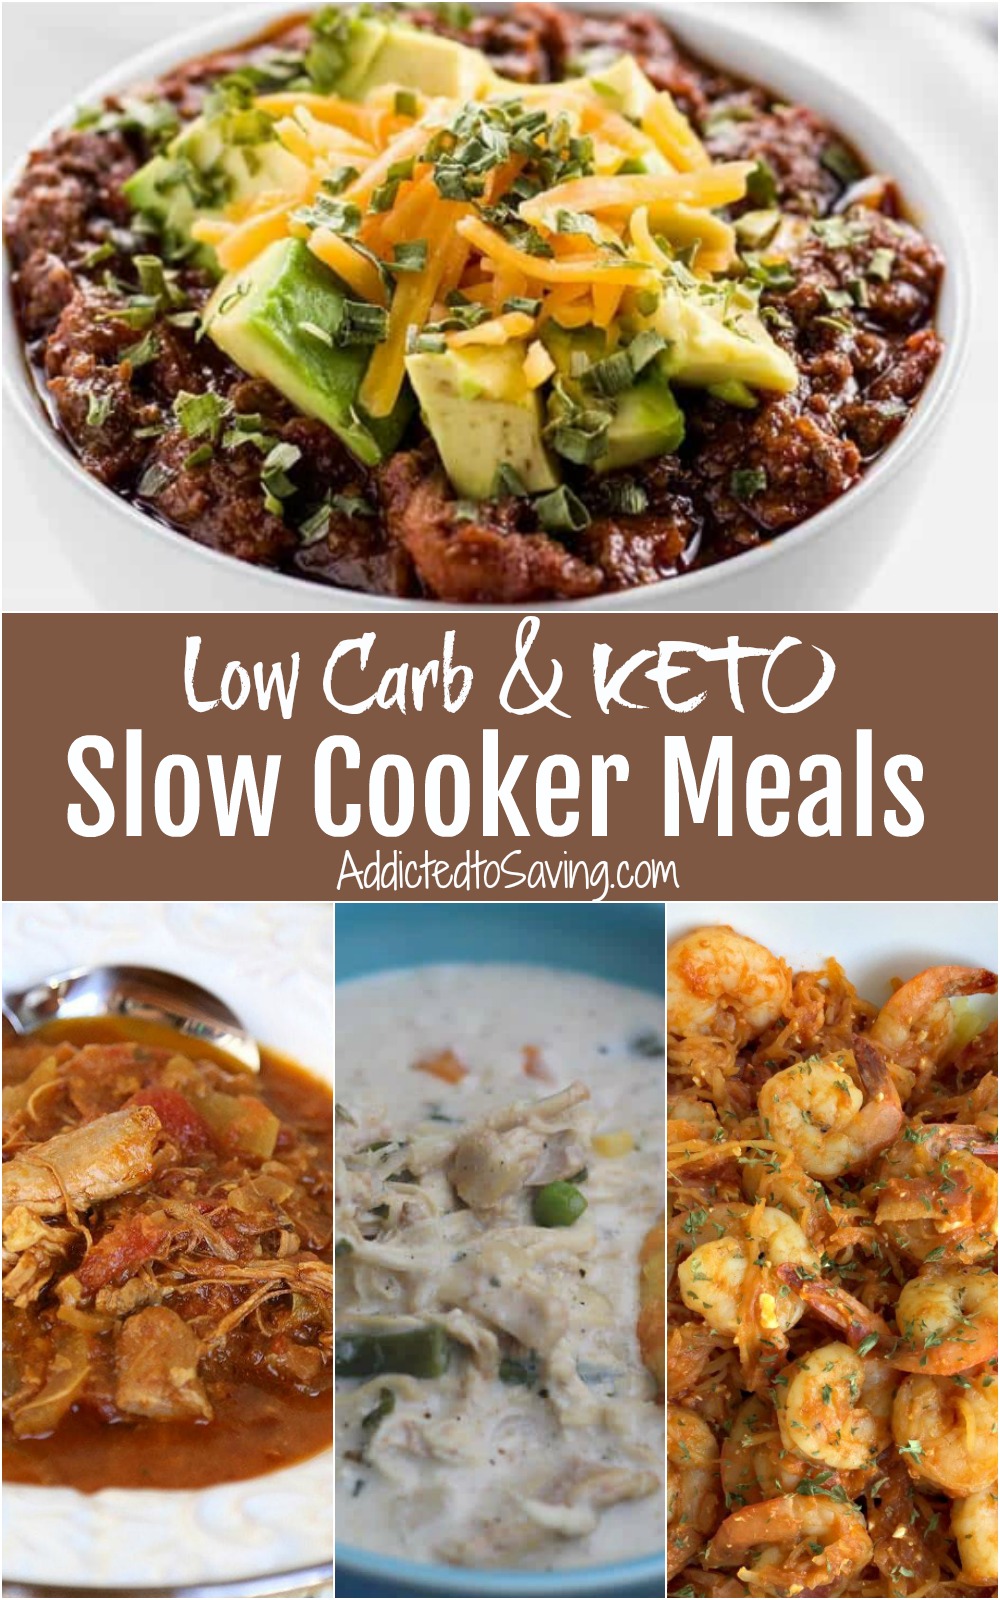
]]>The post Low Carb and KETO Slow Cooker Meals Recipe Roundup appeared first on AddictedToSaving.com.
]]>
With January being almost over, I know that statistically, most people’s New Year’s Resolutions have already failed. I’ve gotten to the point where I don’t make resolutions – not in January at least. If I plan to make a lifestyle change, I wait until after all of the New Year’s hype dies down. Then, I make strategic plans in order to truly see success.
Last February is when I started really trying to take better care of myself. I had found that once I became a mother, I truly forgot myself. I was spending so much time trying to attach to our kiddos and to make sure they were healthy and happy, all while working from home, that I got totally lost in the shuffle. It wasn’t a deliberate decision to put myself last but it happened. Last February, after getting bloodwork results and feeling like I was on my deathbed, I started slowly making changes.
One change I made was to really start to watch what I ate. Food is and always will be a struggle for me. I love food. I love to eat it when I’m having bad days and I love to eat it to celebrate when I’m having good days. It’s a struggle. But I started loosely following the KETO way of eating last winter with the hopes that I could reign in some of my food cravings and get healthier. The Ketogenic diet is a high fat, moderate protein and low carb way of eating. I followed it loosely. I wasn’t so devoted that I tracked my ketones or logged how many grams of carbs/protein/fat I ate. Instead, I focused on staying away from sugar (sugar is the devil – and it’s in EVERYTHING), upping my protein and intentionally adding more healthy fats to my meals. Doing this wasn’t as hard as it sounds.
The first few days were rough. You don’t realize how addicted you are to sugar until you remove it from your diet. My biggest struggle was my 2 cups of daily coffee. By no means did I stop drinking coffee but I removed sugar and switched to Stevia. I just don’t like the taste of stevia in coffee. So my coffees were miserable for at least a few months. Then, a friend introduced me to Pyure. It’s an organic Stevia blend that has more of a vanilla taste and much less of the bitter Stevia aftertaste I was used to. If you like to sweeten your coffee and don’t want to use sugar, Pyure is an awesome option for you.
It is now almost one year after I started reducing the amount of sugar I ate and I still rely on the principles KETO and low carb eating. I definitely have cheat meals And I definitely have moments where my eating gets out of control. Like I said earlier – food will always be an issue for me. BUT, I always go back to focusing on vegetables and proteins and healthy fats. Once I regroup and start eating healthy again, my cravings for junk disappear quick. AND, I’ve kept the almost 30 pounds that I’ve lost off. As I lost weight and started taking 20+ supplements to get my bloodwork back to more healthy ranges (sadly I’m still anemic – but my iron levels are improving albeit slowly), I’ve been able to gain the energy to start running again. I have more energy to take care of myself better care of myself, cook healthier and to chase my kiddos around. It’s marvelous.
Below are some of my favorite Low Carb and/or KETO recipes. I make these recipes at least once a month in my programmable slow cooker.

My friend Kasey Trenum created this yummy soup. Chicken Pot Pie Soup is such a hearty and tasty low carb soup idea. Once I started following the KETO way of eating, I realized quickly that eating low carb does not equal deprivation. Low carb meals can be nutritious with low sugar AND decadent. This soup combines chicken and vegetables with cream cheese and heavy whipping cream. See!?! Decadence!

Salsa Chicken is one of my absolute favorite low carb meals to make. I’ve made it in my slow cooker as well as my instant pot. I always search to make sure I’m using a salsa that doesn’t have a lot of sugar (extra points if I use homemade salsa). I will put my salsa chicken on a salad or on roasted vegetables. It’s so good! For my kiddos, I will make them a chicken burrito bowl and top rice and refried beans with the Salsa Chicken. Or, I’ll make them burritos or tacos with the chicken. This recipe is so versatile and so good!

If you are looking for a meal that tastes like you are cheating, this Creamy Slow Cooker Chicken with Bacon and Cheese from Kasey Trenum will do the trick. One of the things I learned early on while following KETO is that bacon is your friend. It not only tastes awesome but the fat in the bacon will help fill you up while helping your body burn more fat. It’s awesome. This Creamy Slow Cooker Chicken with Bacon and Cheese is a family favorite. The kiddos even love it!

One of the difficult aspects of low carb eating is realizing that beans are high in carbs. I used to cook with all different types of beans multiple times a week. Not anymore. This Keto Low Carb Chili from Wholesome Yum is wonderful because it has all of the amazing flavors of chili without the high carbs from the beans!

I created this Spaghetti Squash Pasta w/ Shrimp, Bacon & Feta Cheese Recipe while I was working on a blogging project. I love using spaghetti squash as a low carb alternative to pasta. This recipe is truly decadent. When I originally created this recipe, it wasn’t a slow cooker meal. But it could easily be adapted to one. Simply add cooked (and shredded) spaghetti squash as well as all of the fillings except the shrimp. Cook on low for 3-4 hours. Add the cooked shrimp 30 minutes prior to completion. This meal is filling and so very tasty.
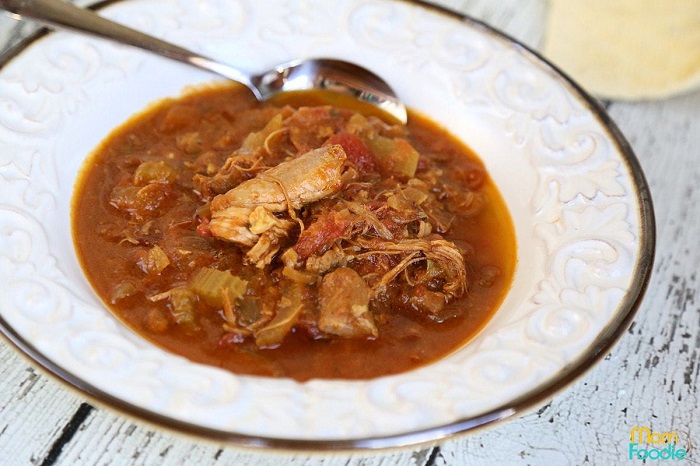
This Slow Cooker Curry Chicken Thighs Recipe from Mom Foodie is so good. It is a hearty stew that will keep you warm on these chilly winter days. I’m not a huge fan of chicken thighs so sometimes I will substitute chicken breasts for them. When you make this recipe, your house will smell so good as it’s cooking. And your taste buds will love the flavors!
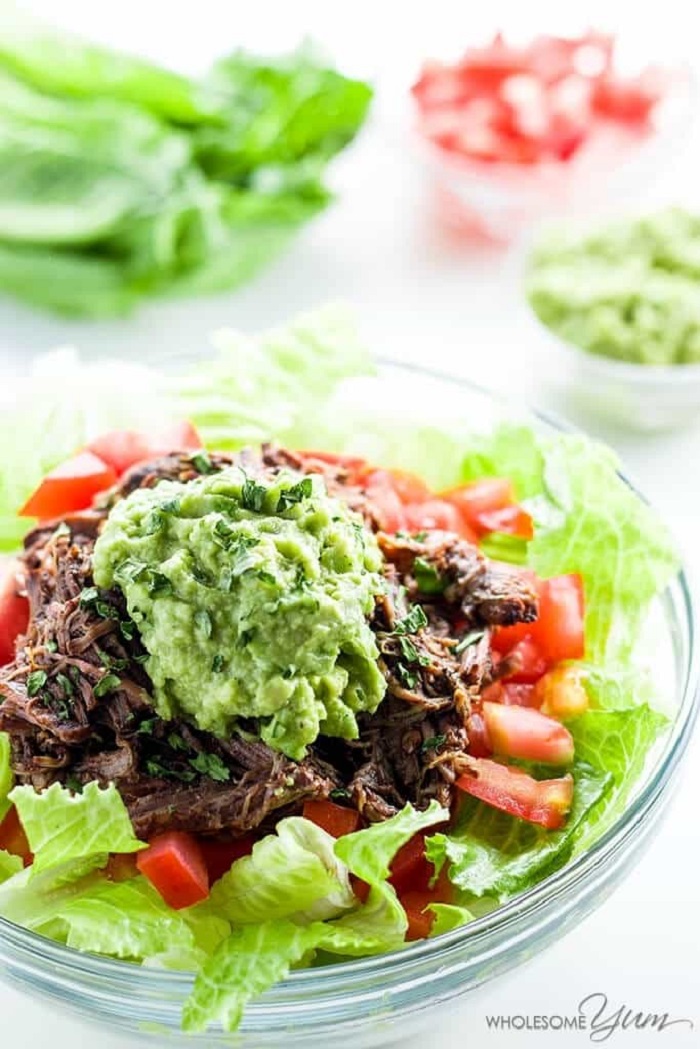
If you enjoy eating at Chipotle, you must try Wholesome Yum’s Copycat Chipotle Barbacoa Recipe. It is OH SO GOOD. Using my slow cooker, this recipe is so easy to make. The meat literally falls apart once it’s done cooking. I top lettuce with Chipotle Barbacoa and avocado or guacamole. Or, I’ll roast vegetables like broccoli, cauliflower and/or brussels sprouts and serve them with Chipotle Barboaco on the side.
Head HERE to see all of our recipes on Addicted to Saving!
The post Low Carb and KETO Slow Cooker Meals Recipe Roundup appeared first on AddictedToSaving.com.
]]>The post BOGO RAGÚ Pasta Sauce at Publix & Cheesy Chicken and Broccoli Recipe appeared first on AddictedToSaving.com.
]]>
I like to try to have a dinner game plan every night. Most days I succeed. But there are some days where I will look at the clock, see it is 5:00 and realize I have no idea what I’m making or feeding my family. And honestly, if I didn’t have kiddos, hubby and I would have what I like to call a “fend for yourself night.” But I do have kiddos who are hungry and growing and need a full belly at dinnertime. So I try to make a hot meal for them every night.
RAGÚ Pasta Sauce to the rescue! If you look in my pantry right now, you will see a few jars of RAGÚ. I stock up on it when Publix has RAGÚ on sale Buy One Get One Free. Now through through Wednesday, October 11th, Publix will have RAGÚ on sale BOGO. Head HERE for more info.
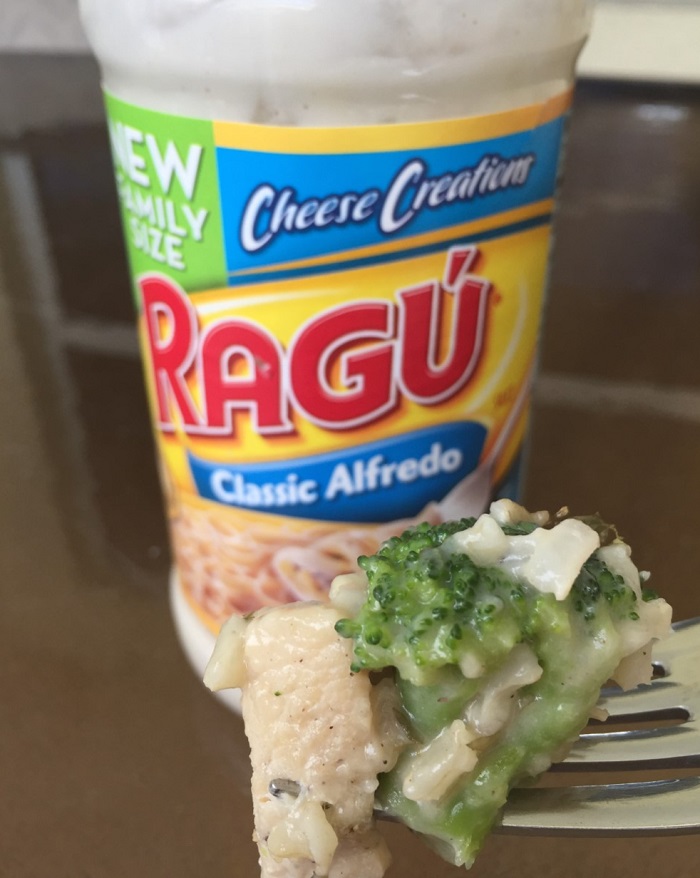
One of the sauces on sale BOGO is RAGÚ® Family Size Cheese Creations Classic Alfredo Pasta Sauce (21.5 oz.). RAGÚ® Classic Alfredo is a thick, creamy Alfredo sauce that is packed with Parmesan and Romano cheeses for more flavor. It is available in 16 ounce and 21.5 ounce jars and is found on the pasta sauce aisle. It’s important to note that now through October 11th, ALL RAGÚ products will be on sale BOGO!
RAGÚ Cheese Creations Classic Alfredo Pasta Sauce is great on a variety of dishes including Chicken Alfredo. It is made with real cheese and fresh cream! I like to create different recipes with classic sauces and when I was trying to think of a recipe to create with this alfredo pasta sauce, I decided to create a recipe that I could easily throw together on a busy school night.

Cheesy Chicken and Broccoli is a recipe you can throw together last minute. As long as you have thawed chicken breasts (or shredded rotisserie chicken), frozen broccoli, rice and RAGÚ® Family Size Cheese Creations Classic Alfredo Pasta Sauce, you will be good to go!

To start cut the chicken into bite size pieces and brown it in a large pan over medium high heat.

Once the chicken is browned, add the cooked broccoli, cooked rice and RAGÚ Alfredo Sauce to the pan. Stir.

Once mixed well and bubbling, serve and top with fresh parsley. You will love this easy to make and tasty meal! I also love this recipe because you can use leftovers too! If you have leftover rotisserie chicken, cooked broccoli and cooked rice, using this sauce you will have a wonderful meal in minutes. Don’t forget that from now through Wednesday, October 11th, Publix will have RAGÚ on sale BOGO!
Cheesy Chicken and Broccoli
Ingredients
1.5 lb Boneless Skinless Chicken Breasts
1 Small Bag Frozen Broccoli (any brand)
2 cups Cooked Rice (any brand – I used brown rice)
2 cups RAGÚ Cheese Creations Classic Alfredo Pasta Sauce (Family Size 21.5 oz)
Olive Oil
Salt
Pepper
Crushed Red Pepper
Parsley
Instructions
1) Cook rice and microwave broccoli according to instructions on package.
2) Cut chicken into bite size pieces. Brown in large pan with olive oil. Top with salt, pepper and crushed red pepper (if you like your food to be a little spicy).
3) Once chicken is browned on one side, turn over and brown on the other side topping with a little more salt, pepper and crushed red pepper.
4) When the chicken, rice and broccoli are all cooked, mix together in large pan along with RAGÚ Cheese Creations Classic Alfredo Pasta Sauce. Cook on medium until sauce is bubbling.
5) Serve. Top with fresh or dry parsley.
Enjoy!
The post BOGO RAGÚ Pasta Sauce at Publix & Cheesy Chicken and Broccoli Recipe appeared first on AddictedToSaving.com.
]]>The post 3 Ingredient Slow Cooker Salsa Chicken appeared first on AddictedToSaving.com.
]]>
This is one of my absolute favorite slow cooker recipes and it is by far the easiest chicken recipe I have ever made. If you haven’t made it yet, you have to! I originally posted this recipe in 2015 but wanted to republish it to make sure none of you miss it!
Many of you know that I have an obsession with my slow cooker. I’ve always loved it. The past two years, it has become a pivotal part of my life. This is my slow cooker – I adore it! I got to the point where I was tired of throwing frozen food into my oven every night because I was so tired and did not have enough to to prepare a home cooked meal. So, I’ve made it a habit to use it at least 3 or 4 times a week and find that my dinner prep is so much easier when I’ve already got it cooking in my slow cooker!
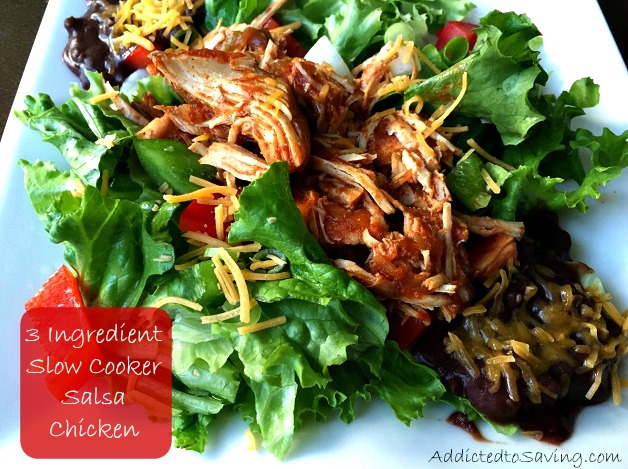
I stumbled upon this 3 Ingredient Slow Cooker Salsa Chicken recipe in 2015 and after testing it out, I made it 3 times in a week! In fact, I have it cooking right now. Hubby loves it. And even my son eats all of it (he’s become finicky with chicken lately). I am trying to avoid eating much sugar so I use the chicken to make a Chicken Salad. Hubby will usually use the chicken to make tacos or burritos. And my friend Amy had the great idea of using this chicken to make Chicken Nachos! Yum.
This 3 Ingredient Slow Cooker Salsa Chicken is SO good. And it is SO easy to prepare.
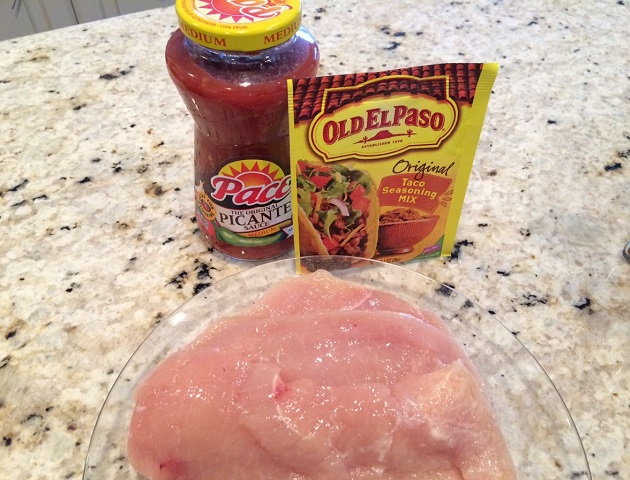 Lay the boneless, skinless chicken breasts in the slow cooker and pour the jar of salsa on top as well as 1/3 of a pack of the taco seasoning. You can use more taco seasoning if you like. One of my upcoming goals is to make homemade taco seasoning so that I can control the sugar and the sodium. But until then, I use 1/3 of a pack and it gives plenty of flavor.
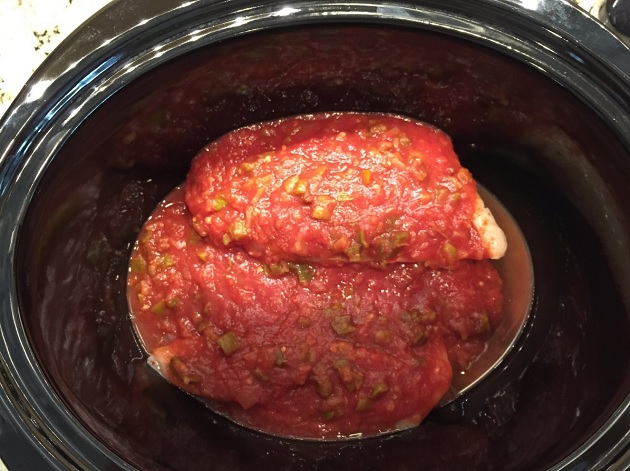 Cook on low for 8 hours. Be prepared – your house will smell amazing.
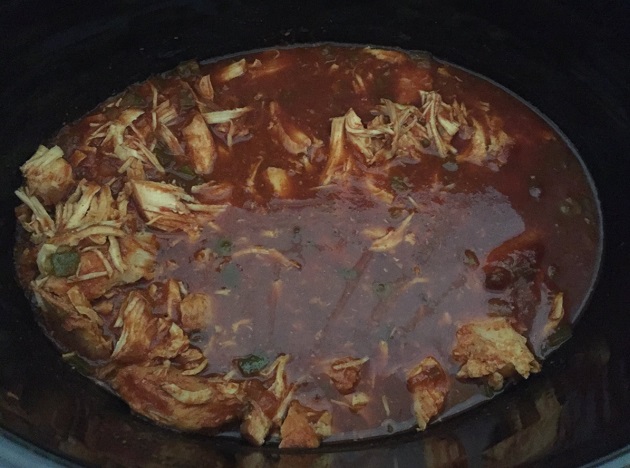 Once the chicken has cooked, use two forks to easily shred it. Add the chicken to tacos or burritos or salads. Serve with rice and/or beans. And enjoy.
3 Ingredient Slow Cooker Salsa Chicken
Ingredients
1 – 1.5 pounds Boneless, Skinless Chicken Breasts
16 ounce Jar of Salsa
1/3 pack of Taco Seasoning
Directions
Add the three ingredients into your slow cooker. Cook on low for 6-9 hours. Serve the chicken in fillets or shred while in the slow cooker so that it absorbs all of the flavorful juices.
Enjoy!
Go HERE to see all Recipes on Addicted to Saving
The post 3 Ingredient Slow Cooker Salsa Chicken appeared first on AddictedToSaving.com.
]]>The post Mexican Lasagna Recipe appeared first on AddictedToSaving.com.
]]>
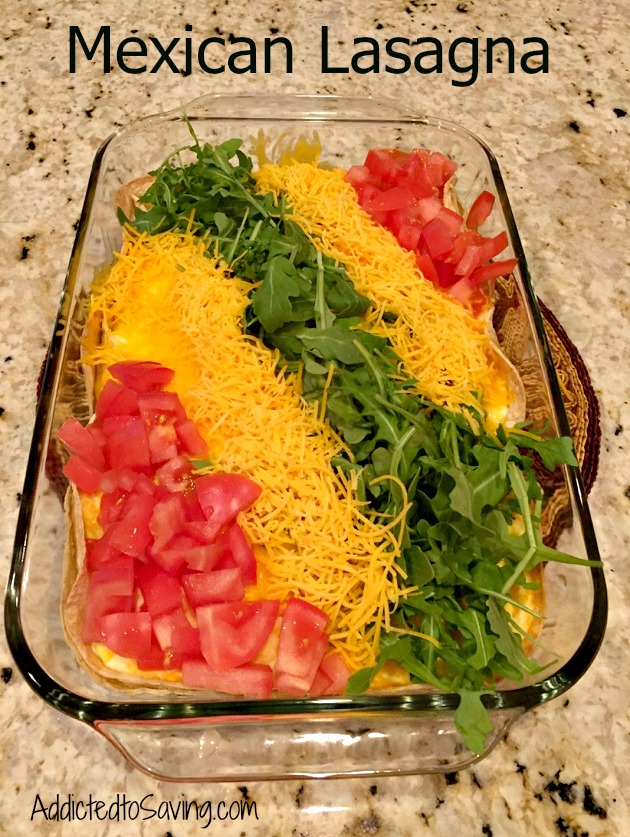
I originally posted this Mexican Lasagna recipe five years ago here on my blog. It was a favorite recipe for us then and it still is a favorite recipe now. My mom first started making this recipe when I was in high-school. She learned the recipe in my favorite cooking magazine Taste of Home Magazine. I love this recipe because it has all of the flavors of Mexican food (cheese, corn tortillas, seasoned ground beef) and yet has tons of fresh veggies on top. And – it is pretty!
There are many variations of this recipe that you can make. You can pick and choose which toppings you prefer. And for the filling, you can either use cottage cheese or ricotta as well as shredded cheddar cheese and/or shredded Monterey Jack cheese.
This is a very easy recipe to make. The hardest work will be browning the ground beef and adding seasoning to it.
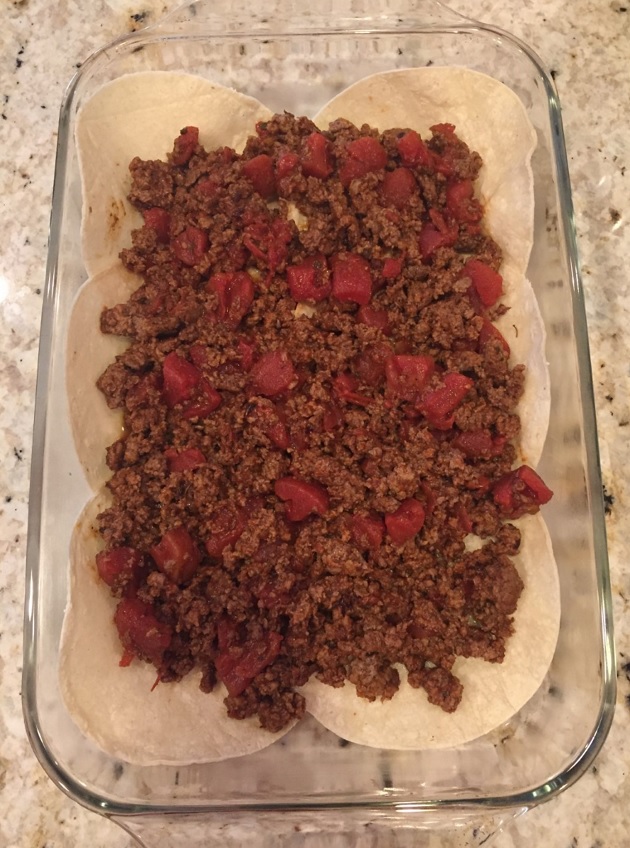
At the very bottom of your Mexican Lasagna you will place six corn tortillas. You will want to use corn versus flour because corn will be easier to cut once your lasagna is baked. I also think the corn tortillas add a great flavor to the dish. On top of the corn tortillas you will layer your seasoned ground beef and tomato mixture.
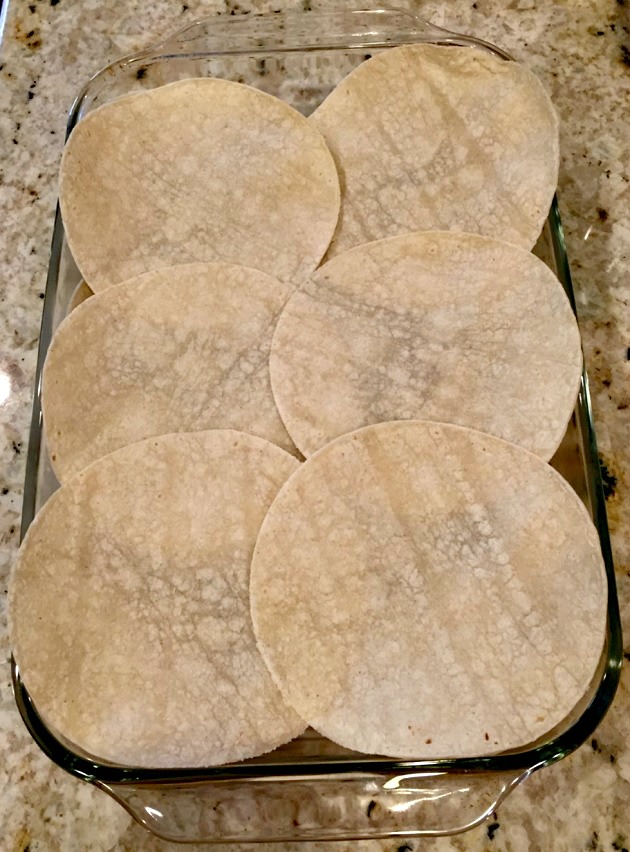
You will top the ground beef mixture with another six corn tortillas (you will only need 12 for this entire recipe).

At the very top of this dish you will spread the cheese mixture. Then bake for 30 minutes.
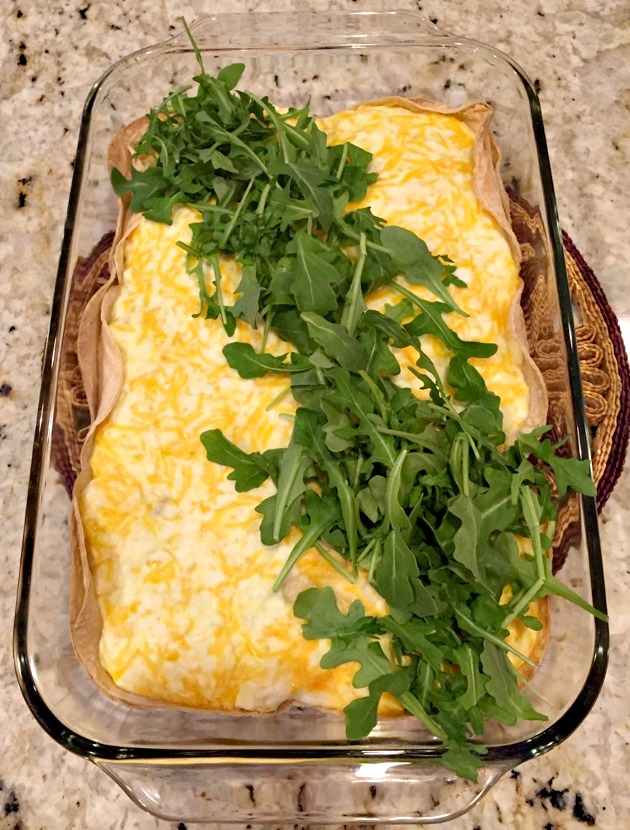
Once the Mexican Lasagna is baked, it’s time to add the toppings. I usually use chopped lettuce but for a variation I decided to use arugula. It was so good.
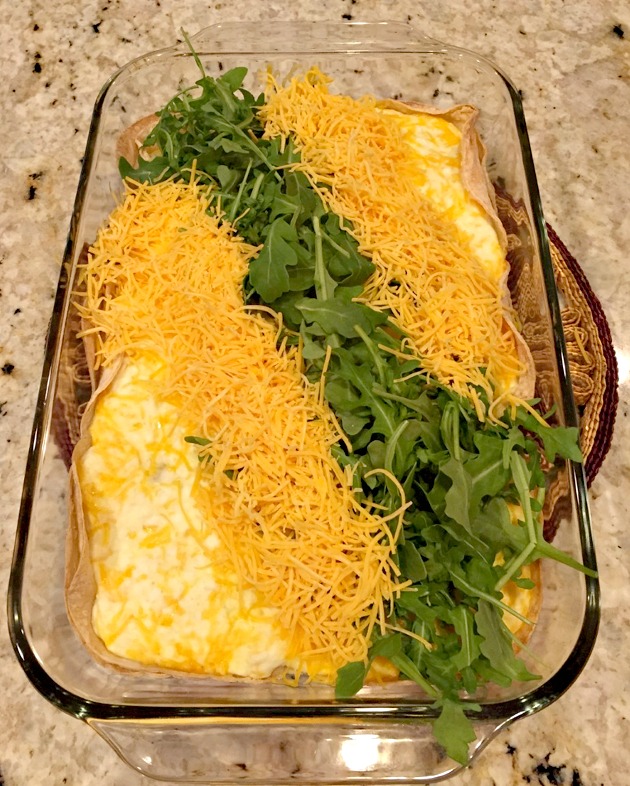
After placing the arugula, I added shredded cheddar cheese (my hubby would be happy if I covered the entire lasagna with just cheese) and then chopped fresh tomatoes. If you like black olives, they would be an awesome addition as would chopped green onions. Below is my finished product. Looks good right? If you try this Mexican Lasagna recipe, let me know your thoughts!
Mexican Lasagna
Ingredients
1.5 lb Ground Beef
1 T Chili Powder
1/4 t Garlic Powder
1/4 t Red Pepper
1 t Salt
1 t Pepper
1 16 oz can Tomatoes
10-12 Small Soft Corn Tortillas (I’ve tried flour and they do not bake as nicely)
2 c small curd cottage cheese, drained
1 c Monterey Jack Grated Cheese
1 Egg
Topping Ingredients
1/2 c Cheddar Cheese Grated
2 c Lettuce
Diced Fresh Tomatoes
Black Olives
Directions
1) Preheat oven at 350 degrees
2) Brown Ground Beef, season with chili powder, red pepper, garlic powder, salt and pepper. Add tomatoes. Heat through.
3) In a bowl, combine cottage cheese with Monterey Jack cheese and egg.
4) Spray lasagna dish with Pam
5) Layer bottom of dish with 6 corn tortillas. Cover tortillas with ground beef mixture.
6) Layer with remaining 6 corn tortillas. Cover with cottage cheese mixture.
7) Bake for 30 mins.
8) Remove from oven. Cover lasagna with lettuce, cheddar cheese, diced tomatoes, black olives and whatever additional toppings you would like.
Enjoy!
The post Mexican Lasagna Recipe appeared first on AddictedToSaving.com.
]]>The post Honey Roasted Chickpeas Recipe appeared first on AddictedToSaving.com.
]]>
I can’t believe I originally posted this recipe three years ago! Time flies! I wanted to repost this recipe because it is really good!
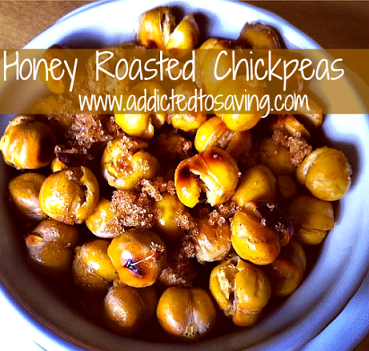
This afternoon I was really craving something sweet and salty. I have Chex cereal in my pantry and while that might have satisfied my sweet tooth, I opted instead to try roasting chickpeas. I’ve been wanting to do this roasted chickpeas recipe for a long time. Let me tell you, after making this simple snack, I’m kicking myself for not having made this months and months ago!
Your main ingredient is one can of garbanzo beans (aka chickpeas) and if you are like me, you probably have cans of beans stockpiled away! You all probably know this about me already, but I LOVE beans. I love that they are high in protein, high in fiber and cheap! They help make meals both frugal and healthy. Besides the beans, all you need is your desired seasoning. I called this recipe Honey Roasted Chickpeas although I didn’t actually use honey. However, they had such a similar taste to Honey Roasted Peanuts that I had to use honey in the name. Also, the recipe calls for 2 teaspoons of olive oil. I’m always looking to conserve calories so I just sprayed some EVOO on the beans. That said, I think next time, I will try using more EVOO to insure that all of the topping sticks to my beans.
Next time I’m going to try kicking up the spices on the roasted chickpeas. I’m envisioning adding a bit of cayenne pepper with the sweet brown sugar.. Have you made these before? I would love to hear the spices you used!
Honey Roasted Chickpeas
Ingredients
1 can Garbanzo Beans (chickpeas) 14 oz, rinsed, drained and air dried
2 teaspoons Olive Oil
1 1/2 teaspoons Brown Sugar
1/4 teaspoon Salt
1/4 teaspoon Cinnamon
Directions
1. Preheat oven to 450 degrees.
2. Rinse, drain and then do your best to air dry the beans (you don’t want them wet when you put them in the oven).
3. Line cookie tray with parchment paper
4. Place chickpeas onto lined baking sheet. Bake for 30 minutes stirring once at around 15 minutes.
5. Pour cooked chickpeas into a mixing bowl. Mix with olive oil, brown sugar, salt & cinnamon.
Enjoy!
Go HERE to see additional Recipes posted on Addicted to Saving
This recipe was adapted from Cupcake Project
The post Honey Roasted Chickpeas Recipe appeared first on AddictedToSaving.com.
]]>The post Make Dinner EASY With Tyson Meal Kits appeared first on AddictedToSaving.com.
]]>
This is a sponsored post written by me on behalf of Tyson Foods, Inc. As always, all opinions are entirely my own.
Before I became a parent, I had grand ideas on what parenthood would look like. After I became a parent, I realized that most of my ideas were not only unrealistic but impossible. Working full-time is exhausting. Parenting a 3.5 year old is exhausting. And there are some days when I’m in survival mode. Dinnertime is often a challenge for me. I want to cook tasty meals but sometimes, I don’t have the time (or energy) to devote to cooking meals from scratch. Enter Tyson® Meal Kits.
One night I was shopping, hungry and running low on time. I’m always looking for convenient dinner solutions that taste GOOD. I saw Tyson® Meal Kits on the shelf and decided to try them out and see what my family thought of it!

Tyson® Meal Kits are sold in the meat section at Publix. We found it by the fresh chicken section. If you have a difficult time finding it, ask for help. We had a tricky time finding it, but the meat department manager helped us! Typically, these kits are found in the “ready to cook section of the fresh meat case”.
There is a large variety of Tyson Meal Kits to choose from. We purchased the Creamy Chicken Fettuccine Alfredo. (We were also pleasantly surprised to see a $2.00 off peelie on the package! So be on the lookout for peelies!) From April 7th through April 13th, Tyson Meal Kits will be on sale $10.99 at Publix. And if you find a peelie, you will save even more bringing your total down to $8.99!
Some of the other kits available are 3 Cheese Chicken Carbonara, Beef & Cheddar Melt and Beef Marinara Penne. All of the kits sound so good!
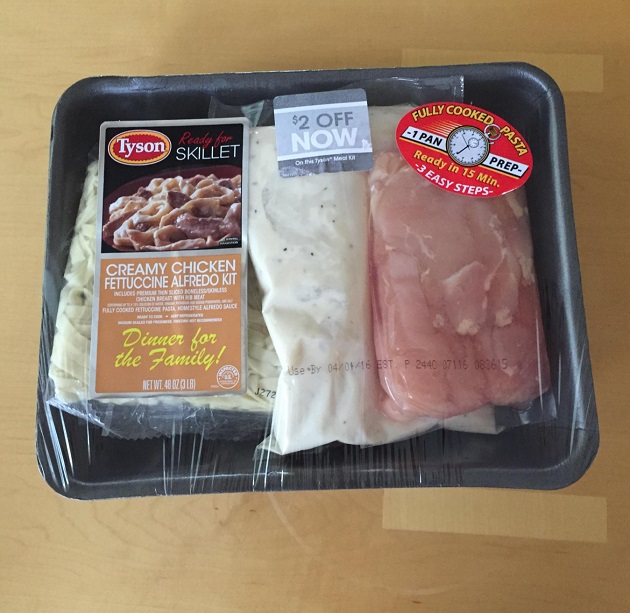
Once we got home, I got to work cooking this meal! This meal could not be easier to prepare. The chicken is already cut, the noodles are precooked, and the sauce is already made. It’s as easy as 1, 2, 3 to make!

First, I browned the pre-cut chicken in a little olive oil.
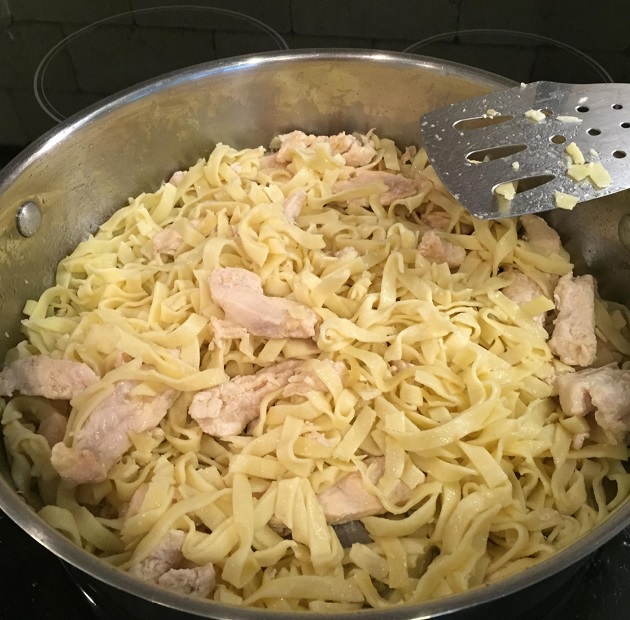
Once the chicken is browned, open the pasta pouch and add the pasta to the skillet. The key is to keep stirring the pasta and chicken until the pasta is heated through. (Continual stirring helps avoid sticking.)

Lastly, open the sauce pouch and add the sauce to the skillet. Again, stir the pasta, chicken and sauce continually until the sauce is cooked through.
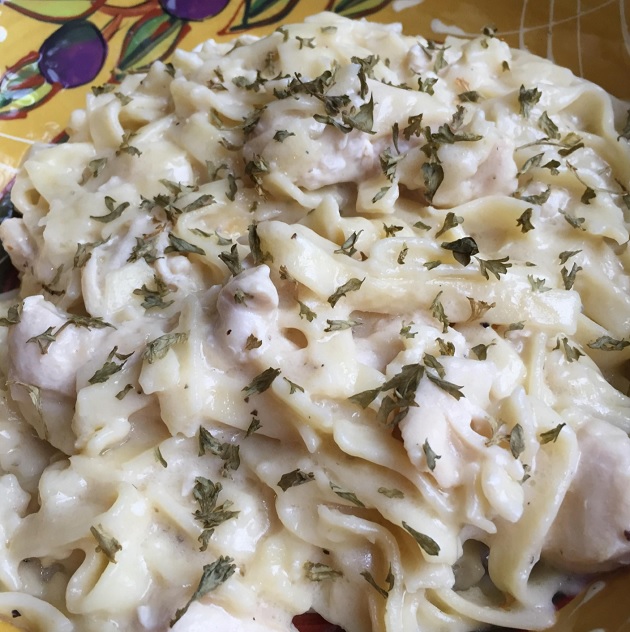
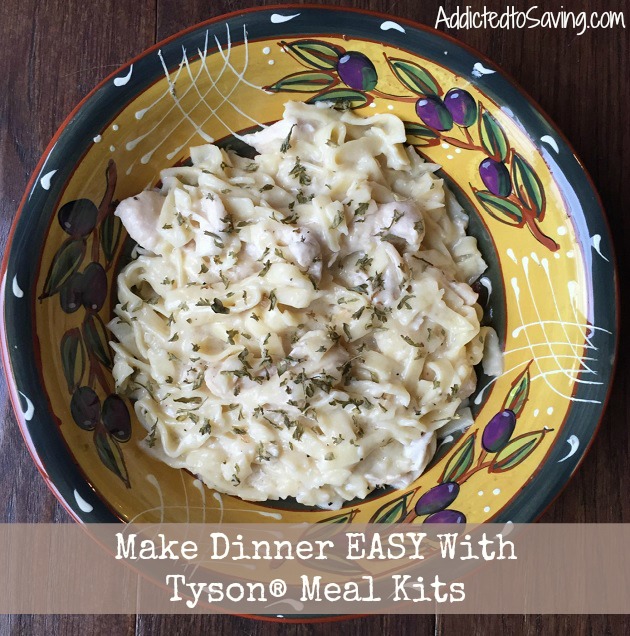
Voila! This dish was a HIT. My 3.5 year old son is a bit picky at dinnertime and he loved this dish! We will definitely make it again! I loved the fact that I could run into Publix, pick up this Tyson® Meal Kit and then in 3 simple steps have a tasty meal for my family!
Have you tried Tyson Meal Kits? What varieties are your favorite?

The post Make Dinner EASY With Tyson Meal Kits appeared first on AddictedToSaving.com.
]]>The post Crustless Quiche with Bacon & Asparagus Recipe appeared first on AddictedToSaving.com.
]]>This is a sponsored post written by me on behalf of Tyson Foods, Inc. As always, the opinions and text are all mine.
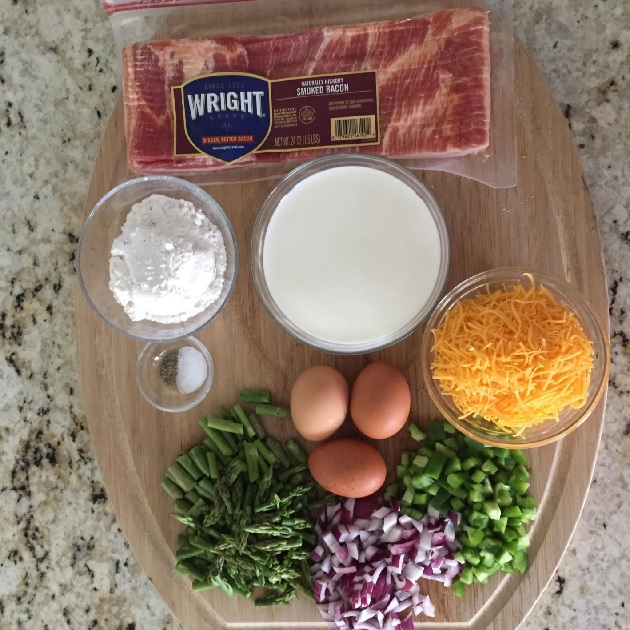
When I was given the opportunity to purchase Wright® Brand Bacon at Publix and create a recipe with it, I knew immediately what I was going to cook. One of my most popular recipes on the blog is my Crustless Veggie Quiche Recipe. I make this quiche at least a couple of times a month. It is so good and so versatile. The one food I haven’t tried in my quiche is bacon and I just knew it would make an amazing addition.
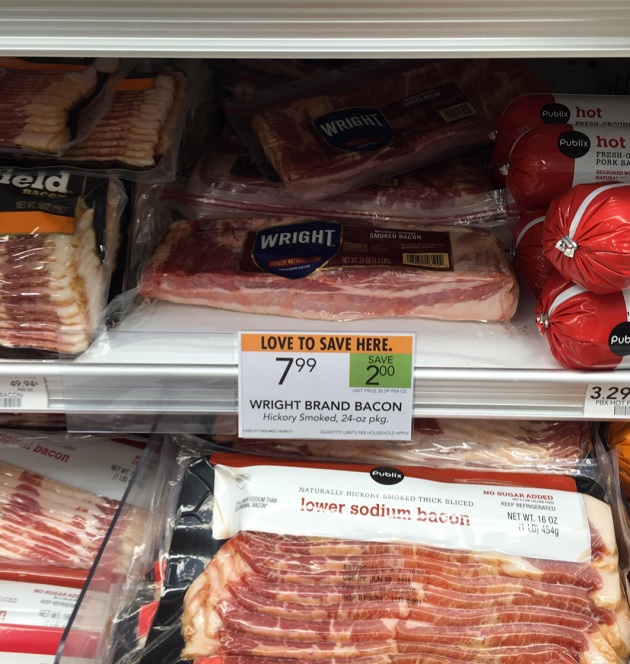
Publix currently has Wright® Brand Bacon on sale $2.00 off! Wright® Brand Bacon has the best cuts of premium meat that are hand-selected and hand-trimmed. Their slices are “Always” Thicker and have an awesome smokey taste. This bacon is regularly priced at $9.99 so with the sale, we can purchase a pack for just $7.99. There is also a $1.00/1 Wright Brand Bacon printable coupon or 3-20-16 SS Insert coupon we can use bringing the price down even lower to $6.99!
Once I got home with my bacon, I opened my fridge to see what fresh produce I had. (That’s why I love this recipe so much – you can use whatever veggies you like!) I decided to use asparagus. This Crustless Quiche with Bacon & Asparagus Recipe calls for just a few ingredients. There are two main components to this recipe: the sauteed component and the wet ingredients. The wet ingredients include baking mix. For this, it can be any baking mix that you typically use. I’ve used both gluten free mixes and regular mixes. We like Heart Smart Bisquick and also Pamela’s Baking and Pancake Mix. Do not, however, use a mix that is strictly for pancake and waffles. That will be too sweet.
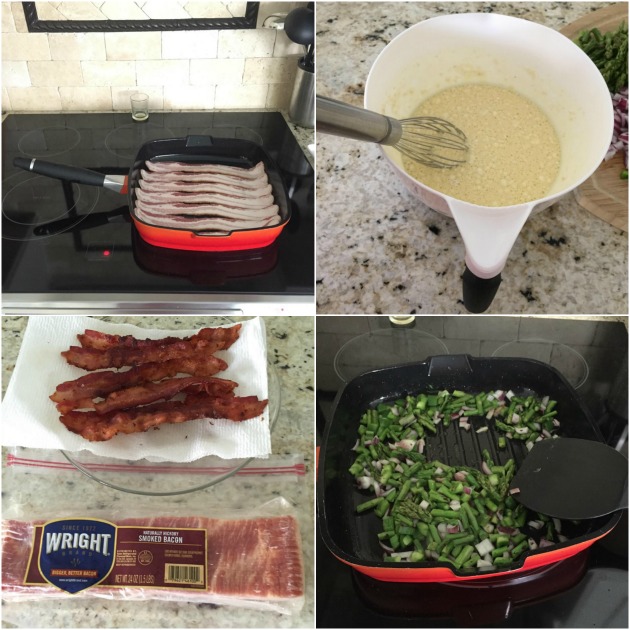
To prepare the quiche, first I browned the bacon. I wanted to get the bacon nice and crispy. While the bacon was browning, I mixed the wet ingredients together. Then, once the bacon was cooked the way I like, I drained it and placed the bacon on paper towels and then chopped the bacon into bite sized pieces. Using the same pan, I then sauteed the asparagus, peppers and onions and added the chopped bacon to them.
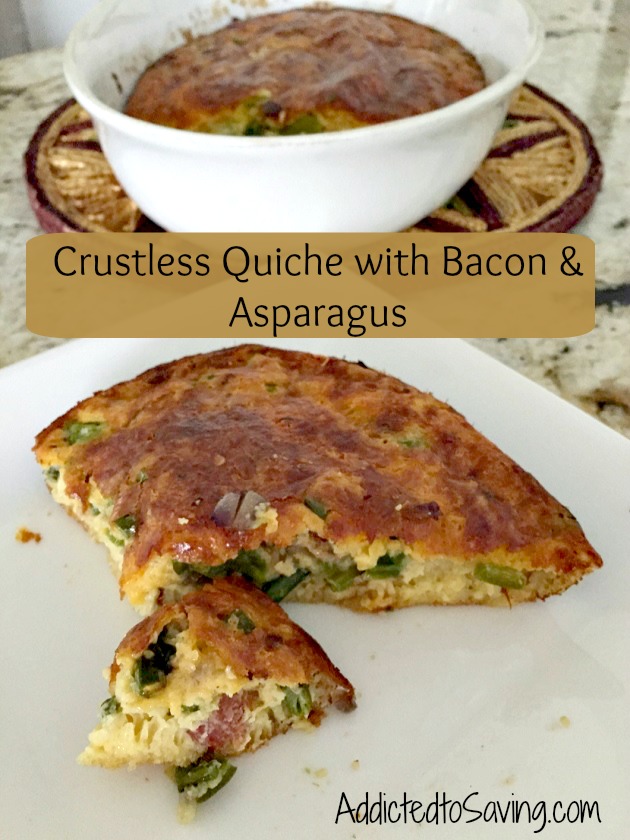
 The bottom layer of the quiche is the sauteed asparagus, onions, peppers and bacon. Then, spread the shredded cheese over it. And lastly, pour the wet ingredients on top. Bake for 35-40 minutes and then voila! Your Crustless Quiche with Bacon & Asparagus will be done!

Crustless Quiche with Bacon & Asparagus Recipe
Ingredients
1/2 package of Bacon (we like Wright® Brand Bacon)
1/2 lb of Asparagus, cut into bite sized pieces
1/2 Large Onion Diced
1/2 Large Pepper Diced
3/4 Cup Baking Mix
1 1/2 Cup Milk (I’ve used skim and 1% milk with great results)
3 Eggs (I’ve also used 1 egg and 4 egg whites with great results)
1/2 cup Cheddar, Swiss or Mexican Blend cheese (I’ve used shredded and block cheese)
1/2 teaspoon Salt
1/2 teaspoon Pepper
1/4 teaspoon Crushed Red Pepper (if you like your food spicy)
**other optional ingredients, spinach, asparagus, pepperoni, sausage, tomatoes – the list goes on and on!
Directions
1) Preheat your oven to 400 degrees. Spray a baking dish with non-stick cooking spray
2) In a frying pan, cook the bacon to the consistency you like. I like crispy.
3) Once bacon is cooked, remove bacon from pan and place on paper towels. Drain oil from pan leaving just a tablespoon in pan.
4) In the same pan, saute all vegetables until veggies are soft. Add bacon to veggies and mix.
5) In a mixing bowl, whisk baking blend, milk, eggs, salt, pepper and crushed red pepper
6) In your casserole dish, spoon bacon & sauteed vegetables and cover the bottom.
7) Layer shredded cheese on top of the meat & veggies.
8) Pour whisked egg & milk mixture onto the top of the cheese.
9) Bake for 35-40 minutes until a nice comes out clean.
Serve and enjoy!
Sponsored post written by me on behalf of Tyson Foods, Inc. The opinions and text are all mine.

The post Crustless Quiche with Bacon & Asparagus Recipe appeared first on AddictedToSaving.com.
]]>The post Crispy Chicken & Spinach Pasta Recipe appeared first on AddictedToSaving.com.
]]>This is a sponsored conversation written by me on behalf of Tyson® and Barilla®. The opinions and text are all mine.

Our family is busy. We aren’t at the stage of life where my son is in school and we are driving him to lots of after school activities. But we are in the stage of life where both hubby and I work full time and parent a very active 3 year old who never stops talking or moving until he is asleep. So, when dinnertime comes around, many nights I’m scrambling to throw a meal together. And the nights where I’m very successful are when the meal I’ve thrown together is not only tasty but well-rounded!
Tyson® Chicken Strips, Barilla® Pasta and Barilla® Sauce work together to create a quick, easy, and flavorful solution to this weeknight struggle that I deal with pretty much every single night! I decided to go to Publix and purchased Tyson® Crispy Chicken Strips, Barilla® Bow Tie Pasta? and Barilla® Pasta Sauce. I also bought a box of frozen spinach. I knew that with the Chicken, Pasta and sauce I would be able to create an easy and tasty meal that my whole family would enjoy! And almost more importantly, I knew that it would be easy to create this meal!
When you go to Publix, be on the lookout for the $3.00 off when you buy any 1 Tyson® Chicken Strips, Tenderloins, or Fillets 25 oz (frozen) AND any 1 Barilla® Pasta Sauce 24 oz AND any 1 Barilla® Pasta 8-16 oz (combined purchase required) Coupon valid February 13 through March 4, 2016.

Once I got home from Publix, my goal was to throw everything together and make a tasty meal quickly. I preheated the oven to 400, started bowling water, starting warming the sauce in a pan and microwaved the frozen spinach. I know this sounds like a lot of work, but seriously, it took me less than 3 minutes to get everything started.
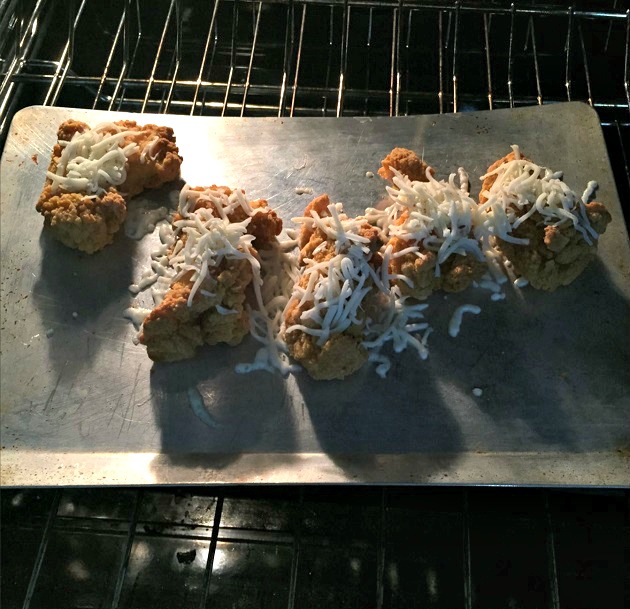
About 5 minutes before the chicken is finished cooking, top with mozzarella and then continue baking until cooked through. This will give your chicken a wonderful chicken parmesan flavor!
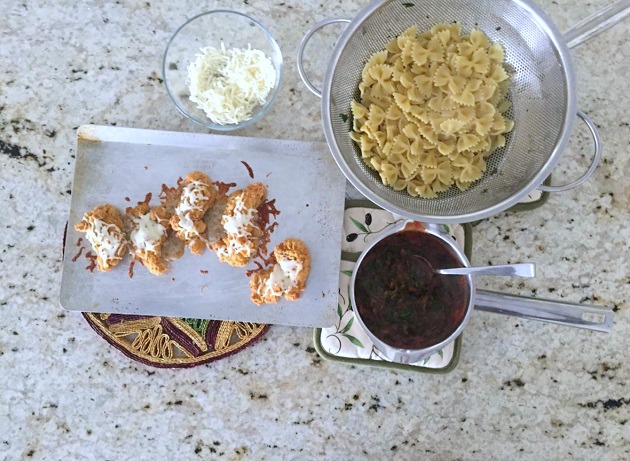
I love that Tyson® Fully Cooked Chicken has 100% All Natural Ingredients and is made from chickens raised with no added hormones, antibiotics or steroids! And being Italian, I appreciate the flavor of Barilla® Sauce! It is made from quality ingredients like vine-ripened tomatoes, extra virgin olive oil and fragrant herbs. This sauce is made with all natural ingredients and contains no preservatives! And for me, Barilla® pasta is my favorite Al Dente pasta of mine to cook with. It is also Italy’s #1 brand of pasta!

How good does this look? It seriously tastes so good! And I love that I was able to sneak some greens into our meal!
Crispy Chicken & Spinach Pasta
Ingredients
1 Bag Tyson® Crispy Chicken Strips
1 Box Barilla® Bow Tie Pasta?
1 Jar Barilla® Pasta Sauce
1 cup Shredded Mozzarella Cheese
Directions
1) Preheat oven to 400
2) Cook box of pasta based on instructions on box. Warm pasta sauce in a pot. Microwave frozen spinach based on instructions on box.
3) Bake chicken for 15 minutes. Then, sprinkle tops of chicken with mozzarella cheese. Bake an additional 5 minutes.
4) Combine spinach and pasta sauce.
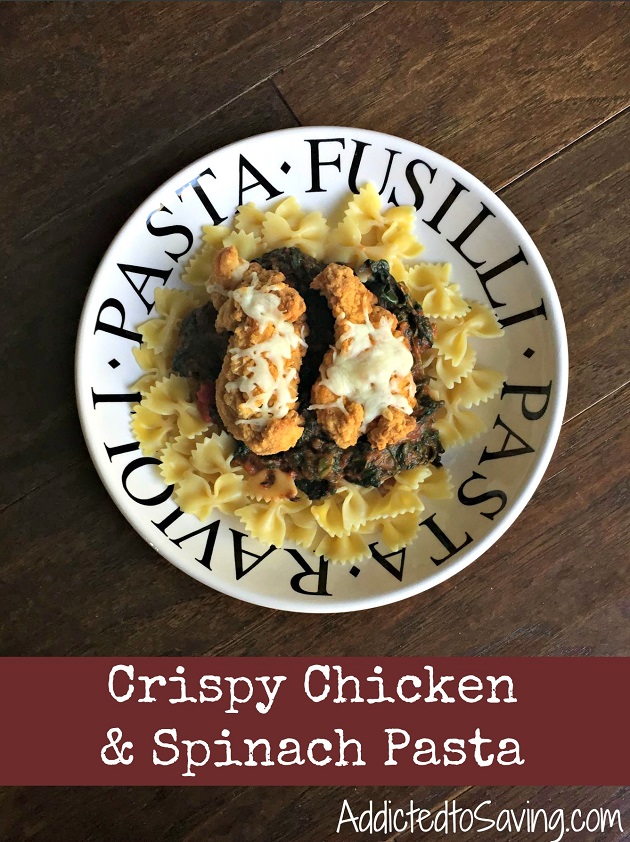
5) Layer cooked pasta with spinach pasta sauce mixture. Top with baked chicken.
Enjoy!
Head HERE to the Tyson & Barilla Pinterest Page for more yummy meal ideas!
This is a sponsored conversation written by me on behalf of Tyson® and Barilla®. The opinions and text are all mine.

The post Crispy Chicken & Spinach Pasta Recipe appeared first on AddictedToSaving.com.
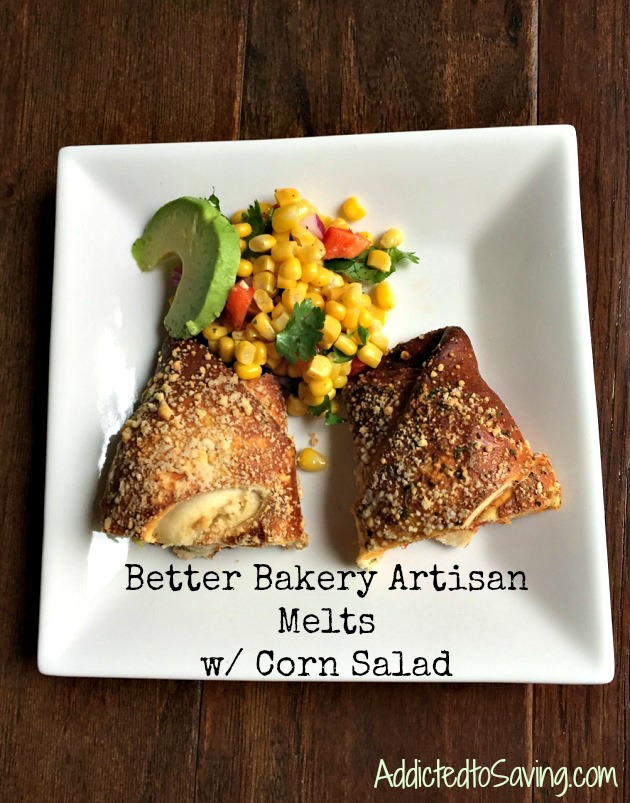
]]>The post Better Bakery Artisan Melts & Corn Salad Recipe appeared first on AddictedToSaving.com.
]]>
When Better Bakery contacted me and asked if I wanted to try their Cheese & Pepperoni Pizza and Chicken & Bacon Club Artisan Melts, I jumped at it. Not only did these artisan melts sound SO good, but I am also finding that at least one night a week (if not more), I’m scrambling to find an easy dinner idea that the whole family will like. And since these sandwich melts sounded perfect for my family, I had to try them out.
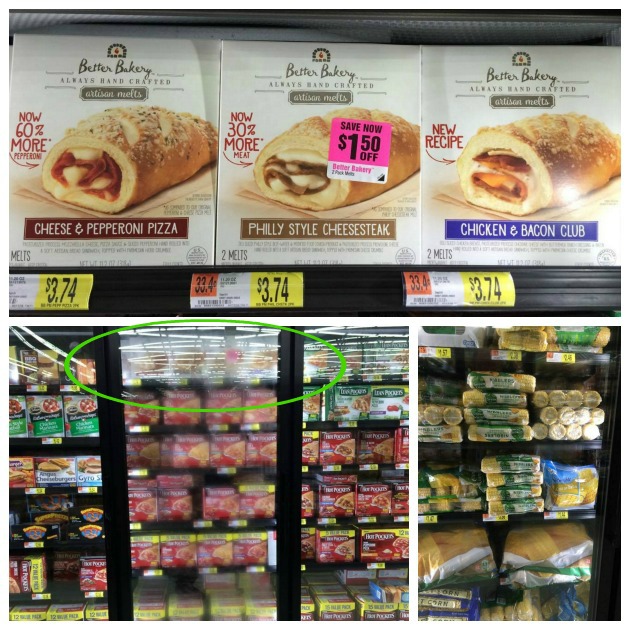
Better Bakery’s melts are found at Walmart, Kroger, Meijer, HEB and Harris Teeter. Head HERE to find the closest retailer near you that sells Better Bakery foods! I headed to Walmart to pick up our boxes. I found them on the top shelf of the sandwich section in the frozen foods aisle. I love how affordable these melts are! And, the frugal gal in me also loved the fact that there is a $1.50 off 1 Better Bakery Artisan Melts coupon we can use! While at the store, I also purchased some frozen corn. I wanted to use the corn to make an easy corn salad to accompany our Artisan Melts.

Better Bakery provides a one of a kind sandwich experience hand made in small batches for everyone to enjoy. The handcrafted, artisan melts are made by Bakers who are committed to the Better Bakery art, and want to make better food. Don’t you love their packaging?

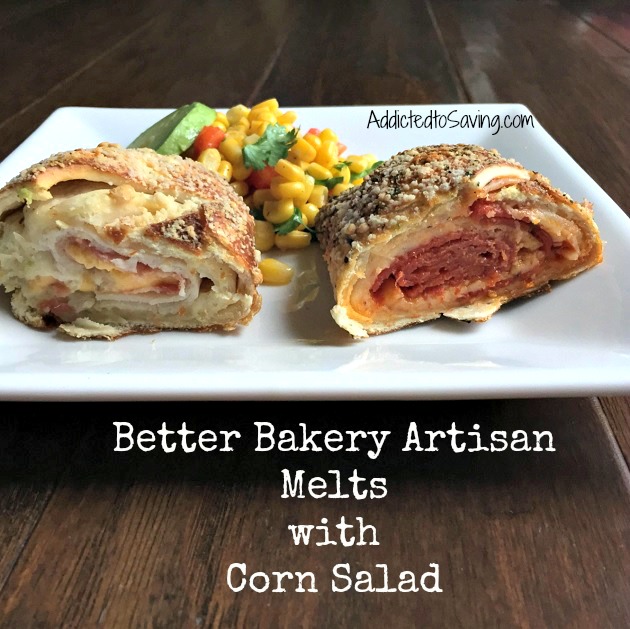
You can either microwave or bake these sandwiches. I chose to use my oven. Once your oven is preheated, it takes only 22 minutes to cook your sandwich! During the time it took cook the sandwiches, I made my Corn Salad.
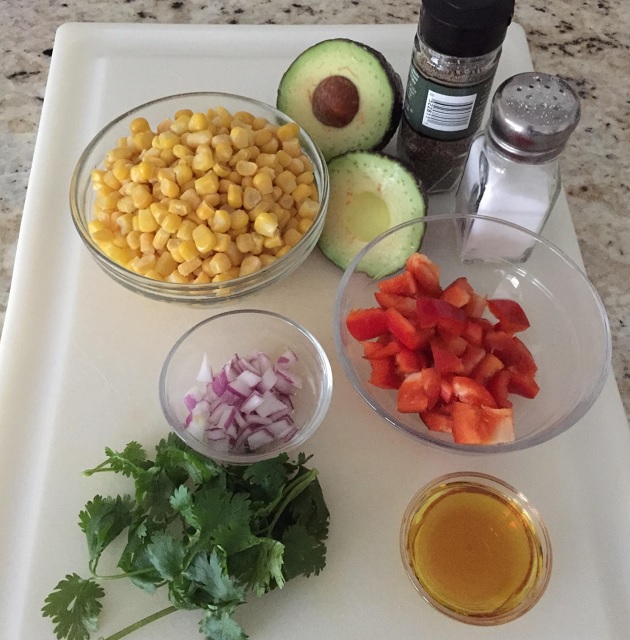
The thing with me is I am busy. So when I cook, I have to be intentional about maximizing my time. This Corn Salad Recipe is one I’ve made countless times. I switch it up all of the time using different flavored vinegar, adding other veggies and sometimes adding sweetness like honey or even white sugar. It always comes out good. It really just depends on what fresh ingredients I have in my fridge. Today’s Corn Salad I made with red pepper and cilantro. YUM.

Corn Salad Recipe
Ingredients
2 cups Corn (if using frozen corn, thaw under running water)
½ Red Pepper (chopped)
2 T Chopped Red Onion
1 T Cilantro
2 t Extra Virgin Olive Oil
1 t Red Wine Vinegar
Salt & Pepper
Avocado (if desired)
Instructions
1) Chop red pepper, red onion and cilantro.
2) In a large bowl, mix corn, red pepper and red onion.
3) Add olive oil, vinegar, salt & pepper. Stir.
4) Add cilantro. Stir gently.
5) If your family likes avocado, you can also chop avocado and add to this salad or top as a garnish.
6) Enjoy!
Have you tried Better Bakery Artisan Melts yet? Leave a comment and share what your favorite melts are!
The post Better Bakery Artisan Melts & Corn Salad Recipe appeared first on AddictedToSaving.com.
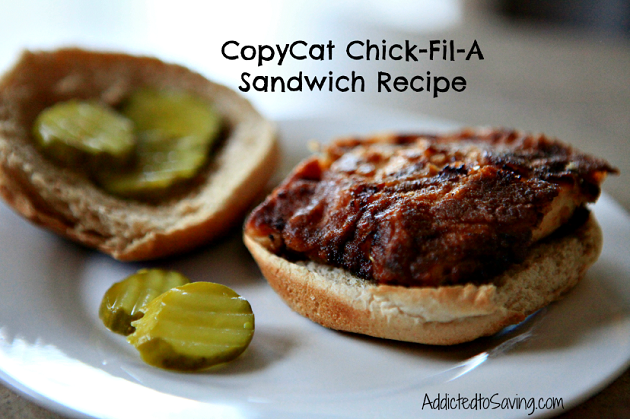
]]>The post CopyCat Chick-Fil-A Sandwich Recipe appeared first on AddictedToSaving.com.
]]>
Have you tried this recipe yet? If you haven’t, you need to! It’s easy to make and the sandwiches are SO good!
When I was in college, my husband introduced me to every fast food restaurant that exists. And he introduced me to all of his favorite entrees and side dishes at each restaurant. On a college budget, he wined and dined me at fast food restaurants. Once we graduated and got married, we stopped going to fast food restaurants. I finally convinced him that every now and then this girl needs a date night at a nicer restaurant versus being served in a paper bag. (Don’t get me wrong – I love frugal date nights!)
Now we only eat at one fast food restaurant. Chick-Fil-A. The problem is that paying for two adults and one child is not cheap! So we don’t go there very often. So when I found this CopyCat Chick-Fil-A Sandwiches recipe, I was all about it. I wanted to try it and see if it would come close to the original sandwich that we love so much. It is really good!
I made two versions of this sandwich. Fried and baked. Because I used coconut oil with the fried chicken, I found it to have a slight coconut flavor. Next time I may try a different type of oil. The baked version was really tasty. I will make the baked version again for sure!
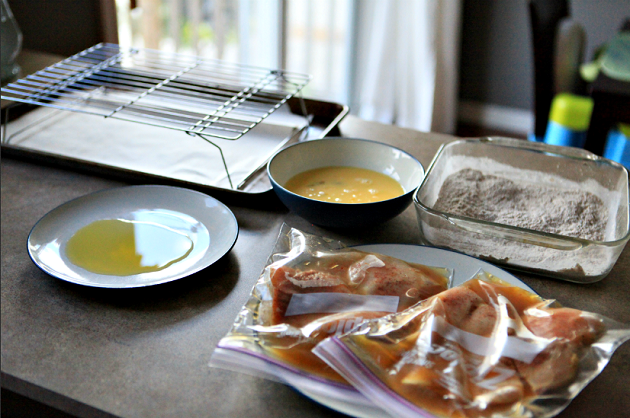 My chicken is marinading and everything is prepped and ready to cook!
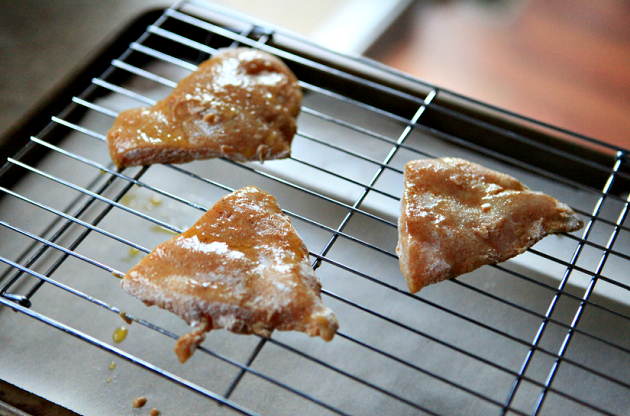 The marinated & floured chicken ready to be put in oven.
 The finished product! Honestly, this chicken is so good you don’t need to put it on a bun! It would go perfectly on a salad or even eaten by itself!
CopyCat Chick-Fil-A Sandwich Recipe
Ingredients
4 chicken breasts, flattened with a meat mallet and cut in half
1 cup of pickle juice
1 ¼ tsp of paprika
salt/pepper
½ cup white flour
½ cup whole wheat flour
¾ tsp of dry mustard
¼ tsp of baking soda
¾ tsp of paprika
½ tsp of garlic salt
1 tbsp of powdered sugar
2 eggs
¼ – ½ cup of milk
cooking spray and/or olive oil and/or coconut oil
Directions
1. Marinate the chicken. Flatten the chicken and cut it in half, sprinkle with salt, pepper and paprika. Place in a bag and seal with 1 cup of pickle juice (I split mine up into 2 bags). Leave marinade on for at least 4 hours up to overnight.
2. Prepare dredge station. Whisk eggs and milk in a bowl. In another dish mix flours, mustard, baking soda, paprika and garlic salt. Dredge chicken in egg mixture, thoroughly coating it, then dredge it in the flour mixture until it is also well coated.
I made both baked and fried chicken, so there are two directions to follow below.
3. For baked chicken: preheat the oven to 450. The directions I was following said to spray the chicken with olive oil, but I didn’t have a sprayer. I instead poured some olive oil onto a plate and dipped the flour-coated chicken into the oil on both sides. Once dipped, place it on a sprayed wire rack on top of a baking sheet. Bake for 12-14 minutes, flip over, and bake for another 12-14 minutes.
4. For fried chicken: heat up oil in a pan (I used coconut oil because of it’s durability in high heat, but you could use any oil you’re comfortable with). Make sure there’s enough oil throughout the duration of the cooking. Cook each flour-coated chicken in a oil heated pan until the chicken is no longer pink on each side.
5. When chicken is done (either the baked or fried or both) let it rest. If you so desire, butter some bread and toast it in the oven or sauté pan for a few minutes. Then place the chicken on the bun along with your 2-3 pickles. Feel free to add lettuce, tomatoes, and whatever else you desire.
Go HERE to see all Recipes on Addicted to Saving
This recipe is adapted from Food Babe and Washington’s Green Grocer
The post CopyCat Chick-Fil-A Sandwich Recipe appeared first on AddictedToSaving.com.
]]>The post Onion Puffs Appetizer & Cracker Barrel Cheese Trays appeared first on AddictedToSaving.com.
]]>
With New Year’s Eve just a few days away, I wanted to share these simple and easy appetizer ideas with you! I love these ideas because they are perfect for large social gatherings as well a quiet night home with family. Right now hubby and I are in the stage of life where our big New Year’s Eve festivities include putting our 3 year old to bed (at his regular bedtime) and then curling up on the couch and watching the ball drop on TV. The goal is to not fall asleep! I love to have lots of finger foods as well as some bubbly on hand so that our somewhat normal night feels a bit more special. This Cracker Barrel Cheese Tray makes entertaining simple! Just open up the package and your cheese is already sliced and ready to go!

You will find Cracker Barrel Cheese Trays at Walmart in the dairy section. Our Walmart had it below all of the shredded and block cheese.

The Onion Puffs Appetizer recipe is simple. I learned this recipe back when I was in high school from a family friend. I love this recipe because it is so flavorful and yet takes less than five minutes to prepare! This recipe requires canned biscuits (or you can make your biscuits from scratch if you have more time), a stick of butter and half a package of Dried Onion Soup Mix!
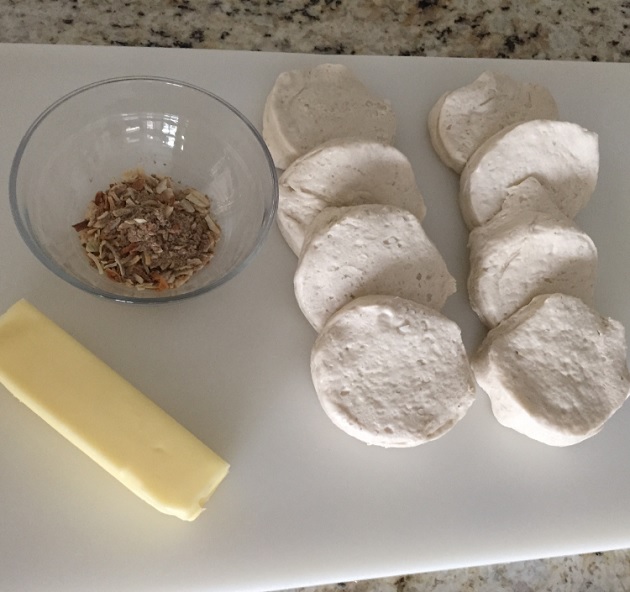
Once you separate your biscuits, you will want to cut each biscuit into quarters and then place on a greased cookie sheet (or use non-stick foil like I did).
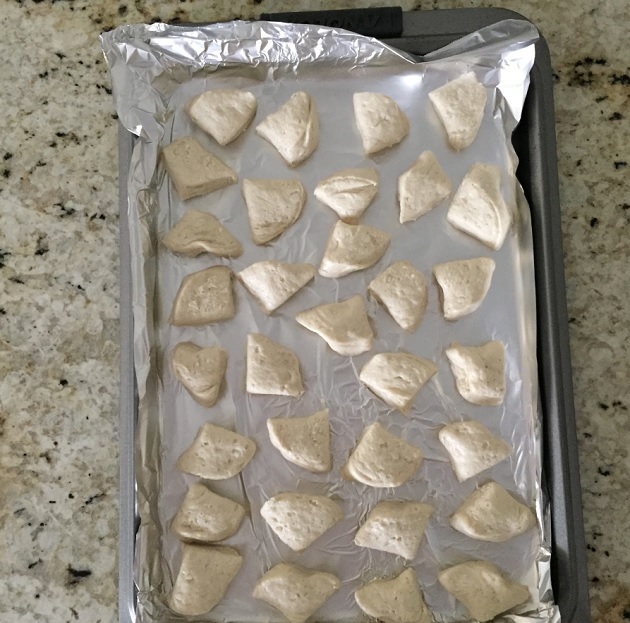
Then, melt your butter.
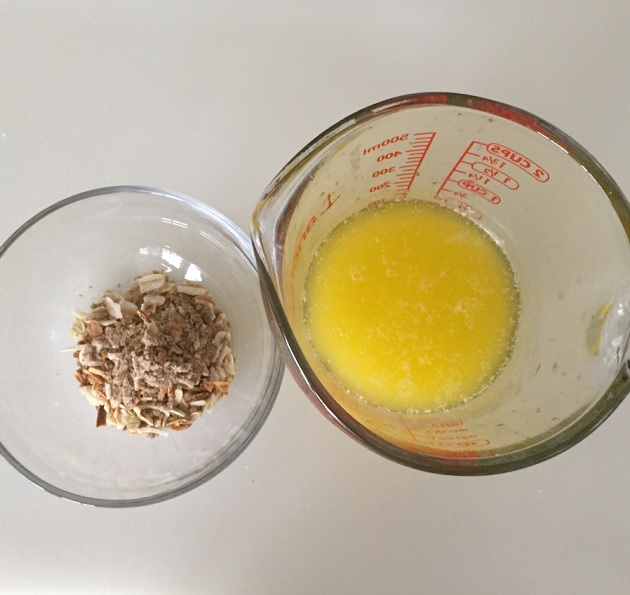
Add the onion soup mix to your butter and mix well.

Then, top each quartered biscuit with some of the butter mixture. Don’t worry about being fancy!
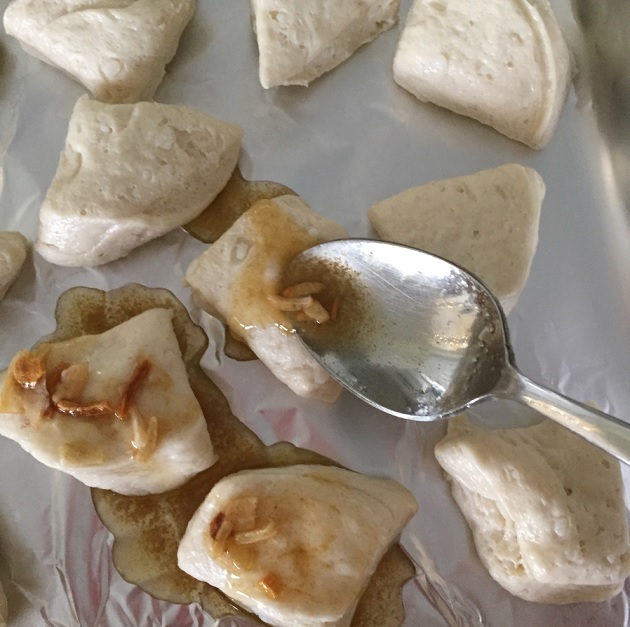
Once each biscuit is covered, bake in the oven according to your canned biscuit’s baking instructions.
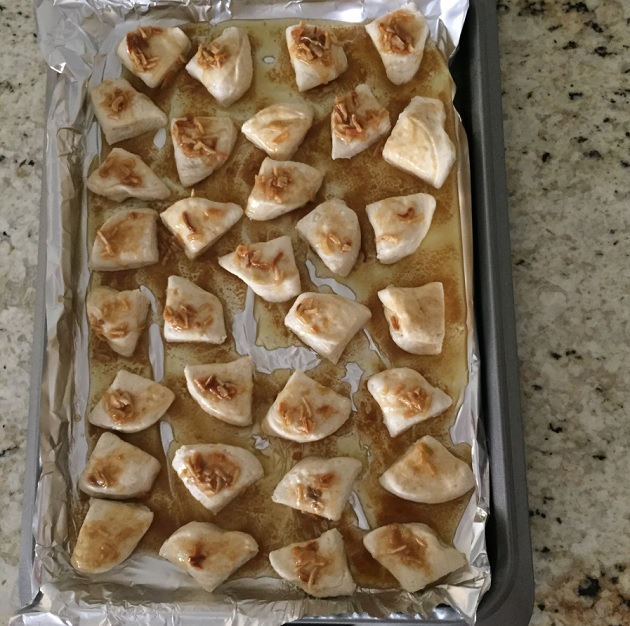
When you take your tray of Onion Puffs out of the oven, you will have to take an immediate sample. They are SO good!
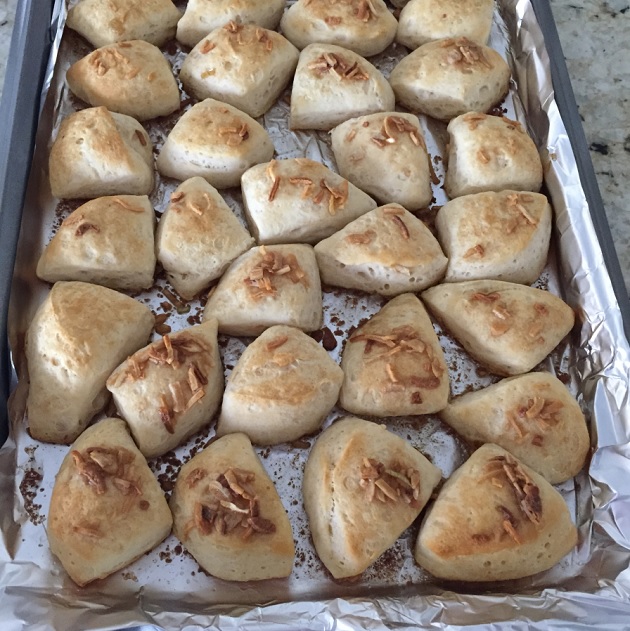
Serve your Onion Puffs Appetizer with your Cracker Barrel Cheese Tray and fresh fruit for a flavor filled appetizer!

Onion Puffs Appetizer
Ingredients
1 Can of Biscuits (any brand)
1 Stick of Butter
1/2 Envelope of Onion Soup Mix
Directions
1) Preheat oven to the temperature listed on the back of the can of biscuits.
2) Pull the biscuits apart. Cut each circle into quarters.
3) Place the quartered biscuits on a baking sheet (sprayed with non-stick spray or lined with non-stick foil)
4) Melt butter in microwave. Stir in onion soup mix.
5) Top each biscuit with butter mixture using a pastry brush or spoon.
6) Bake according to directions on biscuit can.
Enjoy!
Before you head to Walmart, go HERE to print over $13.00 worth of Kraft coupons and find more awesome holiday recipes using Kraft products!
The post Onion Puffs Appetizer & Cracker Barrel Cheese Trays appeared first on AddictedToSaving.com.
]]>The post 5 Ingredient Buckeye Bars Recipe appeared first on AddictedToSaving.com.
]]>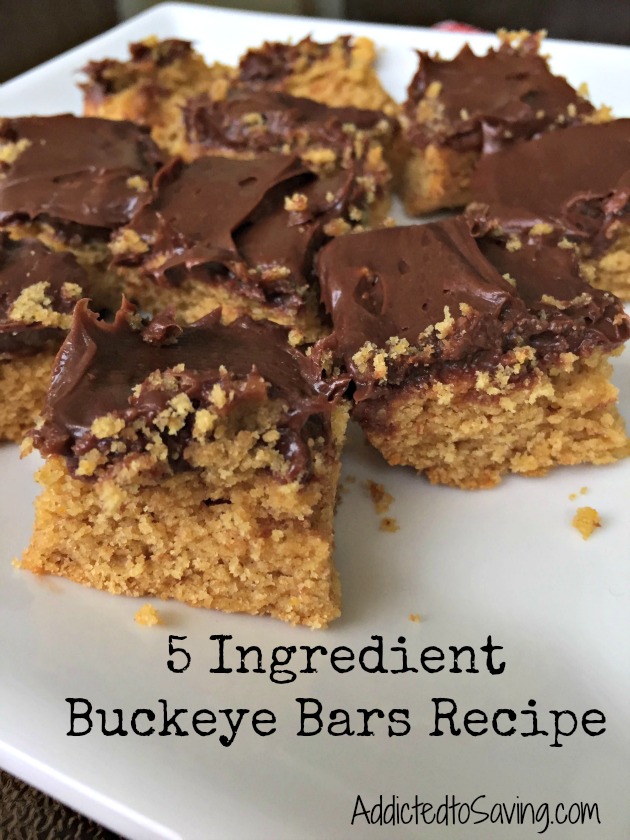
Baking goes hand in hand with the holiday season. I LOVE baking cookies and blondies and candies both to keep and give away as gifts. But let me be honest, this year, I haven’t had the chance to bake like I would like. One of my favorite desserts to make over Christmas are Buckeyes. I wanted to figure out a way to incorporate Pillsbury Baking mixes and frosting to make an easy buckeye-like dessert. And let me tell you, this dessert did not disappoint!
I created a Five Ingredient Buckeye Bar recipe that turned out to be dynamite! When I shared this dessert with my friends and family, they all thought it was homemade! Little did they know that I barely had to do any work to make these Buckeye Bars! And, most of the ingredients I already had in my pantry!
I headed to Publix to purchase one box of Pillsbury Moist Supreme® Classic Yellow Cake Mix and one container of Pillsbury Creamy Supreme® Chocolate Fudge frosting.
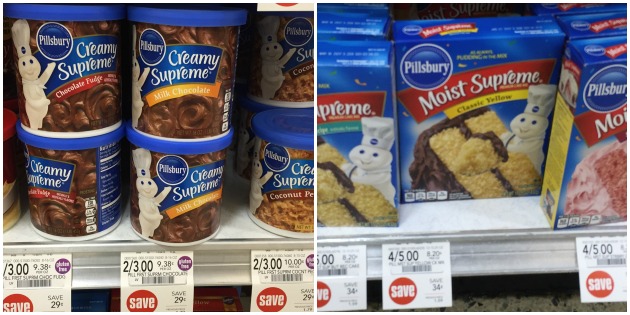
Once I got home, I gathered rest of the ingredients (an egg, peanut butter and water) and got to work.
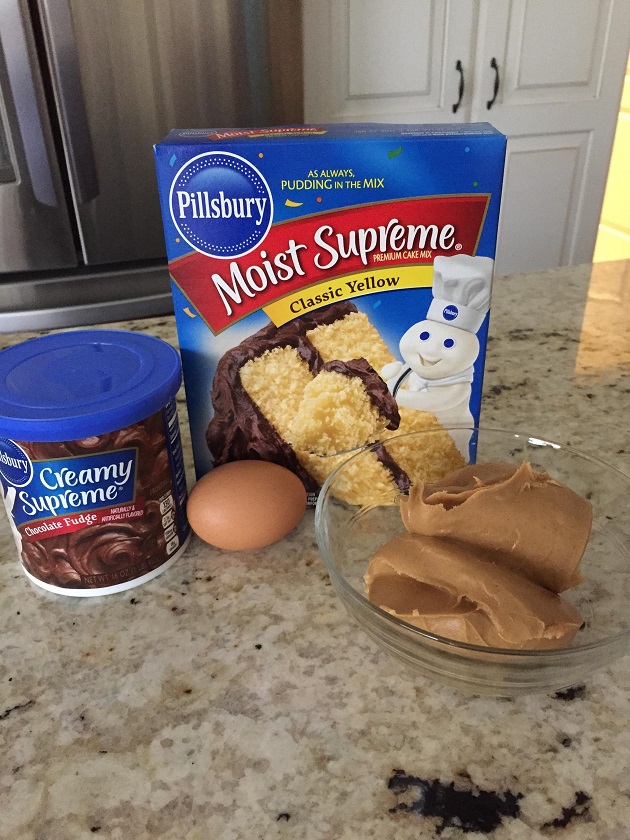
In my Kitchenaid Mixer, I started by mixing the wet ingredients (egg, peanut butter and water).
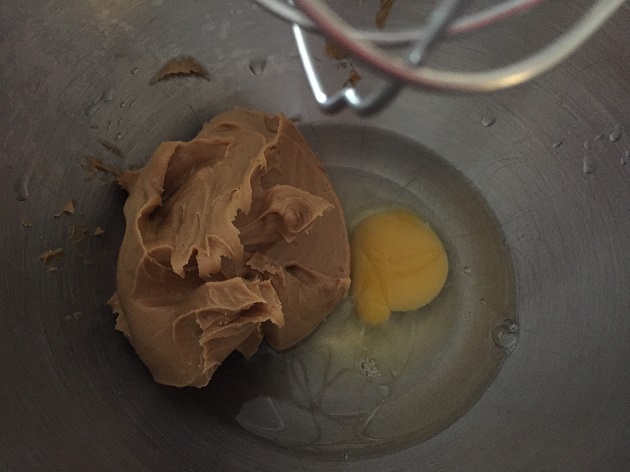
Once the wet ingredients were mixed nicely, I add the cake mix to the wet ingredients. You will know you are done mixing when your batter has the consistency of cookie dough.
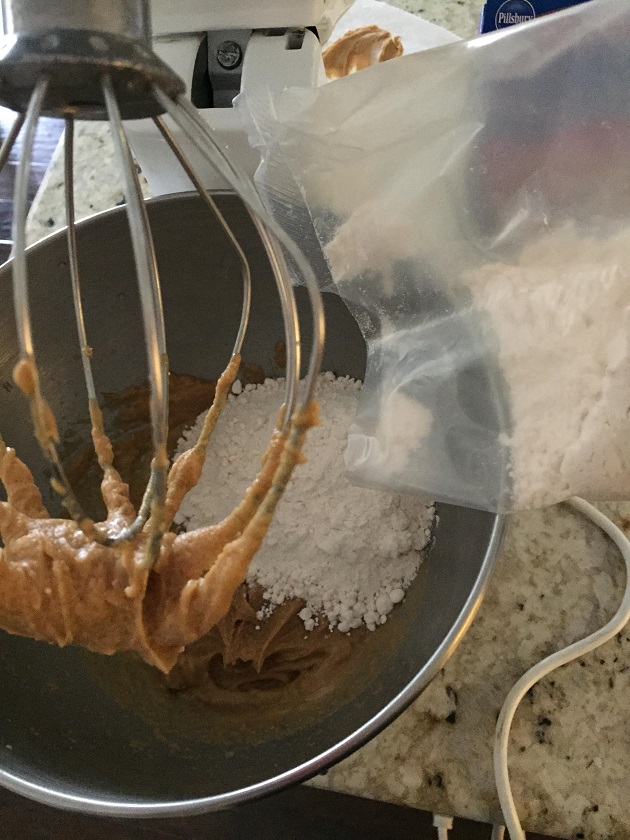
I then spread bar dough into a 13 x 9 inch baking dish and baked for 20 minutes.
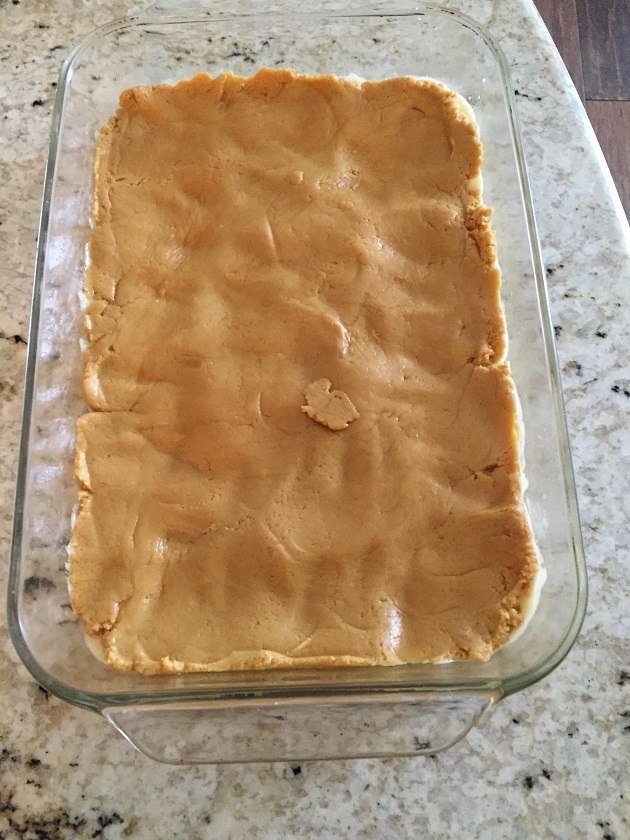
Once the bars cooled, frost them with Pillsbury Creamy Supreme® Chocolate Fudge frosting.

Doesn’t it look divine!?!
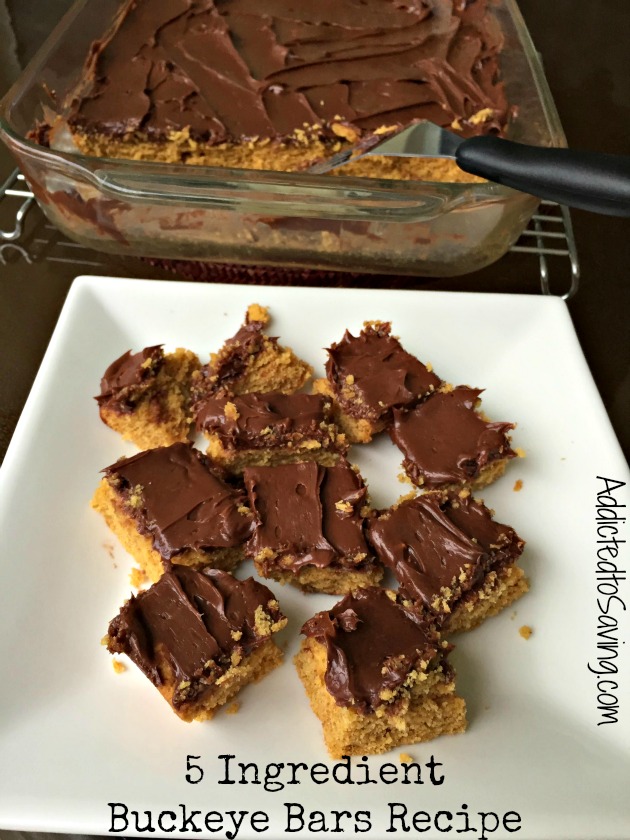
5 Ingredient Buckeye Bars Recipe
Ingredients
1 box Pillsbury Moist Supreme® Classic Yellow cake mix
1 cup of Creamy Peanut Butter
½ cup Water
1 Egg
1 Pillsbury Creamy Supreme® Chocolate Fudge frosting
Directions
1) Preheat oven to 350.
2) Spray non-stick cooking spray in a 13×9 inch baking dish
3) In a large mixing bowl, mix water, egg and peanut butter.
4) Add cake mix to the wet ingredients and mix well.
5) Spread the dough into the baking dish.
6) Bake for 20 minutes or until top is slightly browned.
7) Spread chocolate frosting on top of peanut butter bar. Cut into small squares.
Enjoy!
Have you checked out #TheDessertDebate yet? While there, you will have access to a $0.35 off Pillsbury Dessert Baking Mix or Frosting coupon AND a $0.25 off (1) Crisco® Product coupon!
Visit www.pillsburybaking.com for more Pillsbury information, tips, and recipes. Also make sure you follow them on Facebook, Pinterest and Instagram!
This is a sponsored conversation written by me on behalf of The J.M. Smucker Company. The opinions and text are all mine.

The post 5 Ingredient Buckeye Bars Recipe appeared first on AddictedToSaving.com.
]]>The post How a Non-Camper Goes Glamping with Freschetta® & Honey Maid appeared first on AddictedToSaving.com.
]]>
Are you a camper? I am not. I’ve camped a few times in my life and have not had enjoyable experiences any of those times… until now. Have you tried “glamping”? Glamping is another word for glamorous camping. I decided to try my hand at glamping and see if I had a better time spending time outside glamorously than the normal camping experiences I’ve endured.
It was… fun! It was a lot of work to set up. I’m not going to lie. And I am not going to lie and tell you we went somewhere exotic to for our glamping experience. We did not. Having a three year old who is very very active and who also only sleeps good in his own bed, we decided to create our glamping experience right in our front yard. That way, I had running water, electricity AND indoor plumbing. Wink wink. Oh – and my three year old could sleep in his own room!
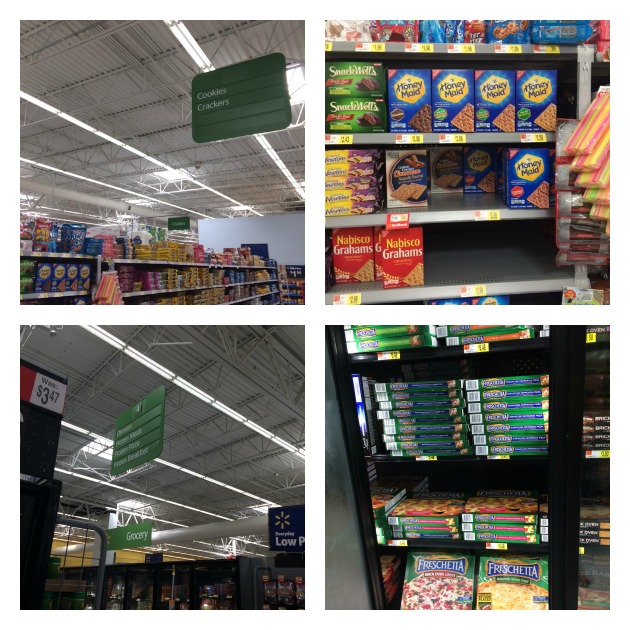
I headed to Walmart and bought some of the glamping supplies we needed including Honey Maid Graham Crackers and Freschetta® Brick Oven.

We set up our tent and got to work making it more glamourous. I brought out one of my favorite white leopard print blankets. It is SO soft and so luxurious, I knew that sleeping on an air mattress plus being
covered in this blanket would make my night’s sleep relaxing. We also hung light, airy, white curtains in the back of the tent as well as the front of the tent to give the tent more of a luxurious feel.

This is the view from our bed. The tent has an open air feeling as the top of it is just see through screen (you can cover it if it rains). I was so relaxed seeing the palm trees overhead!
On the entryway leading into the tent, we used an outdoor rug that is both visually appealing and also practical as I don’t like walking barefoot in the grass. So we could go from inside the chairs outside without having to walk on any grass.
 And then we added both real candles and battery operated candles both on the inside and outside of the tent. (The candles inside the tent were all battery operated – no fire hazards for us! )

At night, we hung a strand of white lights to give us a bit more light.
Once we had our tent set up, we got to work on the food. I’ve never really associated Freschetta® Brick Oven® pizzas with grilling out before but now that we’ve grilled it, we will definitely do this again. Freschetta® Pizza has a crust that is made like fresh baked bread with only natural yeast and no chemical leaveners. It is topped with the most premium ingredients including sauce made from real tomatoes, 100% real cheese and the highest quality meats. You must try Freschetta® Naturally Rising Pizza while #glamping if you haven’t already!

Uncooked pizza on the grill.
Grilling the pizza gave it a bit of a grilled flavor and really kicked up the regular flavors of the pizza!
I do have to state that we covered the entire bottom of the grill with tin foil, however, you do not need to do this.

Cooked pizza after cooking on low for 14 minutes.
Steps to Grilling Your Freschetta® Brick Oven Pizza
1) Preheat grill on high for a least 5 minutes
2) Remove pizza from carton, clear overwrap film and cardboard disk
3) Place pizza on double layered aluminum foil in center of grill
4) Turn grill to low and cook for 10 to 14 minutes. Let pizza stand 2 minutes before serving.
Tips – Keep pizza frozen until placing on grill. Cooking times may vary depending on your grill. While we covered the entire grill with tin foil, you do not need to do this. Just cover the bottom of the pizza with a double layer of aluminum foil.
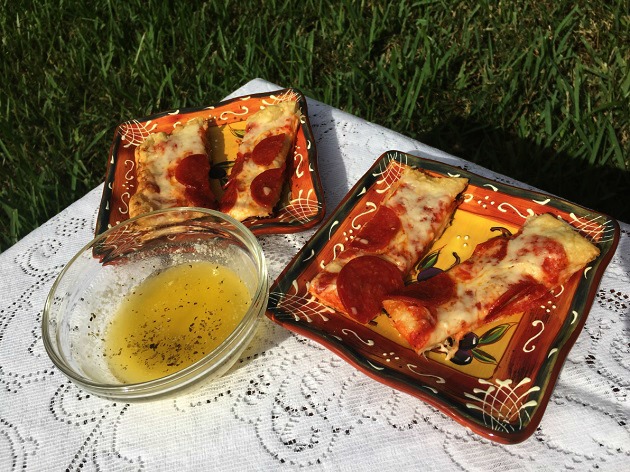
I made a butter dipping sauce to go along with the pizza. I used a half a stick of butter and added about ¼ Teaspoon of Garlic and about ¼ Teaspoon of Italian Herbs. The sauce was perfect for dipping our pizza into.
For dessert, I wanted to make a reliable dessert that most people associate camping with – S’Mores. However, I wanted to kick it up a notch. I made Peanut Butter Chocolate S’Mores Dip.
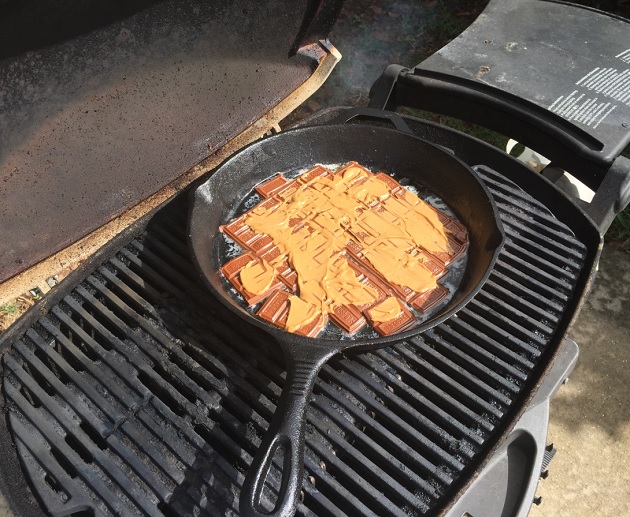
In a cast iron skillet, I started with chocolate bars and peanut butter.
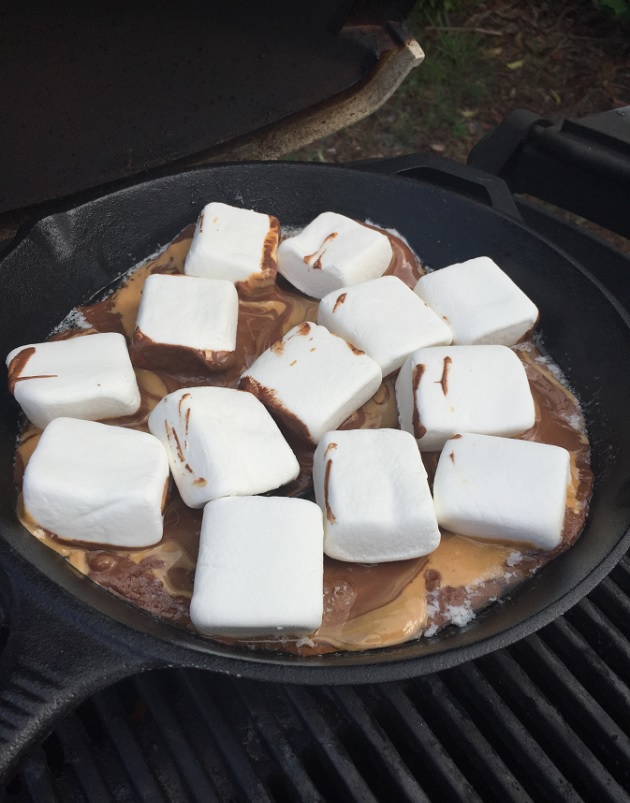
Once the chocolate melted, I topped it with marshmallows.

Peanut Butter Chocolate S’Mores Dip Recipe
Ingredients
4-6 Chocolate Bars
¼ cup Peanut Butter
Marshmallows (as needed)
2 T Butter
Instructions
Preheat the grill for a few minutes on low.
1) Rub melted butter on the inside of a cast iron skillet
2) Cover the bottom of the skillet with chocolate bars.
3) Spread peanut butter over the chocolate bars
4) Grill on low until chocolate peanut butter mixture is spreadable
5) Top with Marshmallows and cook a few minutes until they begin to melt.
6) Enjoy with Honey Maid Graham Crackers. SO SO good.
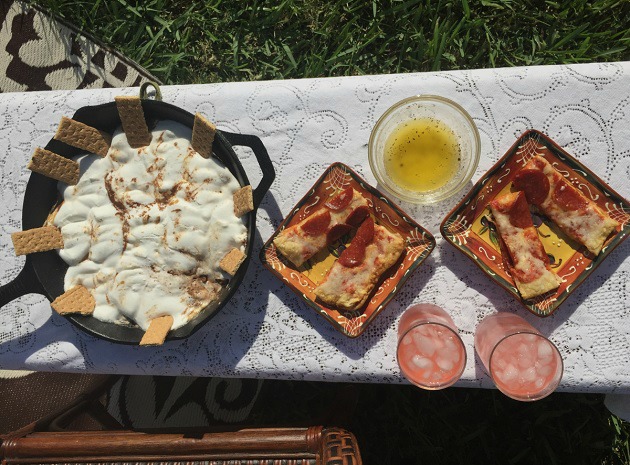
The Freschetta® Brick Oven Pizza with Butter Garlic Sauce and Honey Maid Graham Crackers dipped in Peanut Butter Chocolate S’Mores Dip made my glamping experience extremely tasty!
Have you gone glamping before? Share your tips for making a night of glamping truly glamourous!
The post How a Non-Camper Goes Glamping with Freschetta® & Honey Maid appeared first on AddictedToSaving.com.
]]>The post Apple Pie Trifle Recipe appeared first on AddictedToSaving.com.
]]>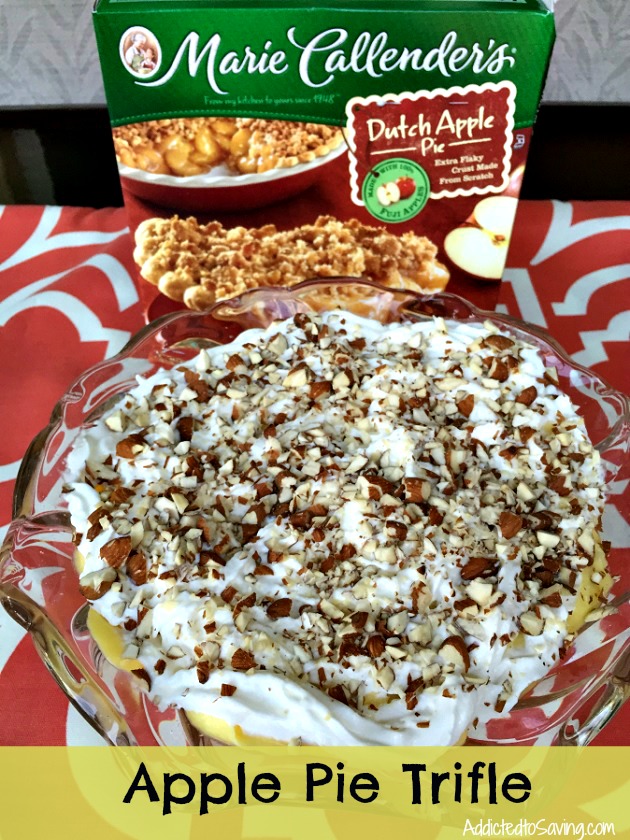
I love everything about the holidays. I love the music. I love the cooler weather. I love spending time with family and friends. And I love the food. I was given the opportunity to create a dessert with how Marie Callender’s® Dessert Pies and Reddi-wip® and I jumped at it. I mean really, what is better than a how Marie Callender’s® Dessert Pie right out of the oven covered with Reddi-wip®?
I don’t consider myself to be an expert mom. My son just turned 3 and honestly, I feel like I am learning how to be a mom every single day. But one of the things I have SO loved as I’ve watched him grow into a 3 year old is his broadening awareness of the world around him. And now that he is about to reach his third Christmas with us, it has been so fun to watch him start to connect the dots and remember the routines we have in place. He’s talked about going to church on Christmas Eve, eating a big meal on Christmas Day and yes – he is talking about Christmas presents. Last year, he didn’t “get it”. But this year, he’s ready. And I’m loving it.
One of the consistent desserts we have each year is Apple Pie or Pumpkin Pie or both! As a child, I grew up watching my mom give desserts as gifts each holiday season. I decided to make a dessert that I could share with friends. Marie Callender’s has a huge line of frozen pies to choose from so it was very easy for me to choose to make a pie.
I headed to Walmart to pick up a Marie Callender’s® Dessert Pie and Reddi-wip®.

Then I headed home to create my dessert.

I decided to try my hand at “pie-cycling.” Have you ever done that before? Basically I took a Marie Callender’s® Dutch Apple Pie and baked it. Prior to baking, I covered the crust with tin-foil to help prevent the crust from burning.

Above is a picture of all of the ingredients I used to make the Apple Pie Trifle. Look how yummy the baked pie looks!

I cut the baked pie into bite sized pieces. Doesn’t it look like apple cobbler?
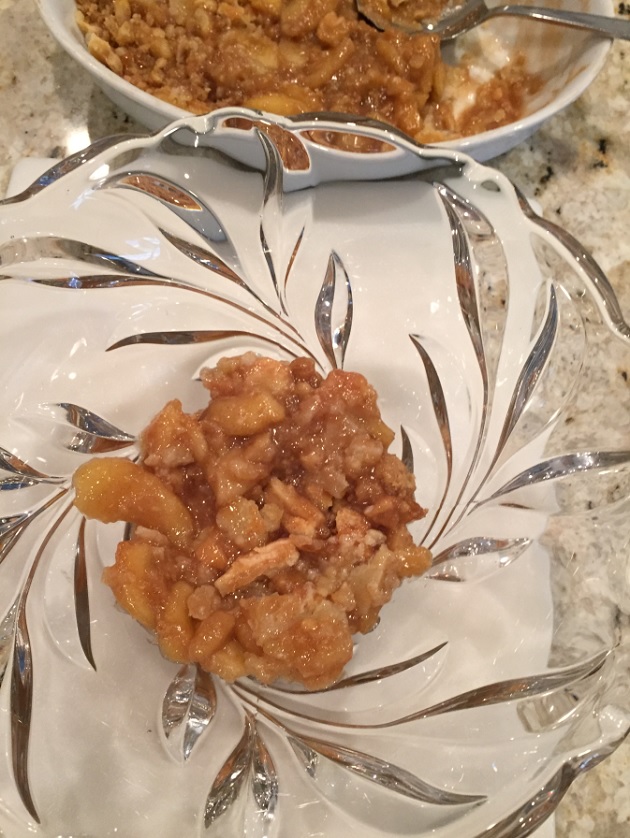
In a large glass bowl (you want glass so that you can see the layers through it), spoon the cut apple pie into the bottom.

Next, layer vanilla pudding.
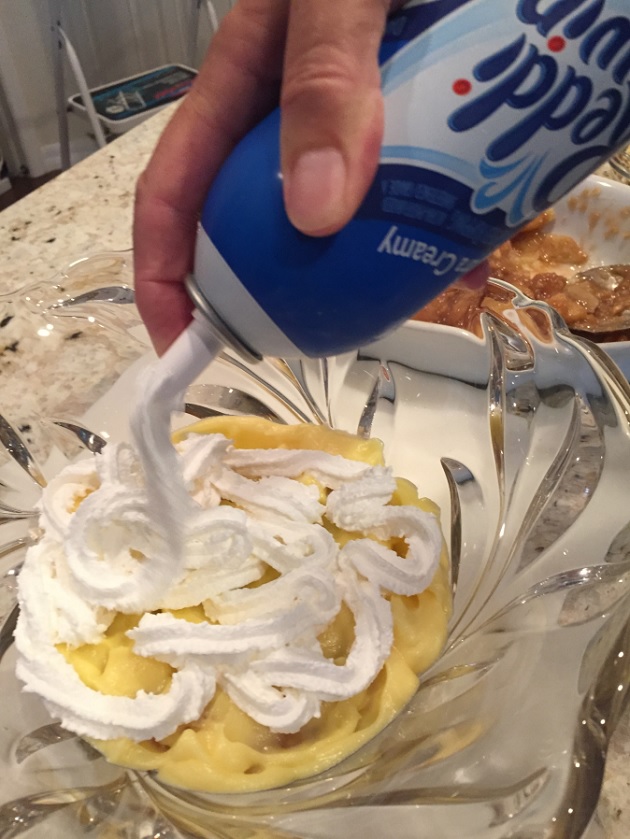
Then, layer Reddi-Wip
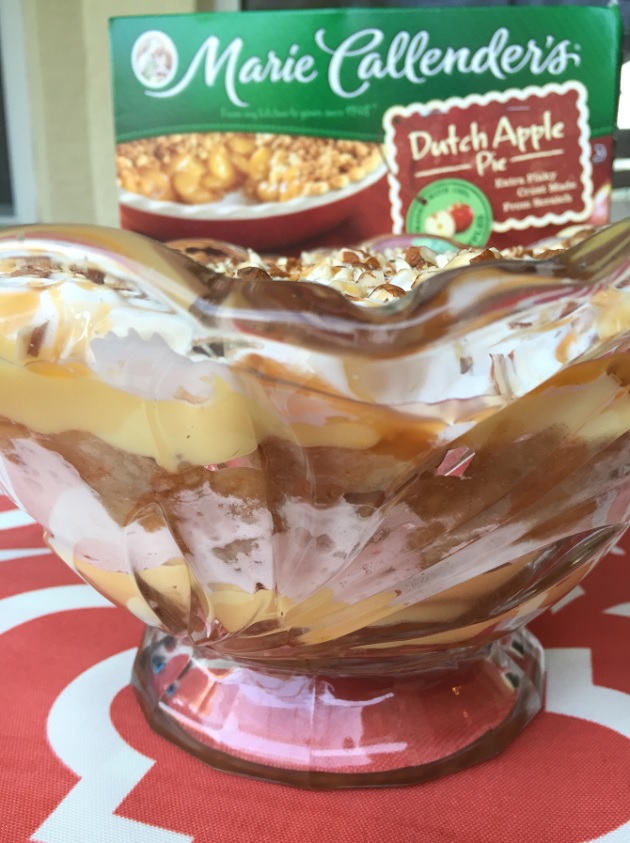
Repeat the layers until your bowl is full. Top with chopped almonds and caramel sauce. How pretty does the Apple Pie Trifle look from the side angle!

And voila! I even made a mini Apple Pie Trifle in a martini glass. I loved how that came out. If you are having a dinner party, you could prepare martini glass Apple Pie Trifles and keep refrigerated until dessert time.

I also created a printable label for you! You can print this out and then customize it with your name to it. Use double sided tape to attach the label to your Apple Pie Trifle to give it away as a gift! Head HERE to print out your label!
Apple Pie Trifle Recipe
Ingredients
1 Marie Callender’s® Dessert Pie
1 can Reddi-wip®
Vanilla Pudding
1/2 cup Chopped Almonds
1/4 cup Caramel Ssauce
Directions
1) Prehead Oven & Prepare Marie Callender’s® Dessert Pie according to instructions on box **tip – to prevent the crust from burning, cover with tin foil.
2) While pie is baking, make vanilla pudding. (to save time, I made instant vanilla pudding). Put in refrigerator once made.
3) Once the pie is baked, cool on countertop.
4) Deconstruct the pie by chopping it into bite size pieces.
5) In a glass bowl, layer apple pie, vanilla pudding and Reddi-wip®.
6) Repeat this sequence again until bowl is filled.
7) Top with chopped almonds and caramel sauce.
Enjoy!
What are your favorite Marie Callender’s pie flavors? Have you ever “pie-cycled” a pie before? If so, share what kinds of recipes you made! Head HERE to see other recipes and my favorite thing ever – COUPONS!
The post Apple Pie Trifle Recipe appeared first on AddictedToSaving.com.
]]>The post Ready. Set. Cook! Contest: Spaghetti Squash Pasta w/ Shrimp, Bacon & Feta Cheese Recipe appeared first on AddictedToSaving.com.
]]>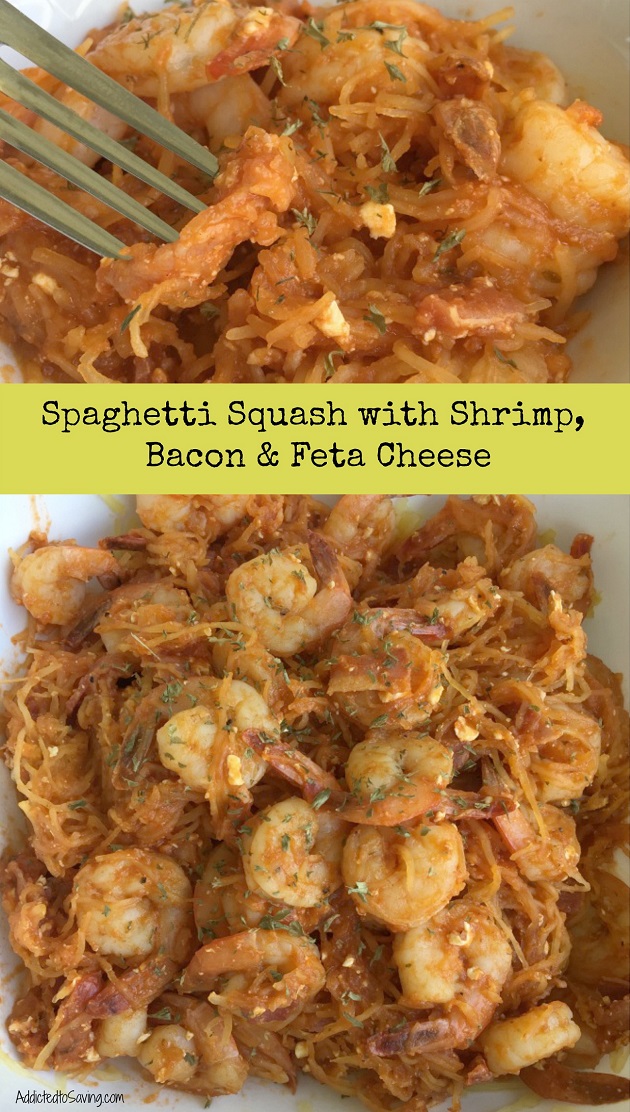
When you cook with Italian sauces, do you have a favorite sauce that you cook with? For us, we love Ragu Traditional Sauce. Ragu is an authentic Italian sauce with richer taste, aroma and texture than most other brands because it’s made the traditional way and with the same standards set by Assunta in 1937. Instead of using shortcuts, Ragu follows Assunta’s secret family recipe slow-simmering vine-ripened tomatoes, garlic, and fragrant herbs. And, they have no artificial flavors, colors and no high fructose corn syrup. Head HERE to learn more about Ragu.
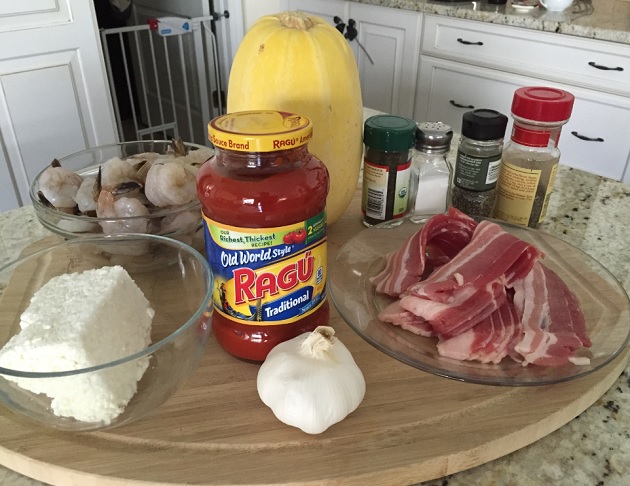
I use Ragu sauce over noodles, in lasagna, in slow cooker meals and even in new recipes that I concoct. While I don’t have a lot of time in the kitchen, I love to put together a wonderful meal that my family can enjoy. Most nights my husband is on the road a lot working. So when he is home for dinner, I love to have my son and hubby at the dinner table enjoying a home cooked meal.
Ragu is encouraging families to gather around the dinner table with their “Ready. Set. Cook!” contest! This contest challenges home cooks to create a new and unique recipe featuring Ragu and ingredients from a set list. For four weeks (from 11/2 – 11/30) you can enter this cooking challenge. The goal is for us to think outside of the box and create a dish that goes beyond the expected and utilizes Ragu sauce. The grand prize winner will receive $3,000, the runner-up $1,250 and the people’s choice winner will receive $750!
I love these kinds of challenges and thus created this Spaghetti Squash with Shrimp, Bacon and Feta recipe. I’ve never made this before and to be honest, have never created a dish combining those four ingredients and marinara sauce. So I was eager to see how it would turn out. I knew their flavors should all go well with Ragu Sauce. But I was still a bit nervous. I shouldn’t have been, though, because this turned out amazing! For more info on this contest, head HERE.
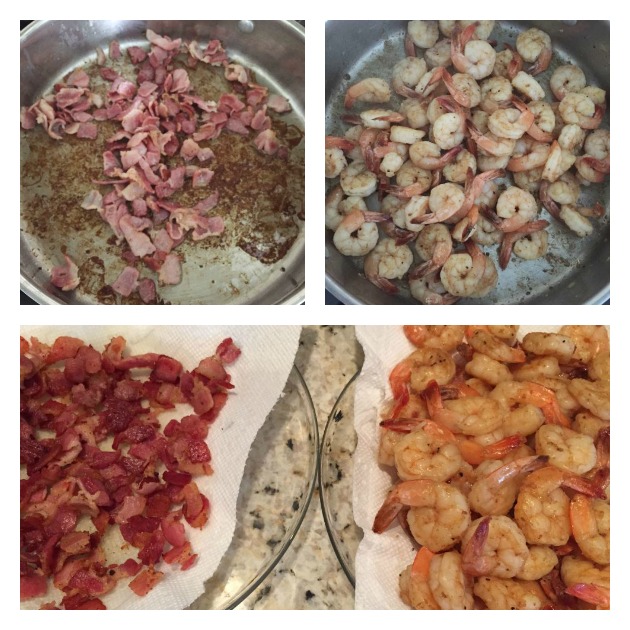 One of the things I love about this meal, is that it is a one pan meal. You do need to cook the spaghetti squash in the oven. But while that is cooking, get a deep pan out and start working on the toppings. Start by browning the bacon – remove once cooked but reserve the drippings in the pan. Then, cook the shrimp – just like the bacon – remove once cooked but reserve the drippings in the pan. And lastly, make the sauce.
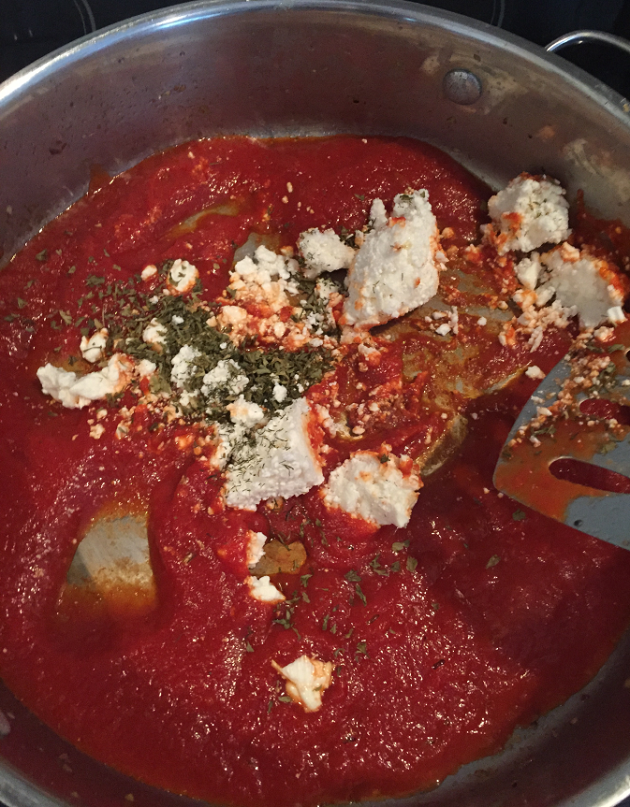
To the Ragu Traditional sauce I added a little dill and feta cheese. I slowly brought the sauce to a boil.

Once the sauce starts boiling, add the cooked bacon and spaghetti squash. Mix together.

Then, add the cooked shrimp. You can either leave the shrimp on the top, or mix with the sauce. I found the sauce to be so tasty that I wanted it to cover the shrimp. So I mixed everything together. This recipe turned out amazing. The saltiness from the bacon went perfectly with sweetness of the sauce and the tanginess of the feta cheese. And honestly, what isn’t better than shrimp in pasta! Below is the recipe!
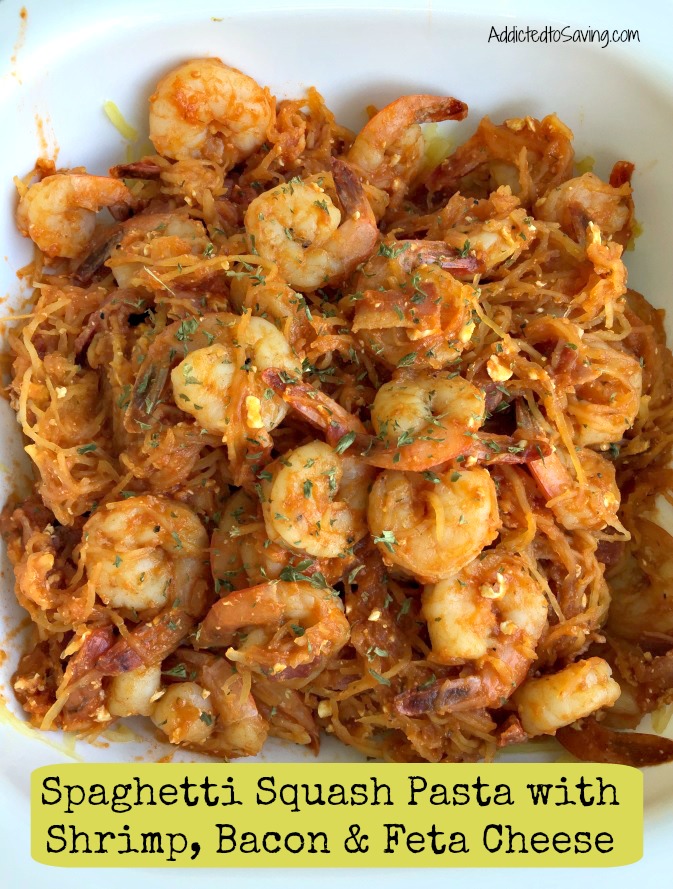
Spaghetti Squash with Shrimp, Bacon & Feta Cheese
Ingredients
1 Spaghetti Squash, halved with seeds removed
1 lb Medium or Large Fresh shrimp, peeled and deveined
8 strips uncooked Bacon, cut into small pieces
3 Garlic Cloves, minced
1 ½ cup Ragu Traditional Sauce
1 T Dill
½ c Feta
Salt
Pepper
Directions
1) Preheat oven to 375
2) Place Spaghetti Squash face down in baking dish. Fill dish with enough water to cover bottom of squash. Cook for 45 minutes or until you can pierce with a fork
3) Cook bacon in large skillet until crisp. Reserve drippings in pan. Place cooked bacon on a paper towel on a plate.
4) Add shrimp and garlic to skillet. Sprinkle shrimp with just a dash of salt & pepper. Cook shrimp approximately 90 seconds on each side until cooked through and pink. Remove cooked shrimp and place on paper towel on a plate.
6) In skillet, add Ragu sauce, dill, and feta. Bring to a slow boil.
7) Add bacon and shrimp to the sauce. Gently stir to combine.
8) Top spaghetti squash with shrimp, bacon and feta sauce mixture.
Enjoy!
Head HERE to see all of the Recipes on Addicted to Saving
Have you created any innovative recipes with Ragu sauces? Leave a comment with your recipes! And, make sure you enter the “Ready. Set. Cook!” contest!
This is a sponsored conversation written by me on behalf of Ragu. The opinions and text are all mine.

The post Ready. Set. Cook! Contest: Spaghetti Squash Pasta w/ Shrimp, Bacon & Feta Cheese Recipe appeared first on AddictedToSaving.com.
]]>The post #ad Making Dinner Fun with Tyson® Chicken Nuggets appeared first on AddictedToSaving.com.
]]>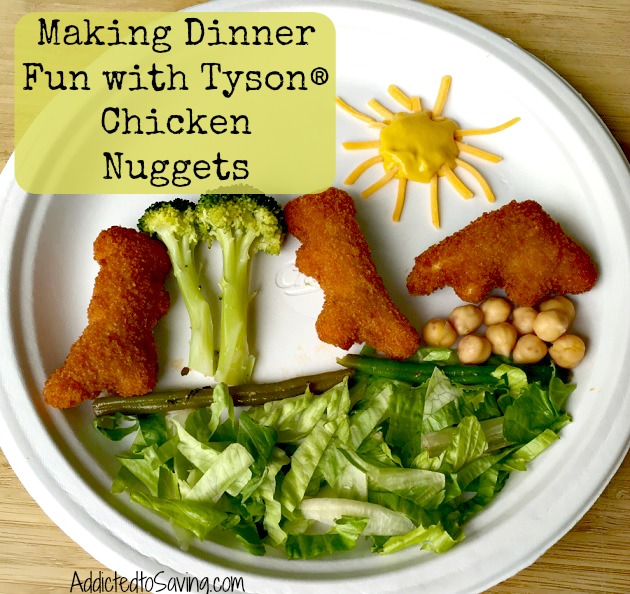
Tyson® Chicken and State Fair® Corn Dogs have teamed up with the Peanuts Movie for an excellent promotion! Buy ANY TWO (2) specially marked packages of Tyson® Chicken Products or State Fair® Corn Dogs and you can receive up to $9.00 toward one child admission to see The Peanuts Movie Only in Theaters. Head HERE to go to the submission form for your codes! I was very excited about this promotion because we LOVE all things Snoopy! Go HERE to learn more about The Peanuts Movie and watch the trailer.

I headed to Walmart to pick up a bag of Tyson® Chicken Dino Nuggets (my son loves them) and a box of State Fair® Corn Dogs (my hubby loves them)! Make sure you are on the lookout for and purchase two items that have the special peelie on them promoting The Peanuts Movie (pictured below).

My son is currently in the stage of toddlerhood where he is a picky eater. While he likes a vast variety of foods, I have a hard time getting him to eat fruits and veggies. So I wanted to take advantage of the protein powered snacking of Tyson® Chicken and add some veggies to his meal. And, I wanted to make him his favorite honey mustard sauce.
The convenience factor of Tyson® Chicken Dino Nuggets is just awesome. They take just 10 minutes to bake once the oven is preheated.
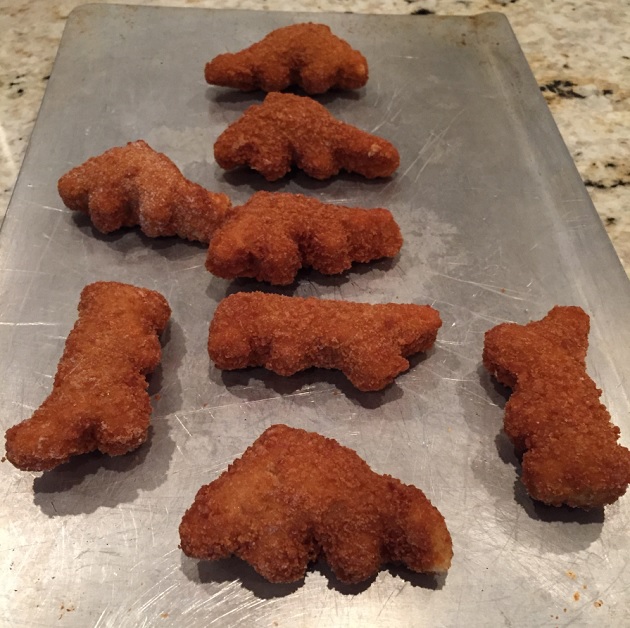
Once I put the Tyson® Chicken Dino Nuggets in the oven, I got to work on some veggies for my son’s plate. Knowing that there is a good chance my son won’t eat all of his veggies, I like to give him a variety with the hopes that he’ll at least try one bite of everything (AND maybe even like something)!
I also took this time to make my Honey Mustard Sauce. And let me tell you.. it’s not a tricky sauce to make. It includes two ingredients… Honey and Yellow Mustard! See the recipe below.
2 Ingredient Honey Mustard Recipe
Ingredients
½ cup Yellow Mustard
¼ cup Honey
Instructions
Mix the mustard and honey together. And voila. If you like your honey mustard really sweet, you can use 1/3 cup of honey instead of ½.
I’d love to hear about your favorite way to eat chicken nuggets! Share your comments!
The post #ad Making Dinner Fun with Tyson® Chicken Nuggets appeared first on AddictedToSaving.com.
]]>The post 5 Ingredient Bowtie Lasagna w/ Bertolli® Pasta Sauce. appeared first on AddictedToSaving.com.
]]>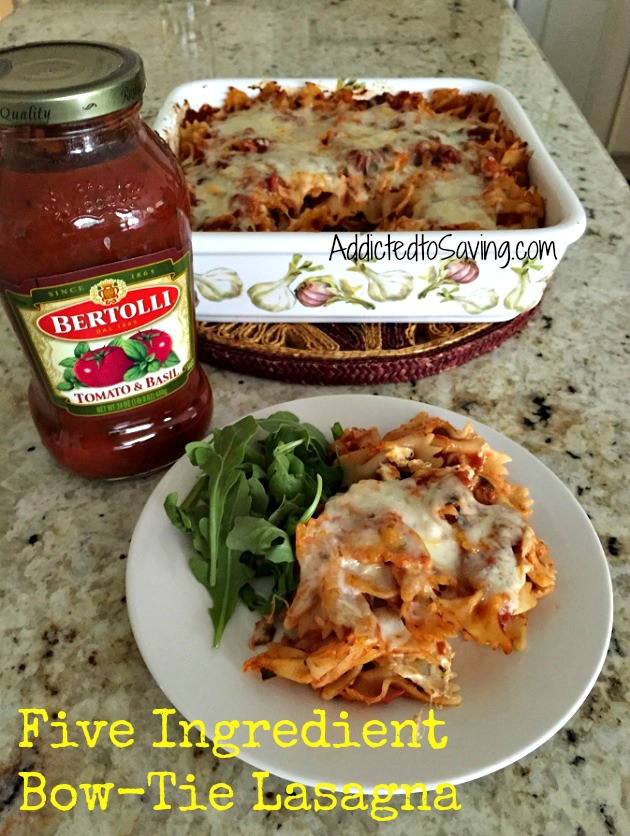
When I go shopping at BJ’s, I always get excited. I know that I am going to get bulk pricing on staples that my household needs. And, I know that I am going to get excellent quality. This week we went to BJ’s to purchase Bertolli® Pasta Sauce. If you follow my blog, you may recall me sharing that this past month, I ran out of pasta sauce in my stockpile. While I like to cook my own marinara sauce, I very seldom have the time to do that. So I like to have jars in my pantry for crazy nights when I’m scrambling and yet want a home cooked meal to feed my family.
If you have never tried shopping at BJ’s, you should. First of all, you can get a free one day pass to use before you even think about purchasing a membership. The store is organized just like regular super centers and everything is easy to find. For us, when we are at BJ’s, we are usually in a rush to get in and get out. So, during moments like this past week when I had just a small grocery list, I love how easy it was for us to find the items, load our cart and then check out.

If you have never tried Bertolli® Pasta Sauces, now is the time. They are flavorful and the perfect accompaniment to an Italian meal. Bertolli® Pasta Sauce even has a White sauce. So if you are looking for a traditional marinara, they have you covered but if you want a white sauce, they have you covered as well! Head to the Bertolli® Pinterest Page for #BertolliTuscanTour recipe ideas!
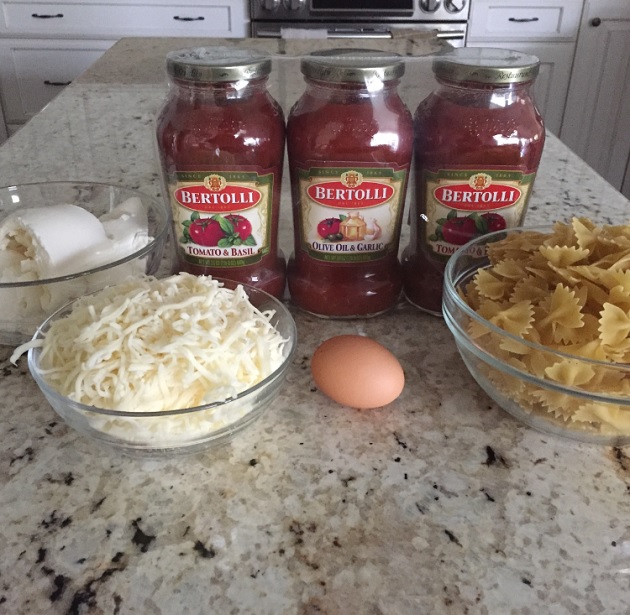
I purchased the three pack of Bertolli® Pasta Sauces. It has two jars of Tomato & Basil and one jar of Olive Oil & Garlic. You can’t go wrong with those flavor combinations! That night, when we got home, I was really craving lasagna. However, I didn’t have the time to boil the lasagna noodles, layer the lasagna and then cook it. So I decided to create a quicker version.
This Bow-tie Lasagna took me 15 minutes to put together. It baked in the oven for 25 minutes. So in 40 minutes, I had a piping hot, home cooked meal that only took me a few minutes to throw together. Oh – and it included just five ingredients! You can’t beat that! My recipe is meatless. But you could very easily brown a pound of ground beef and mix it to the pot along with the sauce and pasta!
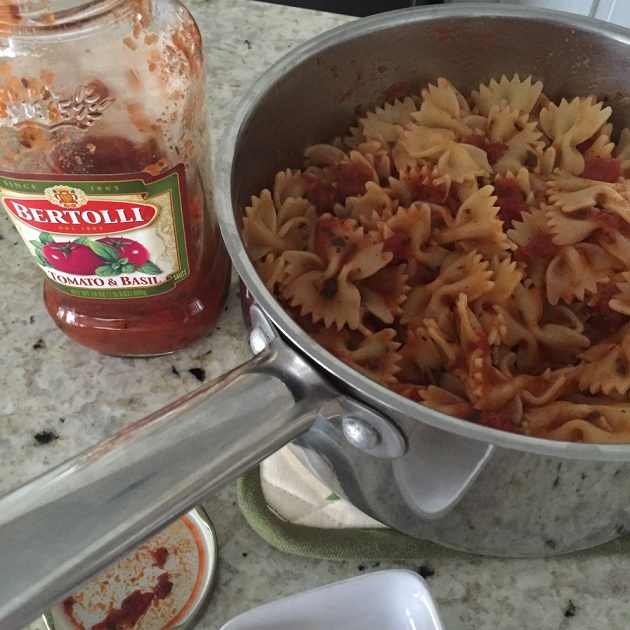
After I cooked the bow-tie pasta, I drained the water and then mixed in 3/4 of a jar of Bertolli® Tomato & Basil sauce.

I poured half of the pot of pasta with sauce into a casserole dish. I layered the pasta with the Ricotta Cheese mixture. And then I topped the mixture with the other half of the cooked pasta and sauce.

You have to have lots of cheese when you cook lasagna! I topped the dish with lots of shredded Mozzarella that I bought at BJ’s.
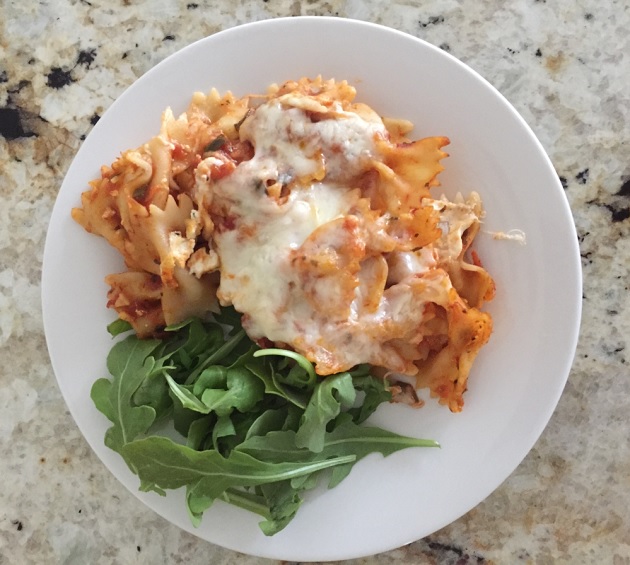
And voila! I baked this covered for 15 minutes and then baked uncovered for another 10 minutes. Tastes just like regular lasagna but involved much less preparation and cooking time!
Five Ingredient Bow-tie Lasagna
Ingredients
12 oz Box Bowtie Pasta
24 oz Jar Marinara Sauce
1 ½ cup Ricotta Cheese
1 Egg
1 ½ cup Mozarella Cheese, divided
Directions
1) Preheat oven to 400
2) Spray 8×8 or 9×9 baking dish with non-stick cooking spray
3) Cook pasta
4) While pasta is cooking, mix Ricotta cheese, egg and ¾ c mozzarella cheese. (If you prefer, you can add parmesan as well. Add up to ¼ a cup. If I have the time, I also like to sprinkle a little parsley and black pepper into my cheese mixture.)
5) Drain pasta. Mix ¾ a jar of sauce in with the pasta.
6) Pour half of the pasta and sauce into baking dish.
7) Layer with cheese mixture.
8) Pour remaining half of pasta over cheese mixture.
9) Top with remaining mozzarella cheese.
10) Cover with foil. Bake 15 minutes. Remove foil. Bake an additional 10 minutes or until cooked through.
Enjoy!
This is a sponsored conversation written by me on behalf of Bertolli®. The opinions and text are all mine.

The post 5 Ingredient Bowtie Lasagna w/ Bertolli® Pasta Sauce. appeared first on AddictedToSaving.com.
]]>The post Oatmeal Greek Yogurt Muffins Recipe (Made with Yoplait Greek 100) appeared first on AddictedToSaving.com.
]]>

One of the staples that we buy every week is yogurt. We love all types of yogurt but especially love greek yogurt. My son (he’s 3 years old) LOVES his yogurt and pretty much every morning he has yogurt. At any given time, you will find our fridge stocked with lots of flavors of Yoplait Greek 100 yogurt. We will eat it right from the container, add it to smoothies and even bake with it! 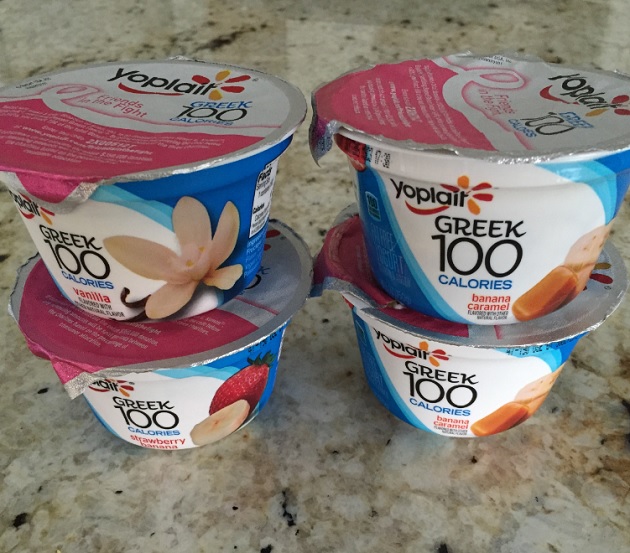 During Florida’s hot summer, we typically eat yogurt right from the carton or add it to yummy smoothies. Now that it is fall and the weather is finally getting cooler, I like to run the oven more and I love to add yogurt to recipes like this Oatmeal Greek Yogurt Muffin recipe! This fall, I am loving baking breads and muffins and I’m particularly loving any breads or muffins that have oats in them. If you have never tried baking with Yoplait Greek 100 yogurt, you must try it! It adds a rich creaminess to your recipe and I also love the fact that it adds protein to your recipe!
 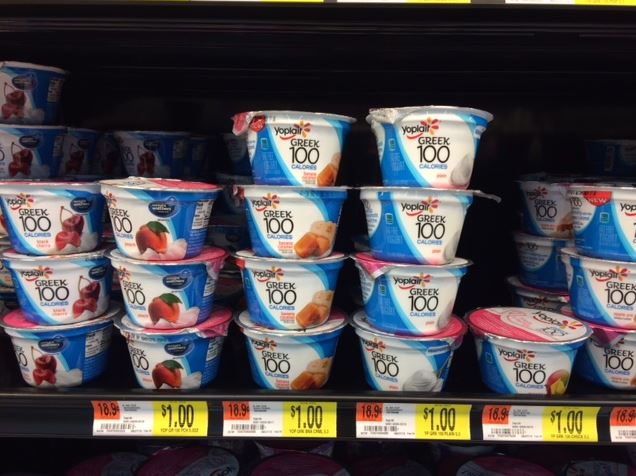 This recipe calls for one cup of Yoplait Greek Yogurt. I didn’t have the large 32 oz carton of yogurt, but instead had small cups of yogurt that I had bought at Walmart. Walmart has this yogurt priced at $1.00 each. While normally I would have used vanilla flavored or plain yogurt, I decided to use Banana Caramel Yoplait Greek 100 yogurt. I thought the banana and caramel flavors would combine perfectly with the oats in the muffins. (I was right! Each bite of muffin has light tastes of banana and caramel!)
  With this recipe, you will need three different mixing bowls of ingredients (dry muffin ingredients, wet muffin ingredients and the streusel topping)
 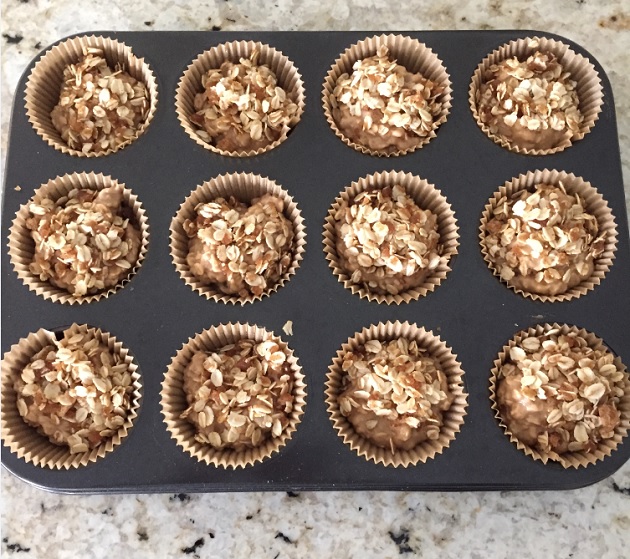 Once your oven is preheated to 350, place your muffin tin in the oven and bake for 15 – 18 minutes (I needed the full 18 minutes for my muffins to cook completely.)

These muffins are OH SO GOOD. You know how some recipes call for you to let your muffins cool completely before eating? I recommend you eat right away! Let your muffin cool a little and then dive in. It is SO good.
Oatmeal Greek Yogurt Muffins Recipe
Muffin Ingredients
1 c Flour
1 ½ Cup Old Fashioned Oats
1 ½ t Baking Powder
1 t Baking Soda
½ t Salt
1 t Cinnamon
¼ c Canola Oil
½ c Brown Sugar
2 Eggs
1 t Vanilla
1 c Yoplait Greek Yogurt (I used Yoplait Greek 100 Banana Caramel Yogurt)
Streusel Ingredients
2 T Canola Oil
1/3 c Brown Sugar
½ c Old Fashioned Oats
Instructions
1) Preheat oven to 350 degrees. Lightly grease a 12 cup muffin pan or use muffin liners
2) In a large mixing bowl, mix flour, oats, baking powder, baking soda, salt and cinnamon.
3) In a smaller mixing bowl, mix oil, brown sugar, eggs, vanilla and yogurt.
4) Combine the wet ingredients and dry ingredients. Mix until combined.
5) In a smaller bowl, combine streusel toppings. Mix together.
6) Spoon muffin ingredients into muffin pan. Top with one tablespoon of streusel toppings.
7) Bake for 15 – 18 minutes until muffins turn golden brown and knife comes out clean. Cool in pan for 5-10 minutes before removing.
Recipe is adapted from Gold Medal Flour
What is your favorite way to snack with Yoplait? Do you eat it straight from the carton or add it to smoothies or other recipes? I would love to hear!
This is a sponsored conversation written by me on behalf of General Mills. The opinions and text are all mine.

The post Oatmeal Greek Yogurt Muffins Recipe (Made with Yoplait Greek 100) appeared first on AddictedToSaving.com.
]]>The post Quick & Easy Recipe: Two Ingredient Pumpkin Spice Cake appeared first on AddictedToSaving.com.
]]>

![]()
Even though the weather is still hot here in sunny Florida, it’s officially fall and I’m officially all about pumpkin! I am finding myself craving pumpkin pie, pumpkin donuts, pumpkin bread, pumpkin coffee… basically anything pumpkin. This recipe is SUPER easy if you are craving pumpkin too! You only need two ingredients take make the cake!
When I first saw this recipe, I immediately thought I was missing something. I mean really. Who makes a cake with just two ingredients? And is the cake even going to be edible? Well, I’m here to report that this recipe ended up turning out really good! The consistency is denser than regular cake (probably because you aren’t using eggs). I would say that it is more of a pumpkin bread consistency. This cake tastes great, made my house smell yummy and impressed hubby. What more do I need than that?
I added a third ingredient by topping the cake with powdered sugar. However, you don’t need to top it with anything. Or, if you are someone who likes toppings, you could melt chocolate chips, pour on some caramel sauce, make a cream cheese topping, the possibilities are endless. The nice thing about this recipe is you can add to it. If you want to throw in some nuts or raisins or chocolate chips into the batter, go for it! In fact, report back to here with any recipe variations you come up with!
Frugal Tips
- Cake mix goes on sale 2/$4.00 or BOGO quite often. During your store’s next sale, try to match a coupon with the sale to really maximize your dollar. If you get a good deal (cake mix for under $0.80/box), buy more than one box and put it in your pantry to be prepared for last minute moments when you need to make a quick dessert. Check out Addicted to Saving’s coupon database to see the available cake mix coupons.
- Canned pumpkin religiously goes on sale every fall. Because of holiday baking, stores and manufacturers know we are going to need canned pumpkin. Stock up with enough canned pumpkin during the fall season to last you through the upcoming year!
Healthy Tips
- The cake mix in this recipe is definitely not the most figure friendly. Because we are not adding oil or eggs to the cake mix, we are saving on calories.
- Canned pumpkin (especially organic canned pumpkin) is SUPER healthy. On average, 1/2 cup of canned pumpkin contains 40 calories and contains no saturated fat, trans fat or cholesterol. And, each serving contains 4 g or 16 percent daily value of dietary fiber. I like to keep canned pumpkin on hand year round because it is perfect for those moments when my puppy has tummy trouble. Just 1 teaspoon (or less since my pup is small) of canned pumpkin is enough to make him regular!

Two Ingredient Pumpkin Spice Cake 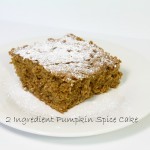
Ingredients
1 box Spice Cake Mix
1 15 oz canned Pumpkin (not pumpkin pie filling)
Directions
1) Preheat oven to 350 degrees. Spray 9×13 baking dish with no-stick spray
2) Mix cake mix with canned pumpkin. Batter will be thick.
3) Spread batter in cake pan.
4) Bake 25 – 35 minutes until knife comes out clean.
Let cool, top with a topping (if desired) and enjoy!
To see additional recipes posted on Addicted to Saving, go HERE
This recipe was inspired by All Recipes
The post Quick & Easy Recipe: Two Ingredient Pumpkin Spice Cake appeared first on AddictedToSaving.com.
]]>The post Campbell’s Back to School Recipes appeared first on AddictedToSaving.com.
]]>
With back-to-school around the corner, it’s time to think about quick and easy weeknight meals. The most common complaint I hear from moms is that during the school year, they don’t have as much time to put towards dinners. With school and after school events, I know you all are on-the-go most nights of the week. Campbell’s® has you covered with inspiring recipes that will leave your kids excited for dinnertime!
Campbell’s has teamed up with Walmart to share their favorite recipes to help prepare your back-to-school meals in record time by incorporating some amazing household brands:
- Pace® Picante Sauce
- V8® Splash®
- Swanson® Chicken Broth
- Campbell’s® Dinner Sauces
- Swanson® Premium Chunk Chicken Breast (go HERE to print this $0.50/2 cans of Swanson® Premium Chunk Chicken Breast coupon)
- Prego® Italian Sauces
- SpaghettiOs®
Go HERE to find back-to-school tips and tricks plus recipes to make the transition easier for your family. Be sure to also check out the “Outside the Lunchbox” section at the bottom of the page which focuses on unique lunch ideas!
Which recipe are you most excited to try first?
The post Campbell’s Back to School Recipes appeared first on AddictedToSaving.com.
]]>The post $0.75/2 Ragu Coupons (Use on Oven Baked Chicken Parmesan Recipe) appeared first on AddictedToSaving.com.
]]>
If you haven’t printed this awesome $0.75/2 participating Ragu Sauces coupon I posted about last week, it isn’t too late!
There are two things I love about couponing 1) saving money on the ingredients of frugal and tasty meals and 2) saving money on necessities like pasta sauce with Ragu coupons! Right now we can save on two jars of Ragu Sauce at Safeway with #SaucesomeSavings! Go HERE to print this manufacturer $0.75/2 participating Ragu Sauces coupon! This coupon expires 5/16/15.
Then, head to the store to get the ingredients for an easy to make, kid-friendly and tasty meal! You will want to pick up your sauce, two pounds of boneless, skinless chicken breasts and mozzarella cheese. If you don’t have bread crumbs and the required herbs listed in the recipe below, you will want to pick that up as well. (But I know most of you have these in your stockpile! )
Ragu Sauce has quality ingredients like tomatoes, onions and extra virgin olive oil, making it the perfect recipe starter for a long list of delectable meals. We made Oven Baked Chicken Parmesan with our Ragu that we had already saved on with Ragu coupons. The recipe is easy to make and kid friendly!

What I love about this recipe is how quickly I was able to prepare this meal. I was also surprised by how far the one egg and the bread crumbs went. Originally I thought I might need to use two eggs and also more bread crumbs. In actuality, there was the perfect amount of each for the two pounds of chicken.
 Bake the chicken in a casserole dish at 400 degrees for 20 minutes. Then, top with Ragu sauce and shredded mozzarella. Bake for another 10 minutes until the cheese is melted and the chicken is cooked through. As this is baking, your house will smell like an Italian restaurant.
 Finished product. How good does this look?
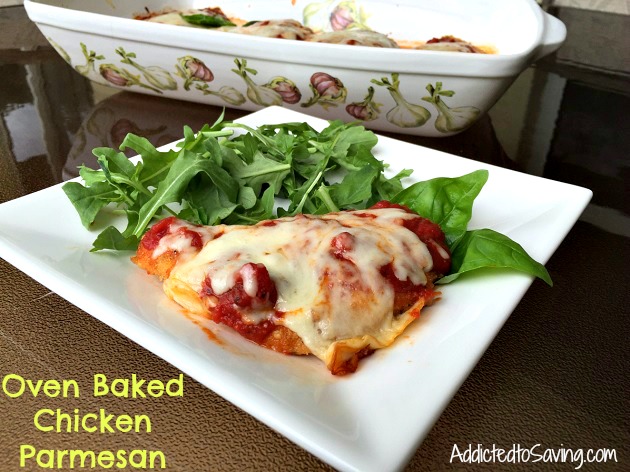 This is a dish where everyone in your family will ask for seconds! It is just. that. good.

Enjoy!
Go HERE to see all Recipes on Addicted To Saving
Go HERE to see all High Value Grocery Coupons like Ragu coupons!
The post $0.75/2 Ragu Coupons (Use on Oven Baked Chicken Parmesan Recipe) appeared first on AddictedToSaving.com.
]]>The post Barbecue Chicken Quinoa Salad Recipe appeared first on AddictedToSaving.com.
]]>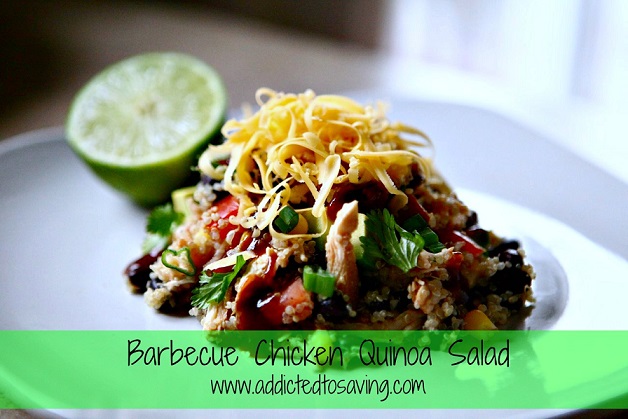
)
**Pin This Recipe**
Now that springtime is here in full force, we use our grill a lot. And we often have leftover chicken. This is the absolute perfect salad to use your leftover chicken in!
I know that I have said this before but if I could eat quinoa every day of the week, I would (and I have). This recipe highlights my love for quinoa and beans and my hubby’s love for barbecue chicken. This BBQ Chicken Quinoa Salad recipe highlights summer fresh ingredients and at the same time combines the ease of using leftover or crockpot chicken with cooked quinoa.
Did you know that quinoa is a seed? It is a seed but it cooks like most grains. And, I love quinoa because one serving of quinoa typically has one serving of protein! To see more Quinoa recipes I’ve posted, go HERE to my Pinterest Page devoted entirely to Quinoa!
For this recipe, you can use shredded rotisserie chicken, leftover shredded chicken, shredded chicken breasts that were boiled or baked or chicken in the crockpot. The chicken used in this picture was made in the crockpot. If you want to use your crockpot, place 4 frozen chicken breasts, 6 oz. of bottled BBQ sauce (our favorite bbq sauce is Sweet Baby Ray’s), 1/3 cup Italian salad dressing, 2 tbsp + 2 tsp of brown sugar, and 2 tbsp + 2 tsp of Worcestershire sauce. Mix all of the ingredients together (in the crockpot) and cook on High for 3-4 hours. (I followed the barbecue chicken recipe on AllRecipes.)
This recipe is gluten-free (Sweet Baby Ray’s barbecue sauce is gluten-free). If you use a different brand of sauce, make sure you double check that there is no gluten in it.
Barbecue Chicken Quinoa Salad
Ingredients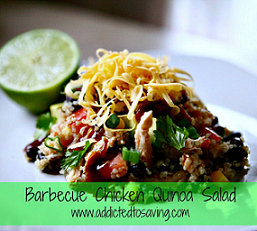
2 cups cooked quinoa
2 cups shredded BBQ chicken
1 cup corn (I like frozen)
1 cup black beans, drained and rinsed (when using canned beans, lower sodium helps decrease salt intake by about 2/3!! )
1 cup roma tomatoes (about 2 tomatoes), chopped
grated cheddar cheese
lime juice
1 avocado, sliced
BBQ sauce
2 Green onions, chopped
cilantro for garnish
Directions
1. Cook your quinoa (2 parts water to 1 part quinoa), then set aside in a LARGE bowl and let cool. I like to cook my quinoa in my rice cooker – just make sure to watch it towards the end so it doesn’t burn.
2. Place cooked quinoa in a large bowl, mix in thawed corn, beans, tomatoes, shredded chicken and avocado, then sprinkle with salt and pepper.
3. Place quinoa salad on a plate or in a bowl and top with green onions, cilantro, BBQ sauce (I used Sweet Baby Ray’s) lime juice and freshly grated cheddar cheese.
4. Enjoy a bite with an explosion of flavors!
Go HERE to see additional Recipes posted on Addicted to Saving
The post Barbecue Chicken Quinoa Salad Recipe appeared first on AddictedToSaving.com.
]]>The post $100 Publix Gift Card Giveaway – Parmesan Crusted Chicken Recipe – Best Meals Happen at Home Recipe appeared first on AddictedToSaving.com.
]]>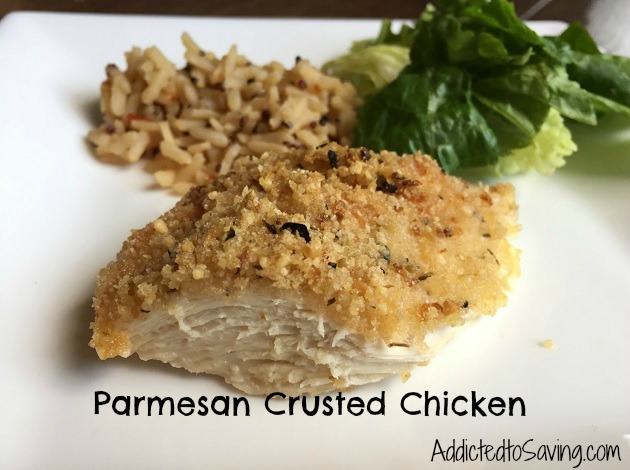
For me, a perfect day would include going to the grocery store, buying fresh produce and meats and then heading home and cooking a lavish meal. I love spending time in the kitchen and everything about it. However, now that I’m a mom who not only parents full-time but works full-time while parenting, I don’t have a lot of free time. And sometimes, cooking meals becomes a chore and not a relaxing time.
Publix and Best Meals Happen At Home remind me that I’m not just making food because I have to; I’m creating a lifetime of family memories at our dinner table. When I signed up to receive the Best Meals Happen at Home free weekly e-newsletter, I not only received high value printable Publix coupons, but the e-newsletter also includes simple and tasty recipes! Go HERE to sign up to receive recipes (and coupons) for brands like Green Giant, Hunt’s, Hellmann’s and Campbell’s products.
When I saw this Parmesan Crusted Chicken recipe, I knew I had to try it. It not only looked easy to make, but it sounded really tasty. And, I’m constantly searching for new chicken recipes because for some reason, my two year old doesn’t care for chicken that much!
 The first thing I noticed about this recipe is that it requires just four ingredients. In fact, I had all four ingredients in my stockpile! (My freezer is stocked with boneless, skinless chicken breasts.) The second thing I noticed is that it only takes 20 minutes to bake this meal. So it is easy to prepare and bakes quickly!
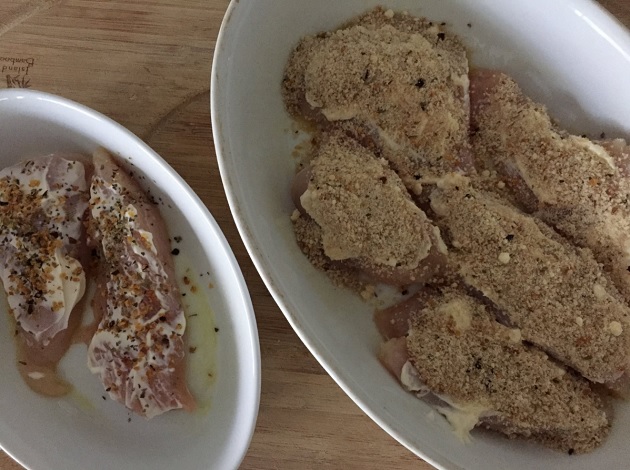 I placed my Boneless, Skinless Chicken Breasts halves in a baking dish (I sprayed it with cooking oil). Then, using a butter knife, I spread the Hellmann’s Real Mayonnaise and cheese mixture on each breast. Then lastly, I spooned bread crumbs on top of each breast. And that was it. Easy peasy! (If you notice, I also made two pieces of chicken without the bread crumbs. If you are going without carbs – like me – just spread Hellmann’s Real Mayonnaise on the chicken and then top with herbs! I topped mine with dried oregano and a dried Italian herb blend!
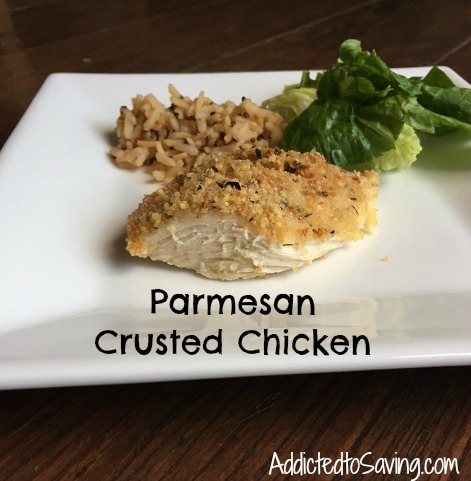
This was the finished product! How good does this look? The chicken was moist and so flavorful. My husband raved about it. And even my “carbless” version was great! As you can see from the photo below, the meal was a hit with my son! He ate all of his chicken AND asked for seconds. You better believe I will be making this meal again!
 And Now for the Giveaway!
I want to see your family’s favorite recipe. Leave a comment on my Facebook post HERE about Publix’s Best Meals Happen At Home with a photo of your family’s favorite recipe for a chance to win a $100 Publix Gift Card. Select entries might even be featured on the Best Meals Happen At Home Facebook Page!
Rules for Facebook Sweepstakes HERE
The post $100 Publix Gift Card Giveaway – Parmesan Crusted Chicken Recipe – Best Meals Happen at Home Recipe appeared first on AddictedToSaving.com.
]]>The post Best Meals Happen at Home w/ Publix Coupons – 5 Minute Slow Cooker Smoky Beef Stew Recipe appeared first on AddictedToSaving.com.
]]>This post is sponsored by Lunchbox. As always, all thoughts and opinions are 100% my own.

Update – with the cold weather we have been experiencing, I’ve been craving more and more comfort meals like the 5 Minute Slow Cooker Smoky Beef Recipe I posted last month. I wanted to repost this easy recipe to help warm you up!
One of my New Year’s Resolutions has been to prepare more home cooked meals each week. With a super busy toddler and working full-time (while at the same time chasing, parenting AND potty training my super busy two year old), I find that I lack the time and energy to cook wholesome meals for my family. So this year, I’ve been making lots and lots of slow cooker meals because I find I can usually pack most of the major food groups into the slow cooker and then 6-8 hours later, I have a hearty meal ready to go. If you shop at Publix, you probably already know that Publix’s Best Meals Happen At Home send out monthly emails with links to printable Publix coupons. But did you know that Publix’s Best Meals at Home also can answer your “what’s for dinner” dilemmas with easy recipes and quality brands?
Publix is teaming up with Unilever foods to celebrate the New Year and bring the best meals to the dinner table. If like me, and you’re looking to get back into a steady routine for the New Year, Best Meals Happen at Home can help. Best Meals Happen At Home helps you find new recipes so you can make quick, easy and delicious meals for the whole family in 30 minutes or less.
I wanted to test one of their Fastastic recipes out. I chose the Slow Cooker Smoky Beef Stew because it could be made in 5 minutes or less!! I headed to Publix and bought all of the ingredients needed. The only variation I made on the recipe is that it called for canned carrots and since I had fresh baby carrots, I decided to use those instead.
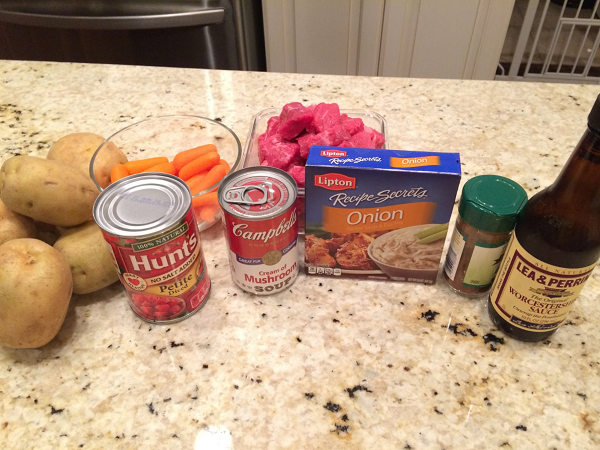 I don’t know if you find your mornings to be super busy, but I sometimes find that making slow cooker meals the night before is easier. Even fastastic meals like this 5 minute meal! So while I watched TV, I dumped all of the ingredients into the slow cooker insert and then covered it with plastic wrap and put it in my fridge.
The next morning, I removed the plastic wrap and placed the slow cooker insert into my slow cooker. Programmed the slow cooker to start and voila, I was done “cooking.”
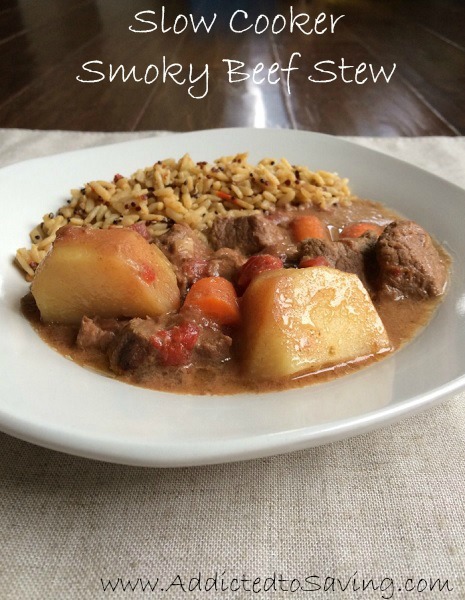 The 5 Minute Slow Cooker Smoky Beef Stew was a hit in our family! We loved the smoky and creamy flavor of the sauce! It was a perfect cold weather meal. I made a rice and quinoa side dish to go with it. But it could very easily go over egg noodles or be made with a veggie like broccoli, cauliflower or zucchini!
5 Minute Slow Cooker Smoky Beef Stew
INGREDIENTS
1 1/2 lbs. boneless beef chuck roast, cut into bite sized pieces
1 envelope Lipton® Recipe Secrets® Onion Soup Mix
1 can (10-3/4 oz.) Campbell’s® Cream of Mushroom Soup
1 can (14.5 oz.) Hunt’s® Diced Tomatoes
6 new potatoes, halved
1 Tbsp. Worcestershire sauce
1/2 tsp. smoked paprika
1 can (15 oz.) Le Sueur® Tender Baby Whole Carrots (I substituted 2 cups of fresh baby carrots)
INSTRUCTIONS
1. Combine all ingredients except roast and carrots and stir. **Note – if you use fresh carrots, add those carrots during this step
2. Add roast, stir and cook on LOW 6 to 7 hours or HIGH 4 to 5 or until beef is fork tender.
3. Add canned baby carrots and allow to sit for 2 minutes. Serve.
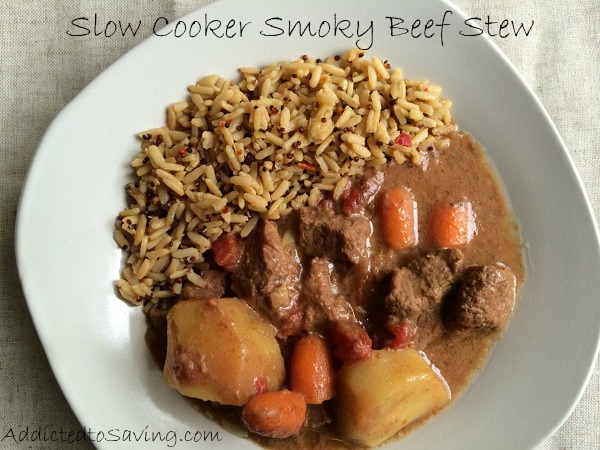 Update – The winner has been chosen using “And The Winner is Plugin! A huge congratulations to Francine T. for winning the $50 gift card!
And now for the giveaway! One Addicted to Saving reader will win a $50.00 Publix gift card! Using Random.org, I will select a winner on 1/26/14 on or after 8:00 pm EST.
Required Entry:
1) Go HERE to Best Meals Happen at Home and leave one comment (on this post) letting me know what Fastastic Recipe you would like to try!
Bonus Entries:
2) Sign up to receive Best Meals Happen at Home emails (they have printable Publix coupons AND yummy recipes)! Leave a comment (on this post) letting me know once you have signed up OR if you are an existing member.
3) Share an image of your Best Meals Happen at Home favorite dish on Facebook, Twitter or Instagram with the hashtag #BestMealsAtHome Come back here and leave a comment (on this post) letting me know you shared the image.
This giveaway is sponsored by Lunchbox. The $50 Gift Card will be supplied and mailed out by Lunchbox.

New Publix Best Meals Happen at Home coupons were emailed out this morning! These coupons are valid 1/15/15 – 2/5/15!
- $0.75/1 Egg Beaters® product Publix coupon
- $1.00/1 Gluten Free Chex® Oatmeal Publix coupon
- $1.00/1 Bisquick® (40 oz. or larger) Publix coupon
- $2.00/2 Nature Valley® Oatmeal Cups Publix coupon
- $0.50/1 Peter Pan® Peanut Butter (13–16.3 oz.) Publix coupon
- $1.00/1 Lipton® Tea (100 ct.) Publix coupon
- $1.00/2 Campbell’s® Skillet, Slow Cooker or Oven Sauces Publix coupon
- $1.00/1 Breyers® Ice Cream (48 oz.) Publix coupon
- $1.50/1 Marie Callendar’s® Pie (45 oz.) Publix coupon
Go HERE to see all Publix Deals on Addicted to Saving
Go HERE to see all Recipes on Addicted to Saving
The post Best Meals Happen at Home w/ Publix Coupons – 5 Minute Slow Cooker Smoky Beef Stew Recipe appeared first on AddictedToSaving.com.
]]>The post Apple Cinnamon Steel Cut Oats Recipe appeared first on AddictedToSaving.com.
]]>

**Pin this on Pinterest**
I originally published this recipe a couple of years ago. I had to repost it for all of you because it is so popular. And SO good. It is the perfect breakfast for these chilly winter mornings!
When I started running almost five years ago, I learned about steel cut oats. I was researching foods that supply long lasting energy and steel cut oats was raved about by running publications and nutritionists. Steel cut oats are filled with macronutrients which give us long lasting energy, fiber and even protein. Sometimes I will make plain steel cut oats and keep them refrigerated for about a week using a small portion every day for breakfast. These oats do take longer to cook than typical oatmeal, hence the reason I will often cook more to leave enough for leftovers. This is a gluten free meal – just make sure that the Steel Cut Oats that you use are certified as g-free.
This Apple Cinnamon Steel Cut Oats recipe is a great one if you like the flavors of apple and cinnamon. This recipe is so yummy and while it is cooking, your house will smell like you are making apple pie. I love that this is a crock pot recipe. You can start your crockpot when you go to bed and have a warm breakfast waiting for you when you wake up. Or, you can make this in the morning and have a yummy dessert! Regardless of when you eat this recipe, you will enjoy the flavors of apple and cinnamon mixed with the crunch of nuts.
I am constantly asked what slow cooker I have. I have the Hamilton Beach 33967 Set ‘n Forget 6-Quart Programmable Slow Cooker. I love that it is programmable. In fact, I use the timer every time I use it. Once the slow cooker finishes its cooking, it automatically turns to Warm. I love knowing that if I’m out running errands or out playing with my son I don’t have to rush in to be home to insure we get a hot meal. This slow cooker keeps the food warm once it finishes cooking!
Combine the ingredients in your crockpot (recipe is below)
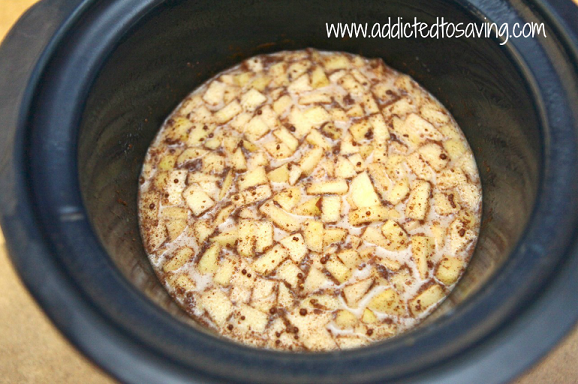
Finished product in crock pot before serving (recipe is below)
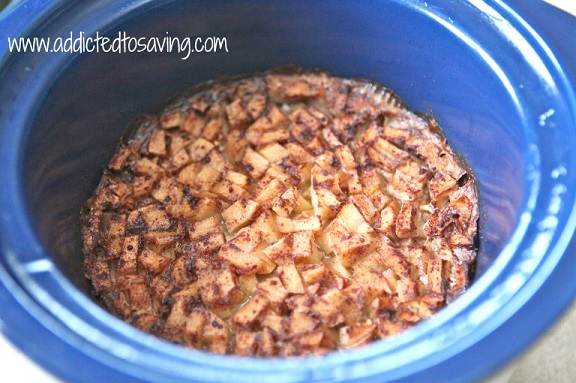
Apple Cinnamon Steel Cut Oats Recipe
Ingredients
2 cups steel cut oats
8 cups water
2 2/3 cups milk (could use almond milk as well!)
4 cups of peeled, chopped apples
2/3 cups brown sugar
1/3 cups white sugar
2 tbsp cinnamon
½ tsp salt
Directions
1. Spray crockpot so oatmeal doesn’t stick
2. Place all ingredients in to crockpot
3. Cook on low for 7-8 hours
4. Add desired toppings to dress up the oats, such as raisins/craisins, pecans, almonds, bananas, etc.
Enjoy!
Go HERE to see additional Recipes on Addicted to Saving
Recipe adapted from He and She Eat Clean
The post Apple Cinnamon Steel Cut Oats Recipe appeared first on AddictedToSaving.com.
]]>The post Cranberry 7UP Mocktail Recipe appeared first on AddictedToSaving.com.
]]>
I don’t know about you but I’m in this interesting spot this holiday season. I want my house decorated and Christmasy… I want to bake lots of cookies and have my house smelling good… I want to prepare a lavish meal on Christmas Day… but I’m tired.. And my schedule is so packed with things to do that finding time to stop and enjoy this season is difficult. I bought fresh cranberries when they were on sale and my mom made a wonderful baked cranberry dish with them. But I had leftovers. And I didn’t want them to go to waste – especially this time of the year when they are so festive looking. So I decided to make a very simple and very affordable (emphasis on very) mocktail that highlighted the cranberries and 7UP.
 I headed to Walmart to purchase 7UP and cranberry juice. (The next time I make this drink, I’m planning on trying it with Canada Dry Ginger Ale®. I’m thinking that the ginger flavor would go perfectly with cranberry juice as well!)

I had fresh oranges and cranberries in my fridge. I wanted this drink to be really really simple to make. The cranberry juice I purchased was not 100% juice. It had some sugar which I knew would add sweetness. If you like drinks that are less sweet, you could definitely purchase 100% Cranberry Juice and just add a little sugar if you need to sweeten it.
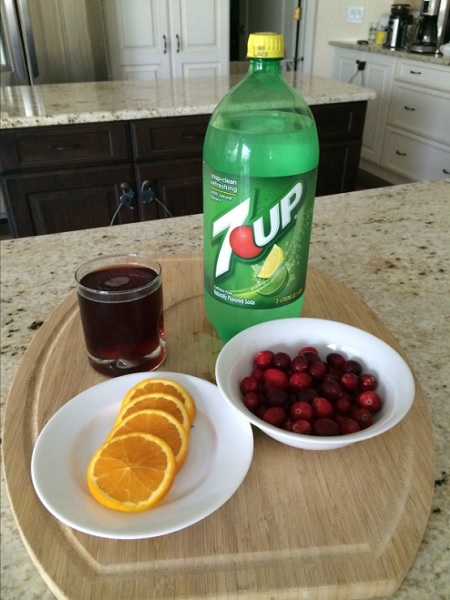
 So for my Cranberry 7UP Mocktail, the ingredients are 7UP®, Cranberry Juice Blend, fresh cranberries and sliced oranges. While I placed the oranges delicately on the side of my glasses, they added an excellent flavor to the drink. If I make a full pitcher of this Cranberry 7UP Mocktail, I will add lots of slices of oranges because their citrus flavor mixed with the tart cranberry and fizzing 7UP was perfect.

Cranberry & 7UP® Mocktail Recipe
Ingredients (Serves two)
1 Cup 7UP®
1 Cup Cranberry Juice Blend
Fresh Cranberries & Sliced Oranges for garnish
**If you decide to make an adult cocktail, you could substitute 1/2 cup champagne or sparkling wine for 1/2 cup of the 7UP!
Directions
Mix 7UP and Cranberry Juice together. Top with fresh cranberries and sliced oranges. Tip – the sliced orange adds amazing flavor to your drink!
Have you used 7UP in any festive drinks? Please share your recipes! I would love to hear what drinks you like to make!
The post Cranberry 7UP Mocktail Recipe appeared first on AddictedToSaving.com.
]]>The post Halloween Punch Recipe with Fanta appeared first on AddictedToSaving.com.
]]>
Halloween has become a fun time of year for us now that we are parents. While our two year old still doesn’t really understand what is going on, I’m having a fun time introducing him to pumpkins (although he likes to carry his pumpkin around the house which I’m not a fan of ), hayrides and Halloween crafts. When I was given the opportunity to purchase Fanta and make a Halloween dish with it, I jumped at it. I have been craving punch and I wanted to make a Halloween Punch out of Fanta! Follow Fanta on Twitter HERE.

I headed to Walmart to pick up Fanta and a pack of Dasani 12 oz bottles. I found Fanta on the Beverages aisle.
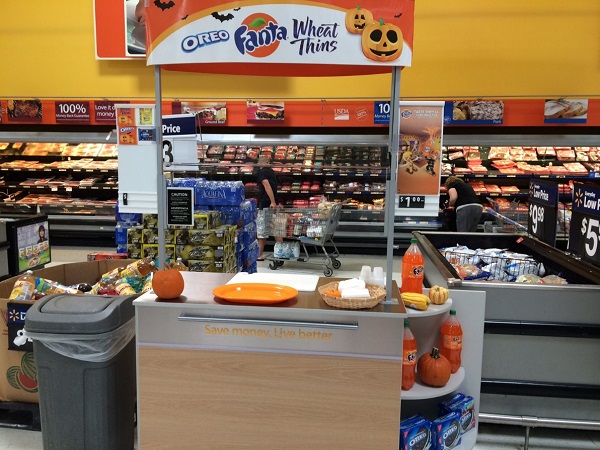
While I was at Walmart, there was also an in-store demo showing how to make Halloween treats out of Fanta, Wheat Thins, Oreos and more! It was a popular demo! The table was wiped clean of samples!

Dasani water bottles are made from plant resin and is a special shape that won’t fall over in the fridge! I wanted to get Dasani bottles to hand out to thirsty trick or treaters that come to our door. Follow Dasani on Twitter!
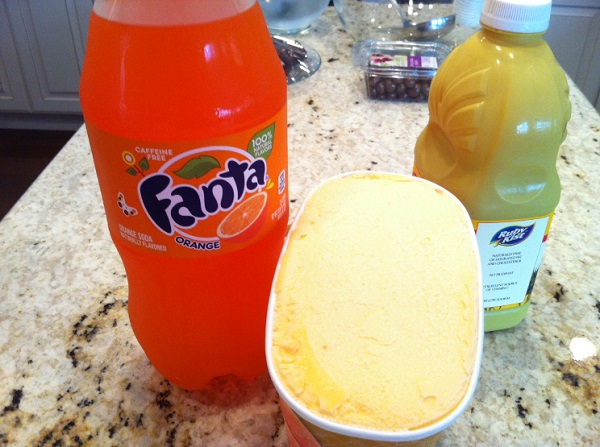 I headed home armed with the three main ingredients for my punch. Fanta, pineapple juice and orange sherbet. I can not even begin to tell you how good this punch was! And how ridiculously simple it was.

Halloween Punch Recipe
Ingredients
1 2 Liter Bottle Fanta Orange Soda
46 oz Pineapple Juice
3/4 container of Orange Sherbet
Directions
1) Approximately 10 minutes before making, take the sherbet out of the freezer to begin to thaw.
2) In a large punch bowl, add Fanta, Pineapple Juice and sherbert. Stir a few times to mix all of the flavors.
3) Enjoy
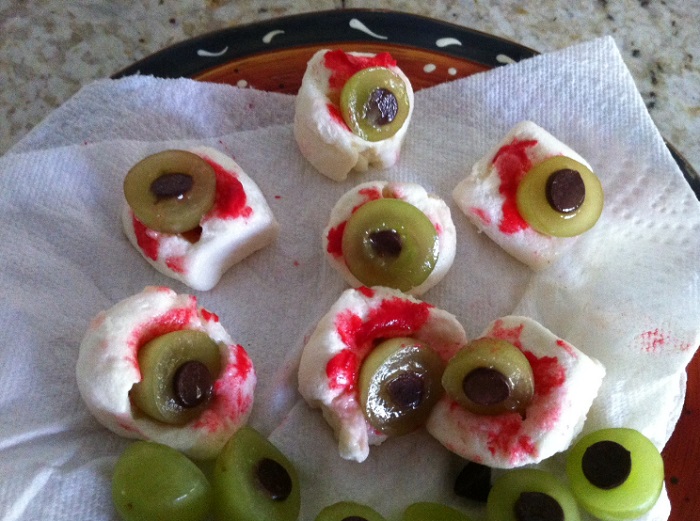 If you decide to make a more ghoulish version of the punch, you can make bloody eyeballs like I did using four ingredients. Marshmallows, grapes (halved), chocolate chips and red icing. I’m not going to lie – these were not the easiest to make because the grapes kept popping out of their sockets (the marshmallows). But when I pushed the grapes in deep enough, they did stay put. And the marshmallows floated in the punch making a perfect floating eyeball.

Do you have any favorite Halloween Punch recipes? Or any other Halloween ideas you could use Fanta in? Leave a comment with your ideas!
The post Halloween Punch Recipe with Fanta appeared first on AddictedToSaving.com.
]]>The post Creating Hot Sauce Recipes with El Yucateco Hot Sauce appeared first on AddictedToSaving.com.
]]> Calling all Hot Sauce fans! I have a brand of hot sauce that you will want to try! I love hot food. Three summers ago I had jalapeno plants growing in my garden and every day I harvested 3 or 4 peppers and added them in every food possible. So when I was given the opportunity to try out El Yucateco hot sauce, I was very excited!
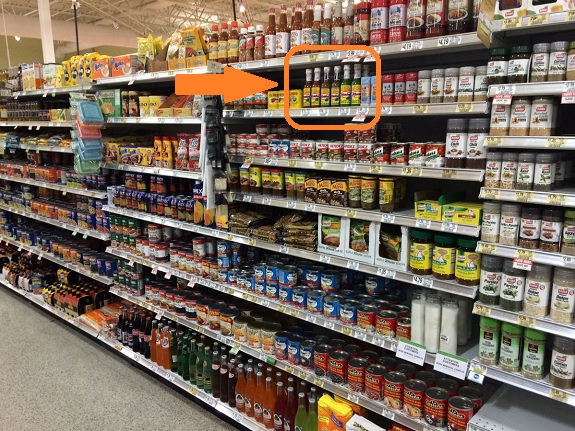 El Yucateco products are found at many Publix and Walmart locations. I found them in the International Foods aisle of my local Publix. If you don’t see El Yucateco products at your Publix, let customer service know!
El Yucateco has three different types of hot sauce to choose from at Publix. I bought all three so that I could try them each out. They have Red Habanero Sauce, Green Habanero Sauce and XXXtra Hot Kutbil-ik Sauce. If you take a taste of each of these sauces, you will tell immediately that they pack a great kick! They are hot! But besides the heat, they each have a unique flavor that will help any of your meals become more flavorful.
Of the three sauces, my favorite was El Yucateco’s Red Habanero Sauce. The immediate flavor that I tasted when I tried the Red Habanero Sauce was habanero peppers. But layered behind the peppers were tomatoes and spices.
I like to make cheesy scrambled eggs for my son. And while I didn’t add hot sauce to his eggs (he’s only 22 months and not a fan of spicy food.. yet ), I added hot sauce to a simple cheddar cheese omelet that I made for myself. It packed a tasty punch. Just a few drops added such an amazing flavor to my omelet!

I’ve also been on a huge pizza kick lately. When I bought the bottles of El Yucateco products at Publix, I also bought pizza dough from their bakery. With the dough, I made a Mexican Pizza. I followed my regular Mexican Pizza recipe but made a small addition. I added a few drops of El Yucateco’s Red Habanero Sauce to the ground beef.

The pizza came out amazing. It is normally a flavorful pizza, but with a few drops of Red Habanero Sauce in the ground beef, it had an extra flavorful kick. You immediately noticed that the pizza was spicier and also flavorful as the ground beef took on flavors of habanero peppers!
 I wanted to use both the Red Habanero Sauce and Green Habanero Sauce with the cooked pizza so I added a few drops to the plate of a piece of pizza. I was able to dip bite sized pieces of pizza into the sauce and get an additional bang of heat with each bite.
Have you tried El Yucateco Hot Sauce? What did you think of it? What recipes do you like to add your hot sauce to? Go HERE to see a list of recipes including their hot sauce available on El Yucateco’s website!
The post Creating Hot Sauce Recipes with El Yucateco Hot Sauce appeared first on AddictedToSaving.com.
]]>The post Strawberry Kefir Pancakes with Lifeway Kefir Smoothies appeared first on AddictedToSaving.com.
]]>
Last summer, when I traveled to Ethiopia twice, I relied heavily on probiotics to help prevent me from getting food poisoning. Because I was traveling, I brought probiotic capsules since bringing yogurt or Kefir across the globe was impossible. I had never tried Kefir before so when I was given the opportunity to try Lifeway Kefir Lowfat Cultured Milk Smoothies, I was very excited. I am always looking for alternatives to probiotic capsules and a smoothie is right up my alley!
I headed to Winn-Dixie to pick up a bottle or two of Lifeway Kefir Lowfat Cultured Milk Smoothies. They were a bit difficult to find. In fact, I had to ask the dairy manager for help! So when you go to purchase them, make sure you look on the top shelf of the dairy case as I show in my picture.

I purchased two different types of Lifeway Kefir Lowfat Milk Smoothies because I really wanted to try both of them out and I couldn’t choose between the two! I purchased Plain and Strawberry. The Lifeway Kefir Plain Smoothie is tart. It doesn’t have any sweetness to it. This smoothie would be awesome to add to fruit smoothies or maybe to add a little honey to! The Lifeway Kefir Strawberry Smoothie has a perfect amount of sweetness. In fact, my 21 month old son loved drinking it!

Lifeway Kefir is a smooth, tart, refreshing cousin of yogurt, often thought of as the “Champagne of Dairy.” Kefir originated in Eastern Europe over 2000 years ago. Kefir’s probiotic cultures have long been enhancing feelings of well-being. Lifeway Kefir contains 12 live and active Probiotic cultures that support the immune system and balance digestive health. It is Gluten Free, 99% Lactose Free and contains No Artificial Sweeteners and is rich in Calcium. Lifeway also only uses milk that comes from cows that are not treated with pesticides, antibiotics, or synthetic growth hormones. The cows are grass fed and GMO free.
I wanted to create a recipe using my Lifeway Kefir Strawberry Smoothie. I had read that kefir makes an excellent replacement for sour cream or buttermilk. So I decided to create a pancake recipe with the kefir smoothie since we love buttermilk pancakes!

Strawberry Kefir Pancakes
Ingredients
½ cup white flour
1/2 cup whole wheat flour
1 tablespoons sugar
1 teaspoon baking powder
¼ teaspoon baking soda
½ teaspoon salt
1 cup Lifeway Kefir Lowfat Milk Strawberry Smoothie
1/2 tablespoon canola oil
1 large egg
1/2 teaspoon vanilla extract
Directions
1)Preheat griddle
2) Mix dry ingredients in a large bowl
3) In a small bowl, mix Kefir, oil, egg and vanilla extract.
4) Pour wet ingredients over dry ingredients. Mix. Do not overmix.
5) In a pre-heated griddle melt a little butter. Pour 1/4 – 1/3 cup of batter onto center of griddle.
6) Once you see bubbles and a firm dry edge, flip the pancake.
7) Continue cooking for approximately 30-60 seconds. Keep an eye on it the bottom of the pancake. It will finish cooking quickly.
Enjoy!

The finished product was a perfectly sweet pancake with hints of strawberry that was light and fluffy. I topped my pancakes with a few frozen berries that I had thawed and a little powdered sugar. Hubby topped his with loads of syrup since he loves his syrup. And my son ate his pancake without any toppings. I made some very small silver dollar sized pancakes and froze them to give to my son as a quick snack or breakfast. They froze really well and thawed really well too!
Have you tried Lifeway Kefir Lowfat Milk Smoothies? I would love to hear your thoughts! For more information on Lifeway Kefir products AND to sign up for coupons, including a $1/2 Kefir 32 oz coupon, go HERE.
The post Strawberry Kefir Pancakes with Lifeway Kefir Smoothies appeared first on AddictedToSaving.com.
]]>The post Chocolate Chip Cookie Dough Ice Cream Recipe appeared first on AddictedToSaving.com.
]]>
**Pin this Recipe**
I originally posted this recipe last summer but now that we are in the heat of summer I had to pull this refreshing recipe out again! My hubby isn’t a fan of fruit in his desserts. So the strawberry ice cream recipe I posted last summer didn’t really float his boat. But he is loving this Chocolate Chip Cookie Dough Ice Cream recipe! This recipe utilizes the Raw Cookie Dough Bites recipe and the vanilla ice cream has just three ingredients – whole milk, vanilla beans and maple syrup.
If you have been on the fence about making homemade ice cream, it is time to get off of it! It is so easy to make and involves just a few ingredients! If you look at all of the ingredients on the back of your cartons of ice cream, you will most often see ingredients that you have never heard of. Homemade ice cream, however, includes whole foods and ingredients that you can pronounce! So pull your ice cream maker out of the closet and put it to use!


Chocolate Chip Cookie Dough Ice Cream Recipe
Ingredients
3.5 cups of whole milk
2 vanilla beans
5 TBSP maple syrup (or other liquid sweetener)
cookie dough balls (see recipe below)
Directions
1. Make sure ice cream bowl has been in freezer for at least 15-18 hours.
2. Mix all ingredients except cookie dough balls in a bowl and then poor into ice cream bowl when ready.
3. Run ice cream machine until desired consistency occurs, usually about 15 minutes – will look like soft serve ice cream.
4. Add in cookie dough balls for last 2-3 minutes of mixing.
5. Serve immediately or place back in freezer for 1-2 hours to harden up consistency. Top with chocolate chips if desired.
Raw Cookie Dough Bites Ingredients
1 cup almonds
1 cup oats (I used old-fashioned, instant)
25 pitted dates
1/3 cup water
¼ cup chocolate chips
1/8 – ¼ cup coconut (optional)
Raw Cookie Dough Bites Directions
1. Blend together almonds and oats in food processor until fine powder
2. Add in dates and blend again for 2-3 minutes
3. Slowly add in water (anywhere between ¼ – ½ cup) until mix becomes a nicely moistened dough
4. Take out of food processor and put it to bowl and stir in mix ins (in this case, chocolate chips and shredded coconut)
5. Roll into balls on parchment paper and place in refrigerator to chill for 10-15 minutes
Go HERE to see all Recipes on Addicted to Saving
This recipe is adapted from My Whole Food Life
The post Chocolate Chip Cookie Dough Ice Cream Recipe appeared first on AddictedToSaving.com.
]]>The post Sour Cream Banana Bread Recipe appeared first on AddictedToSaving.com.
]]>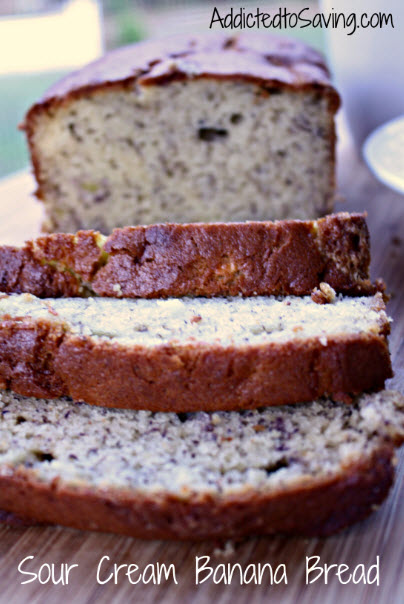 **Pin this Recipe**
I recently got an awesome deal on Greek Sour Cream when I was grocery shopping. So I stocked up. And then I realized, I didn’t have a ton of recipes that utilized sour cream. I didn’t want it to go to waste. I had a few bananas on my counter that were overly ripe and I decided to try my hand at making Sour Cream Banana Bread. And let me tell you, we ate my first loaf in less than 24 hours. Since then I’ve been making this Sour Cream Banana Bread recipe weekly. It is so so moist and so good.
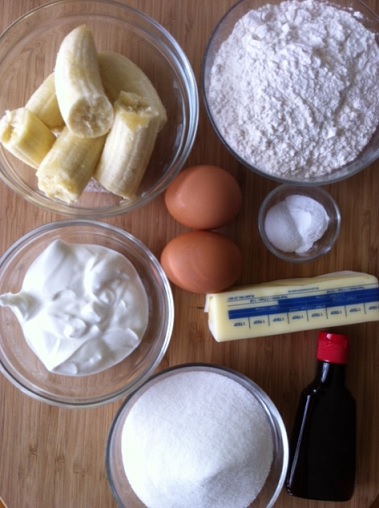 The ingredients for this banana bread are comparable to most banana bread ingredients. Except for the sour cream. The recipe calls for 3 ripe bananas. However, one of the loaves I made I only had 2 bananas and they were not overly ripe. The bread still came out delicious! Most of these ingredients you should have in your stockpile so if you have sour cream in your fridge, you shouldn’t have to make an extra trip to the grocery store to make this bread!
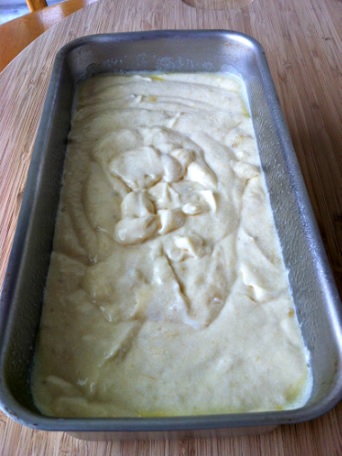 The banana bread bakes for 60-70 minutes at 350 degrees. Your house will smell heavenly as it is baking!

Sour Cream Banana Bread Recipe
Ingredients
1 stick Salted Butter, at room temperature
1 c Sugar
2 Eggs
1 ½ c Flour
1 teaspooon salt
1 teaspoon baking soda
3 Mashed, Ripe Bananas (the riper, the better!)
½ c Sour Cream
1 teaspoon Vanilla
½ cup Chocolate Chips, Chopped Walnuts or Chopped Pecans (optional)
Directions
1) Preheat oven to 350. Spray non-stick cooking spray to 9x5x3 inch loaf pan.
2) In a medium bowl mix flour, baking soda and salt. Set aside.
3) In a large bowl with an electric mixer, mix butter and sugar until fluffy. Then add eggs and mix.
4) Combine dry ingredients to butter mixture. Mix until combined.
5) Add Bananas, sour cream and vanilla and mix until combined. If adding nuts or chocolate chips, add now and mix just slightly.
6) Pour into loaf pan.
7) Bake for 60 – 70 minutes until knife or cake tester comes out clean.
8) Let loaf cool in pan and then remove from pan.
Enjoy!
Go HERE to see all Recipes on Addicted to Saving
The post Sour Cream Banana Bread Recipe appeared first on AddictedToSaving.com.
]]>The post Brown Butter Pasta with Arugula Recipe appeared first on AddictedToSaving.com.
]]>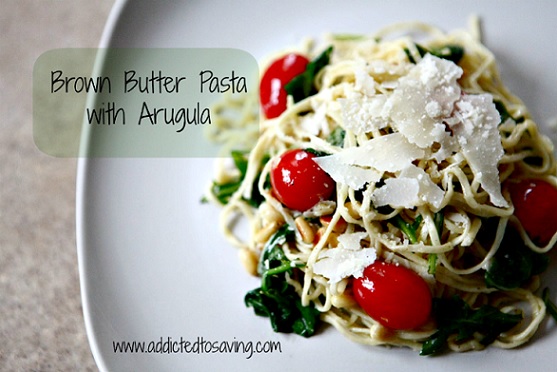

**Pin this Recipe on Pinterest**
I originally posted this recipe last summer but it is so good I had to post it again! Pasta is a go-to staple in my house. And even after I started eating only gluten free foods, I still was able to eat pasta by using gluten free pasta. While I’m don’t love the taste of plain gluten free pasta quite as much as regular pasta, I find that if I make a yummy sauce with lots of flavor, I don’t even realize that my pasta isn’t made with traditional flour!
If you haven’t tried making brown butter sauce for your pasta, you have to try it. Brown butter has a creamy and almost nutty flavor that goes perfectly with pasta and fresh vegetables. This Brown Butter Pasta with Arugula recipe is simple to make and an easy introduction into the world of Brown Butter sauce if you are new to it! Like most of my recipes, if you want to substitute out any of the vegetables in this dish, you can most definitely do so. The recipe below calls for arugula and tomatoes. If you prefer spinach, that would work really well too. This recipe also calls for pine nuts which I ADORE (especially toasted pine nuts). However, they are pricey. So if you have almonds or even walnuts in your stockpile, you could chop them up and toast them and they would add yummy flavor to this dish as well.
If you have made Brown Butter Pasta, I would love to hear the ingredients you used! And, if you try out this recipe, I would love to hear your thoughts after you eat it!


Brown Butter Pasta with Arugula
Ingredients
1 lb. pasta (linguine, spaghetti, or penne work well)
1 pint of grape tomatoes
½ cup of toasted pine nuts
4 cups arugula
½ stick room temperature butter
1 cup grated Parmesan
Dressing Ingredients
¼ cup EVOO
1 lemon zested and juiced
2 tsp salt
½ tsp pepper
Directions
1. Dressing: whisk together EVOO, lemon zest, lemon juice, salt and pepper; set aside
2. Cook pasta according to package directions, drain and save ½ cup of pasta water, if needed
3. In large sauté pan, melt butter over medium and then simmer until foamy. Continue cooking for about 5 minutes, until butter has a nutty aroma and a caramel color, then immediately remove from heat
4. Add remaining ingredients to brown butter, and coat well. If needed, add in saved pasta water a couple teaspoons at a time until pasta is well coated.
5. Serve and enjoy!
Go HERE to see all Recipes on Addicted to Saving
This recipe has been adapted from Food Network
The post Brown Butter Pasta with Arugula Recipe appeared first on AddictedToSaving.com.
]]>The post Gevalia Coffee and Sour Cream Banana Bread #CookinComfort #CollectiveBias appeared first on AddictedToSaving.com.
]]>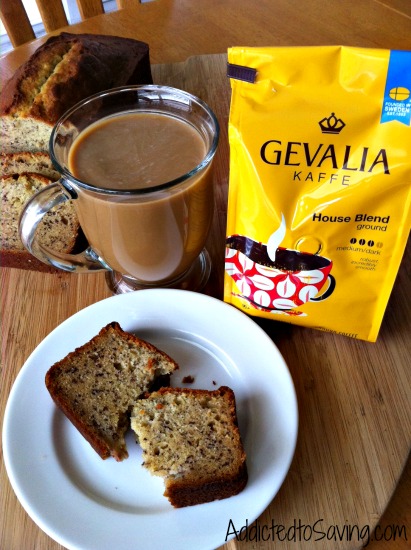 It was about 8 years ago when I discovered I had a love for coffee. I loved the taste, the smell, the slow process of drinking it.. basically, I realized I loved everything about it. Hubby has a love for coffee that is as strong as mine (if not stronger). Together, the two of us can very easily put a huge dent into our budget if we purchase gourmet coffee while we are out driving. We’ve learned that we can not only save a ton of money, but really make tasty cups of coffee in the comfort of our own home. Have you tried Gevalia coffee? They have many different strengths and flavors to choose from. Go HERE to see the learn about Cooking up Magic with Kraft Foods and view all of the different Gevalia Coffees and K-cups that are available!
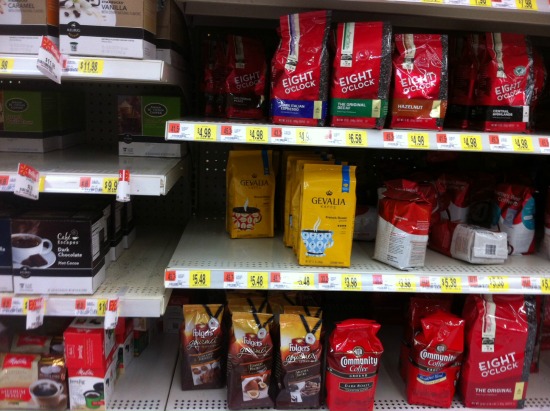
I purchased my Gevalia House Blend coffee at my local Walmart. The coffee aisle was clearly marked and it wasn’t difficult to find the Gevalia coffee! I was armed with a $1.50 off Gevalia Coffee 12 oz bag coupon which brought the cost of my coffee down to just $3.98! Talk about frugal! It was interesting because it was apparent that Gevalia Coffee is very popular at my Walmart! One flavor was completely sold out and there were only a few bags of House Blend available.
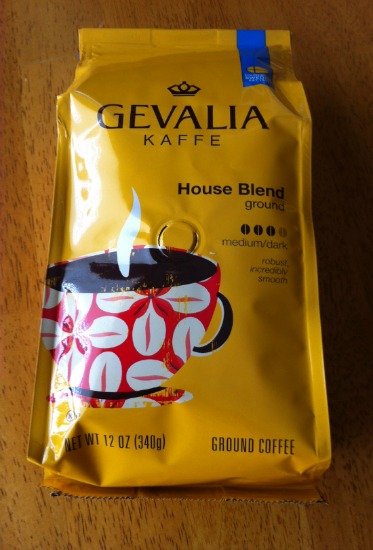
Instantly when I opened the bag of Gevalia Coffee I was happy. The coffee smells amazing and I was excited to brew it and drink it. How do you drink your coffee? I find that most days, I will have a cup of coffee while working and then a second cup of coffee with either a morning snack or an early afternoon snack.
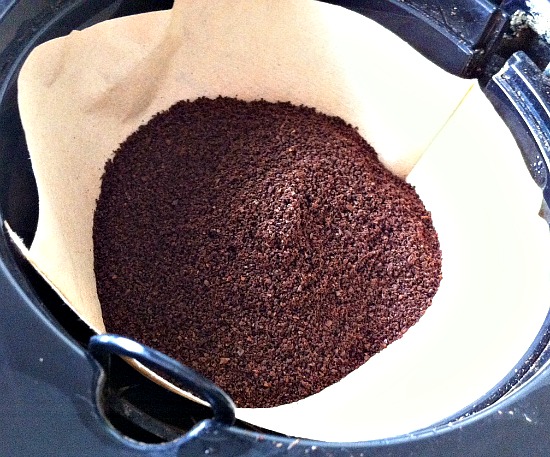
Today I was in the mood to enjoy a cup of coffee while eating fresh baked Sour Cream Banana Bread so I decided to whip up a loaf. Instead of waiting to have a cup with the baked bread, I decided to pour a cup to enjoy while I prepared the bread. (See below for the Sour Cream Banana Bread Recipe.) I don’t know how you like your coffee, but I like mine with cream and just a little sugar. The House Blend is smooth – not to0 strong but yet full of flavor. The cup of coffee was divine and was the perfect accompaniment to baking.
Once the banana bread was baked, I poured a cup of coffee and enjoyed it with a piece of banana bread. The coffee went perfectly with the sweetness of the sour cream banana bread.
Have you tried Gevalia coffee? Leave a commenting sharing how you enjoy your coffee!
Sour Cream Banana Bread Recipe
Ingredients
1 stick Salted Butter, at room temperature
1 c Sugar
2 Eggs
1 ½ c Flour
1 teaspooon salt
1 teaspoon baking soda
3 Mashed, Ripe Bananas (the riper, the better!)
½ c Sour Cream
1 teaspoon Vanilla
½ cup Chocolate Chips, Chopped Walnuts or Chopped Pecans (optional)
Directions
1) Preheat oven to 350. Spray non-stick cooking spray to 9x5x3 inch loaf pan.
2) In a medium bowl mix flour, baking soda and salt. Set aside.
3) In a large bowl with an electric mixer, mix butter and sugar until fluffy. Then add eggs and mix.
4) Combine dry ingredients to butter mixture. Mix until combined.
5) Add Bananas, sour cream and vanilla and mix until combined. If adding nuts or chocolate chips, add now and mix just slightly.
6) Pour into loaf pan.
7) Bake for 60 – 70 minutes until knife or cake tester comes out clean.
8) Let loaf cool in pan and then remove from pan.
Enjoy!
The post Gevalia Coffee and Sour Cream Banana Bread #CookinComfort #CollectiveBias appeared first on AddictedToSaving.com.
]]>The post White Bean Stuffed Peppers Recipe appeared first on AddictedToSaving.com.
]]>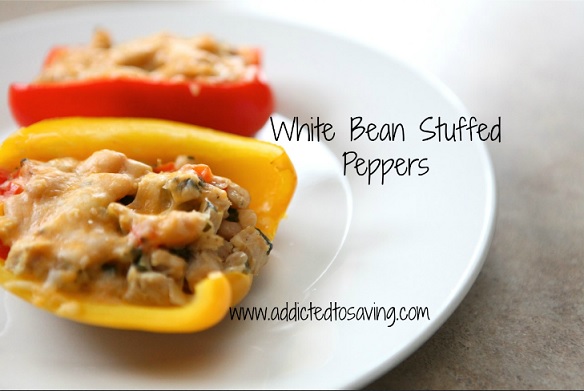
)
**Pin this Recipe to Pinterest**
Have you tried this recipe yet? This is by far one of my favorite recipes I’ve posted. This White Bean Stuffed Peppers meal is so easy to make and is SO good for you! You all know my love for beans. Beans are an affordable protein source that are good for you! I’ve said this before, but I have a bean stockpile and while I will give you any food from my pantry, I will intentionally forget to give you my canned beans! I like them that much.
This recipe’s main ingredients are peppers (you can use any colored peppers), white beans and chicken. There is no gluten in this recipe so it is a perfect meal for people with gluten intolerance or celiac. **Just make sure you check your spices to insure they are gluten free. Some spices are “contaminated” in the factories in which they are made. And, if you are a vegetarian, you can very easily omit the chicken. I’ve had this recipe without chicken and it is just as good!
From a frugality standpoint, if you purchase peppers that are on sale, you should be able to get two green peppers for under $2.50 (red, yellow and orange peppers are typically more pricey – but worth it from a flavor standpoint). Canned beans are usually between $0.75 and $0.99 when on sale and chicken should be around $2.49/lb (or less if you purchase a whole bird)! (Gone are the days when boneless skinless chicken breasts are on sale $1.99/lb!) You could use also use rotisserie chicken or leftover chicken! And again, if you omit the chicken, you will still have plenty of flavor and you will save a bit of money!
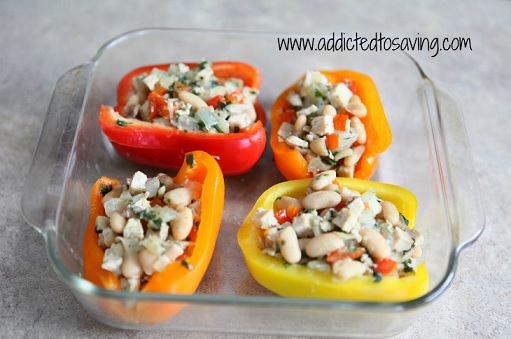
White Bean Stuffed Peppers Recipe
Ingredients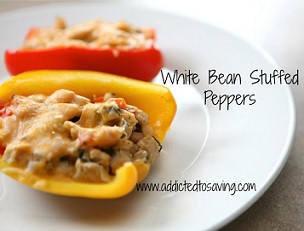
2 tsp EVOO
1 onion, chopped
3-4 garlic cloves, minced
½ red bell pepper, diced
¼ – 1/3 cup cilantro
4-5 bell peppers (any color – I use orange, red and yellow), seeded and halved
2 cups cooked chicken, diced (I’ve used rotisserie as well as breast)
½ – 1 tsp cumin
½ tsp of adobo seasoning
1 15.5 oz can white beans, rinsed and drained
½ cup shredded cheddar cheese
Directions
1. Preheat oven to 350 degrees.
2. Heat oil, then sauté onion in EVOO for 2 minutes
3. Add in garlic, parsley and red pepper and sauté for another 2-3 minutes.
4. Add chicken and seasonings to taste (cumin, adobo, salt and pepper).
5. Add beans and 1½ cups of water then simmer for 10 minutes until sauce thickens.
6. Place peppers (seeded and halved) in a 9×13 baking dish with a little water in the bottom to prevent burning.
7. Fill each pepper with bean mixture.
8. Place foil on top of dish and bake for 30 minutes at 350 degrees.
9. After 30 minutes, remove foil, add a sprinkle of cheese to each pepper, and bake another 5 minutes.
10. Enjoy!
Go HERE to see additional Recipes posted on Addicted to Saving
The post White Bean Stuffed Peppers Recipe appeared first on AddictedToSaving.com.
]]>The post Homemade Chicken Noodle Soup Recipe appeared first on AddictedToSaving.com.
]]>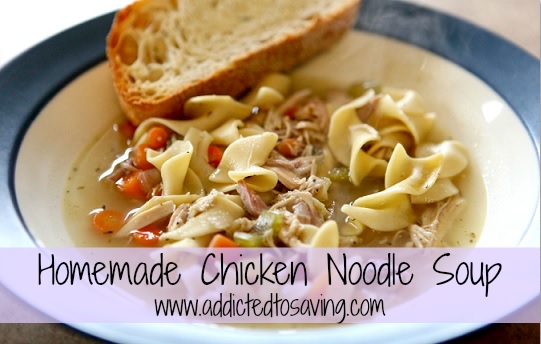

On cold days like today I want one thing to eat – SOUP! Soup is one of my favorite meals on chilly days or when I am sick. Especially homemade soup. Living in Florida, it seems like warm days outnumber cold days. But this winter has been cold! We’ve had some really cold days and then some really warm days. It seems the weather doesn’t know if it should stay cold or just go back and forth.
Below is an easy recipe for Homemade Chicken Noodle Soup that I love. You can follow the recipe below using the exact veggies in the recipe, or you can adjust the recipe depending on the veggies you have in your fridge. With my coop, I have a differing array of veggies to cook with each week so some times, I may add veggies like spinach, squash and even cabbage!
If you eat gluten-free like me, check your chicken broth & poultry seasoning. Some are gluten-free but not all. Also – I use gluten-free noodles in my soup and I can’t even tell the difference!
Do you make chicken noodle soup? How is it similar or different to my recipe below?
Homemade Chicken Noodle Soup
Ingredients
2 tbsp. butter
½ large onion, diced
20 baby carrots, chopped
5 celery stalks, chopped
3 cups of chicken, shredded (I use rotisserie chicken because it has great flavor and is pre-cooked)
¾ tsp. basil
¾ tsp. oregano
½ tsp. rosemary
½ tsp. poultry seasoning
5-6 cups chicken stock
2-3 cups water
1 tsp. salt
½ tsp. ground pepper
3 bay leaves
8-12 oz. egg noodles
*Seasoning amounts are an estimate and can be adjusted according to taste.
Directions
1. In a large pot (I used a dutch oven), melt butter and sauté onion, carrots, and celery until tender (about 5 minutes).
2. Add in chicken, basil, oregano, rosemary, poultry seasoning, chicken stock, water, salt, pepper and bay leaves. Bring to a boil then simmer for about 30 minutes.
3. Add in egg noodles during the last 5 minutes of cooking
4. Serve with some crusty bread (I love the Rosemary and Olive Oil bread from Costco) and enjoy!
Go HERE to see all Recipes posted on Addicted to Saving
This recipe was adapted from Table from Two
The post Homemade Chicken Noodle Soup Recipe appeared first on AddictedToSaving.com.
]]>The post Crustless Veggie Quiche Recipe (Gluten-Free) appeared first on AddictedToSaving.com.
]]>
%20www.addictedtosaving.com)
**Pin this on Pinterest**
One of my favorite meals to make for breakfast, lunch or dinner is Crustless Veggie Quiche. This is by far one of the most versatile recipes I’ve ever made. When I’m eating extra healthy, I will make this with mostly egg whites and skim milk. If I’m in the mood to add meat to the recipe, I’ll dice up some pepperoni or bacon to add it. I also always cram lots of vegetables in it. I always use peppers and onions and have used other veggies like kale, cauliflower, spinach, broccoli, jalapenos and even zucchini.
When I was eating foods with gluten, I would always make this recipe with Heart Smart Bisquick. Last year when I was 100% gluten free, I would make this Crustless Veggie Quiche, with gluten free baking blends. I have had great success using Pamela’s Baking and Pancake Mix as well as Gluten Free Bisquick in this recipe. (Please note that the recipe below is interchangeable – all you need is 3/4 cups Bisquick or Pamela’s or a different baking mix.) Check: Publix Ad, Meijer Ad in WeeklyAds2. The major difference I have noted for regular Bisquick versus a gluten free baking mix is that the Bisquick quiche rises a bit more and is a bit more fluffy while the gluten free variation is a bit more dense.
This Crustless Veggie Quiche is excellent fresh out of the oven. But it is also amazing reheated the next day. It is filling and well rounded meal as it has lots of protein from the eggs, milk and cheese. And, it has lots of fiber, vitamins and nutrients from the veggies!
In a mixing bowl, mix the wet ingredients (recipe is below)
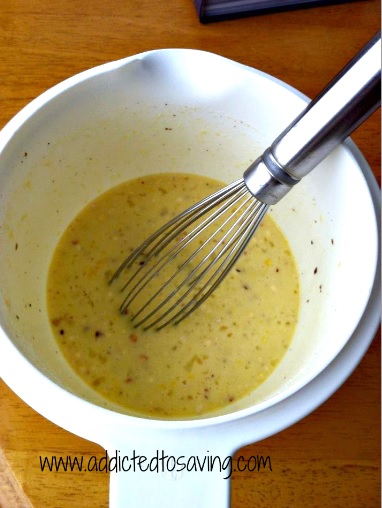
Saute your vegetables (recipe is below)
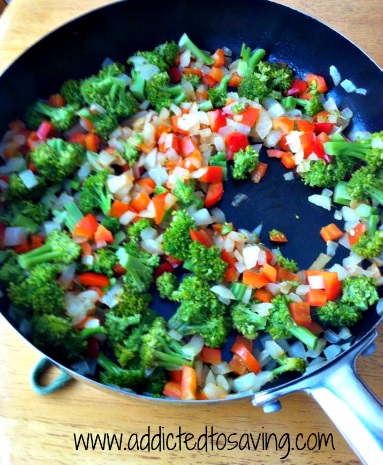
In a casserole dish, layer your vegetables, cheese and then milk and egg mixture (recipe is below)

Finished Product: Crustless Veggie Quiche

Crustless Veggie Quiche
Ingredients
1/2 Large Onion Diced
1 Large Pepper Diced
1/2 Head of Broccoli (I steam the broccoli until it is almost fully cooked)
3/4 Cup Bisquick or Pamela’s Gluten Free Baking & Pancake Mix
1 1/2 Cup Milk (I’ve used skim and 1% milk with great results)
3 Eggs (I’ve also used 1 egg and 4 egg whites with great results)
1/2 cup Cheddar, Swiss or Mexican Blend cheese (I’ve used shredded and block cheese)
1/2 teaspoon Salt
1/2 teaspoon Pepper
1/4 teaspoon Crushed Red Pepper (if you like your food spicy)
**other optional ingredients, spinach, asparagus, pepperoni, bacon, tomatoes – the list goes on and on!
Directions
1) Preheat your oven to 400 degrees. Spray a baking dish with non-stick cooking spray
2) In a frying pan, saute all vegetables (and meat if you use it) in olive oil until veggies are soft.
3) In a mixing bowl, whisk baking blend, milk, eggs, salt, pepper and crushed red pepper
4) In your casserole dish, spoon sauteed vegetables and cover the bottom.
5) Layer shredded cheese on top of the veggies.
6) Pour whisked egg & milk mixture onto the top of the cheese.
7) Bake for 35-40 minutes until a nice comes out clean.
Serve and enjoy!
Go HERE to see additional Recipes on Addicted to Saving
The post Crustless Veggie Quiche Recipe (Gluten-Free) appeared first on AddictedToSaving.com.
]]>The post Sauteed Veggies with Breaded Paprika Chicken Recipe with #STAROliveOil #shop appeared first on AddictedToSaving.com.
]]>
 I was excited to try STAR Butter Flavored Olive Oil! STAR has a huge line of olive oils, vinegar, and more. I’ve tried their olive oil so trying the STAR Butter Flavored Olive Oil really intrigued me. STAR’s website says that you can “substitute Butter Flavored Olive Oil for butter in recipes for baked goods, seafood, pasta, rice and mashed potatoes.” I couldn’t wait to try it!
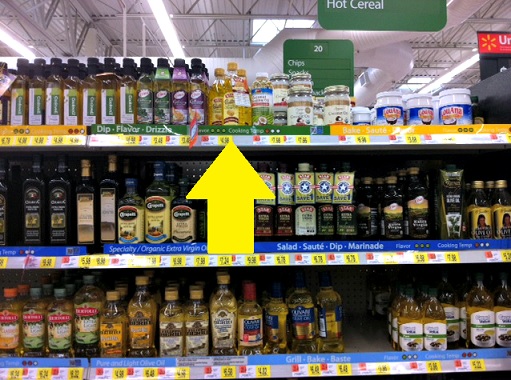 I headed to Walmart and found the STAR Butter Flavored Olive Oil on the top shelf where all of the olive oils and baking oils are found. I also noticed that STAR has a huge selection of olive oils to choose from in addition to the butter flavored oil! Go HERE to learn more about Star Olive Oils. And, ff you would like to try STAR Butter Flavored Olive Oil, right now, STAR Fine Foods’ Facebook page is giving away bottles of STAR Butter Flavored Olive Oil! There will be 10 winners! To enter, go HERE.
Once I returned home, I knew that I wanted to make Sauteed Vegetables with Breaded Paprika Chicken using my STAR Butter flavored Olive Oil. We always have lots of veggies in our coop bin and I thought that using some of the veggies with the oil might go well together. I decided to top the sautéed vegetables with chicken that I breaded with flour, paprika, salt & pepper and sautéed in the oil. Everything turned out amazing! I’ve sautéed vegetables countless times before. But this time was unlike prior meals. The vegetables had a slight buttery flavor that went perfectly with the breaded chicken. If you didn’t know that I used STAR Butter Flavored Olive Oil, you would have thought that I sautéed the vegetables in butter. They were so good. Below are the instructions and recipe.
 I gathered the ingredients for the breaded chicken and placed a large sauté pan on my stove-top in preparation. Below is a picture of the finished product – yummo!
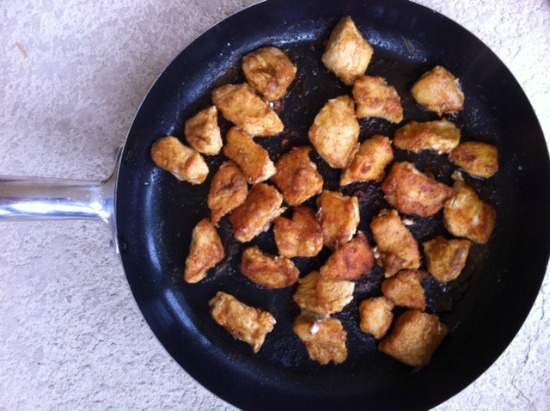 Breaded Paprika Chicken Recipe
Ingredients
• 1/3 cup Flour
• 1.5 t Paprika
• 1 t Salt
• Dash Pepper
• 1 lbs Boneless, Skinless, Chicken Breast cut in pieces
• 2 T STAR Butter Flavored Olive Oil
Instructions
1) In plastic bag combine flour, paprika, salt and pepper.
2) Add a few pieces of chicken to the bag at a time. Coat the chicken.
3) Brown chicken on both sides in a large skillet with STAR Butter flavored Olive Oil. Only use enough oil to coat pan and prevent sticking.
4) Transfer browned chicken to plate with paper towels on it to drain excess oil. Reserve drippings in pan.
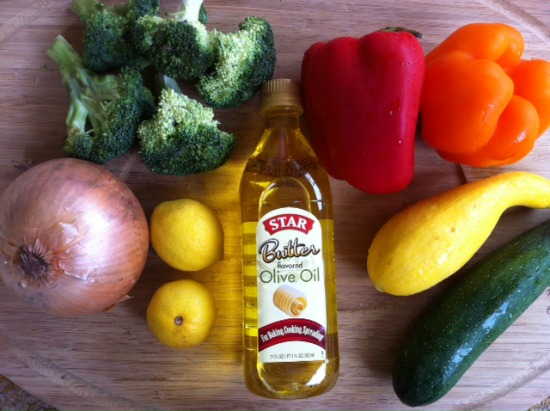 For the sautéed vegetables, I ransacked my fridge and took out an assortment of vegetables. If you are making this dish, you do not need to use the same veggies I used. If you prefer carrots, cauliflower, no pepper, etc etc, that is totally fine!
 Sauteed Vegetables Recipe
Ingredients
1/3 head Broccoli
½ Red Pepper
½ Yellow Pepper
¼ Large Onion
1 Zucchini
1 Yellow Squash
Lemon
1 T STAR Butter flavored Olive Oil
¼ t Garlic Powder
Salt & Pepper
Instructions
1) Warm the STAR oil in the pan.
2) Add Onion, Peppers, Broccoli to pan. Saute until onion & peppers soften and broccoli turns bright green.
3) Add Zucchini and squash. Saute until cooked.
To serve, place vegetables on your plate. Top with breaded chicken. If desired, squeeze fresh lemon juice on top of dish for extra flavor.
Enjoy!
If you haven’t tried STAR Butter flavored Olive Oil, I highly recommend you do! You can use it in cooking, baking and even dipping sauces! I would love to hear how you used the oil. Leave a comment if you have tried it!
The post Sauteed Veggies with Breaded Paprika Chicken Recipe with #STAROliveOil #shop appeared first on AddictedToSaving.com.
]]>The post Samsung Women of Steel Contest & Quinoa Pizza Bites Recipe – Enter to Win a Kitchen Suite and MORE #spon appeared first on AddictedToSaving.com.
]]>
Do you know a woman who seems to be able to do it all? Maybe it is a busy mother of six who is able to complete two IRONMANS in less than two years? Or maybe it is a mom who has a baby and just two months later her and her husband bring their one year old child home from Ethiopia who they adopt! Or maybe it is your own mom who works tirelessly to provide for herself and then still takes the time almost every night after work to play with her grandson and help out with bedtime. (Yes, I personally know and admire all three of these ladies
) Well, Samsung Home is giving us the chance to nominate one woman in their Women of Steel contest.
Nominees of the Women of Steel contest receive the chance to win a new Samsung Kitchen Suite and honorary dinner party for eight prepared by a local chef. And, there are also weekly prizes including a new Sparkling Refrigerator for those of you who nominate a friend/family member/etc for Women of Steel! There are also daily $50.00 prizes – if you vote on nominees, you are entered for a chance to win the daily prize! To nominate the Woman of Steel in your life or to vote for a woman already nominated, go HERE. Go HERE to read the official rules.What foods do you like to make for dinner parties? I thought about what recipe I will be making for the holiday dinner parties I attend this year and decided to make a tasty recipe that included one of my favorite foods – Quinoa! So I will be making Quinoa Pizza Bites!
 In a large mixing bowl, mix all of the ingredients listed below (except the pizza sauce).

In muffin tins, place enough of the quinoa mixture to fill each cup 3/4 of the way.

Quinoa Pizza Bites Recipe
Ingredients 
1/2 cup uncooked quinoa
1 large egg
1/2 cup chopped onion
1/2 cup shredded mozzarella
1 tsp minced garlic
2 tsp dried basil (or use fresh)
2 tsp dried oregano
salt
any desired pizza toppings (pepperoni, green pepper, etc)
pizza sauce for dipping
Instructions
1. Cook quinoa following instructions on package.
2. Preheat oven to 350.
3. Combine cooked quinoa, egg, mozzarella, onion, (other desired pizza toppings), garlic, basil, oregano, and salt in a bowl until well mixed.
4. Spray a muffin pan then scoop enough of the quinoa mix into each cup until ¾ – all the way full.
5. Bake for 15-20 minutes, and let cool.
6. Serve with pizza sauce and enjoy
recipe adapted from Fit for Success
This post has been compensated and sponsored by Samsung Home Appliances. As always, all thoughts and opinions are 100% my own.
The post Samsung Women of Steel Contest & Quinoa Pizza Bites Recipe – Enter to Win a Kitchen Suite and MORE #spon appeared first on AddictedToSaving.com.
]]>The post Enjoying Life With Pumpkin Spice Liquid Coffee-mate #loveyourcup #shop appeared first on AddictedToSaving.com.
]]>

Coffee. I honestly can not live without it. One of the “perks” to working from home is that I can make fresh coffee whenever I want. When I pour a cup of coffee, I will often put work down for a short while and just enjoy the moment. We have coffee brewing throughout the day so if you ever stop over, chances are high that we will offer you a cup of coffee! There is something about chatting with friends over a hot cup of coffee that slows this hectic life down a little! Now that fall is here, one of my favorite flavors to add to coffee is pumpkin. There is something about the combination of pumpkin and coffee that goes perfectly together. Because of this, I was very eager to try Pumpkin Spice Liquid Coffee-mate out. Pumpkin Spice Liquid Coffee-mate offers the perfect blend of fall flavors to your coffee.
Feeding Asher his lunch is the perfect time for me to enjoy a cup of coffee with Pumpkin Spice Liquid Coffee-mate

Both my hubby and I have really enjoyed drinking coffee with Pumpkin Spice Liquid Coffee-mate. Now that we have been parents for 9 weeks to Asher, we’ve found that our busy life has become even more busy. Especially with a 12.5 month old who is getting into everything. So we like to take moments to connect while enjoying coffee.
Naptime is the only time hubby and I have to really breathe. Sometimes we’ll take a break from work and enjoy a cup of coffee together. I highly recommend having a piece of pumpkin bread with your coffee with Pumpkin Spice Liquid Coffee-mate. You will be in pumpkin heaven!

My hubby is wonderful. Every day he makes me my morning cup of coffee. He used our frother on the Pumpkin Spice Liquid Coffee-mate and look at the layer of foam that he got on the cup of coffee he made me! So good!

I’m finding with age and with responsibilities, it is becoming harder and harder for me to connect with friends. Every waking minute is spent being a mom and being a business owner. The combination gives me little time for anything else. I have to be intentional about connecting with friends and stopping to drink a cup of coffee gives me the perfect opportunity to email old friends and get caught up.

Have you tried Pumpkin Spice Liquid Coffee-mate? I would love to hear your thoughts! If you haven’t tried it yet, you need to! Most major grocery stores and Walmart locations carry it. To find a store near you that sells Pumpkin Spice Liquid Coffee-mate, go HERE.
The post Enjoying Life With Pumpkin Spice Liquid Coffee-mate #loveyourcup #shop appeared first on AddictedToSaving.com.
]]>The post Kraft Recipe Makers Meal Kit – Three Cheese Chicken Florentine #kraftrecipemakers #shop appeared first on AddictedToSaving.com.
]]>
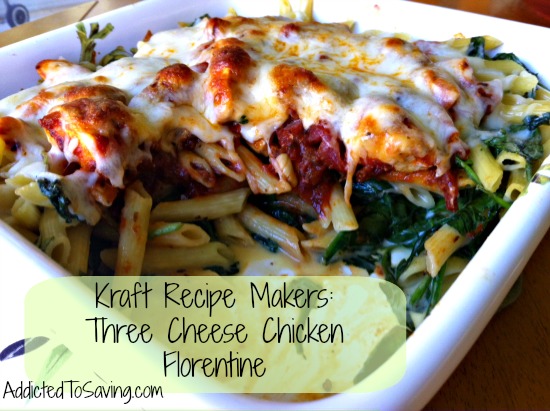
I was recently given the opportunity to try out and cook with Kraft Recipe Makers.
I am going to be honest… right now my life has been turned upside down now that we have brought home our Asher and completed our adoption. Before our adoption, I cooked every single night and usually cooked from scratch. Now that we have a very busy 11 month old and I’m using all free time to work on Addicted to Saving, this tired momma cooks very little for herself. (I do make lots of homemade baby food for our baby boy. He is definitely eating the best out of all of us!) I’m constantly looking for easy meals that will be flavorful and different from typical pre-packaged meals. I knew that Kraft Recipe Makers is a meal kit that makes cooking much easier and quicker and so I wanted to try it out for myself!
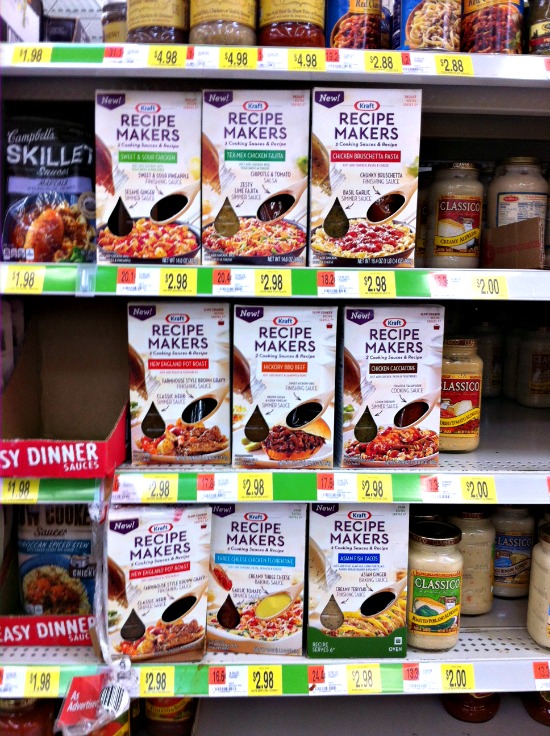
Kraft Recipe Makers is found in Walmart’s pasta aisle. (To learn more about Kraft’s products, make sure you “like” their Facebook page) Not all Walmart locations carry Kraft Recipe Makers, but if your Walmart sells meat, you should find Kraft Recipe Makers at your store! My local store sold 9 different variations of Kraft Recipe Makers. Go HERE to see my shopping trip in pictures in Addicted to Saving’s Google+ Album I eagerly took the Three Cheese Chicken Florentine off the shelf to try it out. We love pasta and chicken in our house. And, I was so excited to see that the recipe for Three Cheese Chicken Florentine called for fresh spinach. Any recipe that calls for spinach (especially pasta recipes) is a winner in my book!
Each box of Kraft Recipe Makers includes 2 cooking sauces in the box. You will need to purchase the “extras” needed for the recipe like the meat and any fresh produce or cheese that is needed. Besides buying the Three Cheese Chicken Florentine, I had to purchase fresh baby spinach, shredded mozzarella cheese and boneless, skinless chicken breasts.
It did not take long for me to make this meal. In fact, I made it during Asher’s morning nap. I was curious if I would be able to prepare, make and then clean up the meal while he slept. Since he had a great nap the morning I made this, I was able to get all three steps completed before he even woke up. Success!
The steps to this meal are quite easy! First, you need to preheat the oven to 375 degrees and spray your baking dish with non-stick cooking spray. The recipe calls for a 13×9 baking dish although I used a deep 9×9 dish and that worked perfectly. After you preheat your oven, you will want to cook three cups of pasta. One tip I have for you is to use a large saucepan for your pasta – perhaps even larger than you would normally use. (You will see below what I mean.)
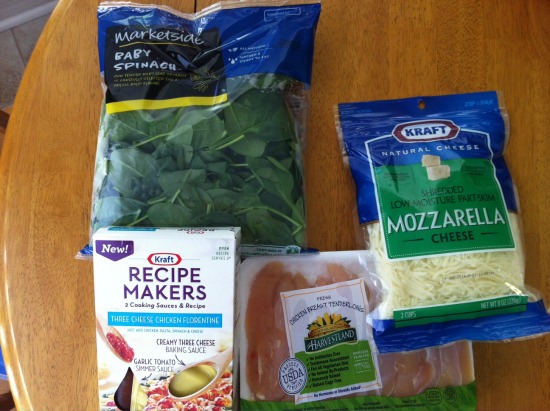
As you have your water boiling and your pasta is cooking, you will need to cook your diced chicken in a skillet. The recipe on the box doesn’t have you adding any seasoning to the chicken. I cooked the chicken in a little bit of extra virgin olive oil although the recipe on the box has you spraying your skillet with cooking spray.
Once your chicken is cooked, add the Garlic Tomato Simmer Sauce to the chicken and stir. Heat through for about 2 – 3 minutes.
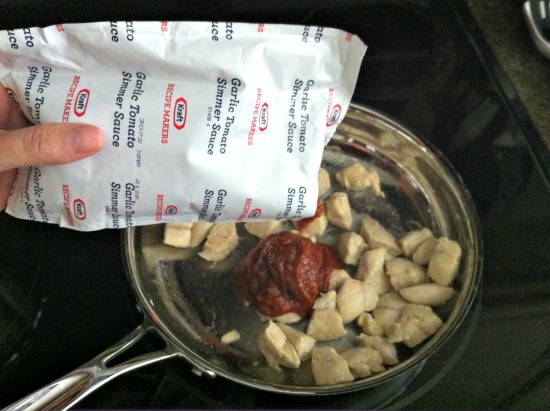
Once your pasta is cooked, drain it and return it to your saucepan. You will then want to add 1 package of fresh baby spinach to the saucepan as well as the Creamy Three Cheese Baking Sauce to your saucepan. Mix lightly so that everything is evenly distributed. You can see from my picture that my saucepan was filled to the brim. I had a really tricky time mixing the sauce, spinach and cooked pasta together. So I highly recommend you use a larger saucepan than normal to make it easier for you to mix.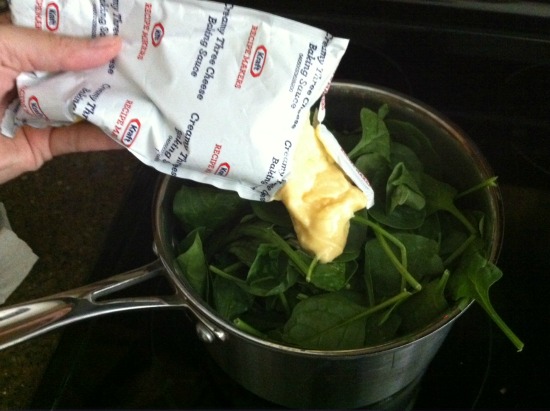
Once your pasta, spinach and sauce is mixed, pour it into your baking dish. On top of the pasta, add the chicken and sauce from your skillet. Top the dish with shredded mozzarella. The recipe on the box calls for ½ cup of shredded cheese. I’m not going to lie, I used at least a cup and a half of shredded cheese. We love our cheese in this house!
Place the baking dish into your preheated oven and bake for 10 to 15 minutes or until your dish is heated through.
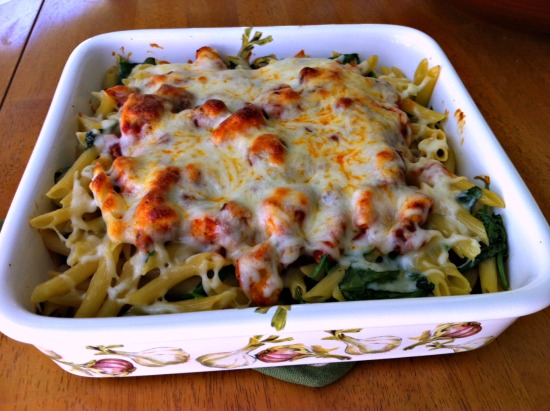
I served my dish with steamed zucchini. I topped the zucchini with Italian herbs and they were the perfect accompaniment to our dinner. I had family over my house and was able to serve everyone this dish. Everyone was very pleased with the flavor as well as with the appearance of the dish. And, they had seconds which tells me my meal was a success!
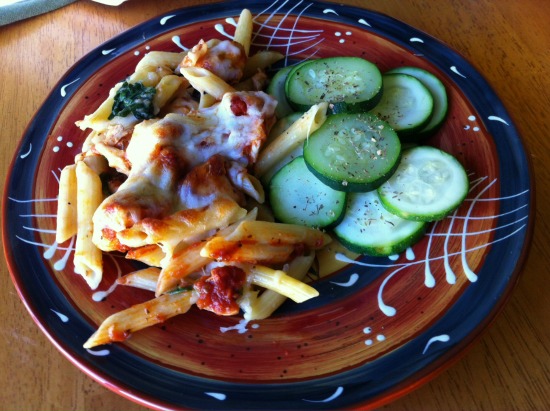
If you asked me if I would make this again, I most definitely would. Using Kraft Recipe Makers took out all of the work behind seasoning my dish and making my sauces. While I did have to do a bit of prepwork cutting up and then cooking the chicken and boiling the pasta, that was really all I had to do. Everything else consisted of mixing the ingredients together and then baking. It was really easy to make and came out so flavorful!
The post Kraft Recipe Makers Meal Kit – Three Cheese Chicken Florentine #kraftrecipemakers #shop appeared first on AddictedToSaving.com.
]]>The post Quinoa with Roasted Red Pepper & Cauliflower Recipe appeared first on AddictedToSaving.com.
]]>

You all already know I have a deep love for quinoa. I love the healthiness of it, the ease of cooking it and the fact that it absorbs flavors so nicely! Go HERE to see my favorite Quinoa recipes on Pinterest. Besides having quinoa, this recipe has two of my favorite veggies – cauliflower and red peppers! You may have remember the Cilantro & Honey Dressing recipe I published a couple of months ago? Well, this Quinoa with Roasted Red Pepper & Cauliflower recipe utilizes that dressing to give the veggies a fun and zesty twist.
If you haven’t made quinoa before, do not be intimidated! I was scared to try cooking it thinking that it was going to be difficult. Let me tell you, if you can make rice, you can make quinoa! It is so so easy. And the cauliflower and red pepper in this recipe are simple to prepare as well. Roasted veggies have become a staple in our household. Ever since we joined a coop, I have found that I roast veggies at least a few times each week!


Quinoa with Roasted Red Pepper and Cauliflower Recipe
Quinoa & Veggie Ingredients
1 ½ cup cooked quinoa
1 cauliflower head, chopped into bite size pieces and roasted
2 red peppers, roasted then skinned, seeded and diced
Cilantro & Honey Dressing Recipe
1/3 cup cilantro, chopped
salt and pepper
2 tbsp honey
juice from one lime (about 3 tbsp)
3 tbsp EVOO
Directions
1. Preheat oven to 425 degrees.
2. Chop cauliflower and place in a bowl, then drizzle with olive oil and sprinkle with salt. Stir until well coated and transfer to a baking sheet.
3. On the same sheet, place the 2 red peppers.
4. Roast in the oven at 425 degrees for about 30-35 minutes, stirring the cauliflower and rotating the red pepper every 5-10 minutes.
5. While veggies are being roasted, prepare quinoa and chop your cilantro.
6. Make your lime vinaigrette: combine 2 tbsp of honey, 3 tbsp of lime juice (basically one lime) and 3 tbsp of EVOO and wisk until a smooth consistency.
7. Once quinoa is done cooking, place in a large bowl. Add all other ingredients (cauliflower, roasted red peppers, cilantro and lime vinaigrette) and stir until well coated.
Enjoy!
Go HERE to see additional Recipes on Addicted to Saving
Recipe adapted from Naturally Ella
The post Quinoa with Roasted Red Pepper & Cauliflower Recipe appeared first on AddictedToSaving.com.
]]>The post Cranberry Coconut Granola Recipe appeared first on AddictedToSaving.com.
]]>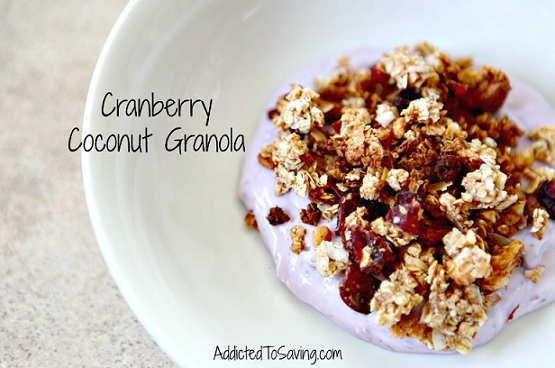

Granola. Granola is a filling food that is perfectly eaten as a cereal, snack or yogurt topping. (Have you tried it on ice cream? It is so good on ice cream too!) When I began running over 5 years ago, I realized that I needed to fuel my body with foods like granola. Granola is high in carbohydrates which runner’s need to fuel their runs as well as to refuel after long runs. And it is just so tasty. While there are many different types of granola that you can buy at the grocery store, homemade granola has less preservatives and can actually be more affordable.
This Cranberry Coconut Granola recipe is so good. It pairs oats with coconut, almonds and craisins. And, if you like a little chocolate in your granola, you can even add chocolate chips! If you eat gluten free like me, you will want to make sure you use gluten free oats in your recipe.
Mix the dry ingredients together (see recipe below)

Mix applesauce, vanilla and honey in a separate bowl and then combine with dry ingredients (recipe is below)

Spread ingredients on a baking sheet. Bake at 350 for 30 minutes.

Once baked, cool on parchment paper. Enjoy!


Cranberry Coconut Granola Recipe
Ingredients
3 cups of oats
1 cup shredded coconut
2/3 cup chopped almonds
2/3 cup craisins (or dried cherries if you’d prefer)
2/3 cup applesauce (use store bought or homemade see recipe below)
2 tsp vanilla
2 tsp cinnamon
2/3 cup honey
3 TBSP chocolate chips (if desired)
Directions
1. Preheat oven to 350
2. Mix oats, coconut, almonds, dried fruit and cinnamon (and chocolate chips if desired) together in a bowl
3. Mix applesauce, vanilla and honey together in another bowl
4. Add applesauce mix to oat mix and coat well
5. Bake on a baking sheet (or 2) for 30 minutes, stirring halfway through
6. Let cool on parchment paper out of oven, then enjoy by itself or as a topping to some yummy yogurt ?
Homemade Applesauce Directions
1. Core 2-4 apples and chop into 4ths
2. Place in pan and barely cover with water
3. Bring to a boil, then let simmer for 5-10 minutes (until apples are soft)
4. Throw cooked apples in a food processor for 2-3 minutes
Go HERE to see all Recipes on Addicted to Saving
Recipe adapted from My Whole Life
The post Cranberry Coconut Granola Recipe appeared first on AddictedToSaving.com.
]]>The post Almond Joy Ice Cream Recipe appeared first on AddictedToSaving.com.
]]>

**Pin this to Pinterest**
To carry on my addiction to home made ice cream, I wanted to share this refreshing Almond Joy Ice Cream Recipe that my sister-in-law created for me. This recipe utilizes the Almond Joy Larabars Recipe I posted about a month ago. Once you make your Almond Joy Larabars, you will want to crumble it up to use it as a mix-in to the ice cream base below. In fact, you can really add whatever mix-ins you want to the ice cream base below!
Like most home made ice cream recipes, this recipe utilizes very few ingredients and is SO much healthier than store bought ice cream that has lots of preservatives!
While you are making homemade ice cream, make sure you check out my Chocolate Chip Cookie Dough Ice Cream Recipe and Strawberry Ice Cream Recipe.


Almond Joy Ice Cream Recipe
Ingredients
1 can coconut milk
3 cups whole milk
2 vanilla beans
½ tsp of vanilla extract
5-6 tbsp of liquid sweetener (I used maple syrup)
almond joy larabars, crumbled (see recipe HERE)
Directions
1. Make sure ice cream bowl has been in freezer for at least 15-18 hours.
2. Mix all ingredients except almond joy larabars in a bowl and then poor into ice cream bowl when ready.
3. Run ice cream machine until desired consistency occurs, usually about 15 minutes – will look like soft serve ice cream.
4. Add in almond joy larabars for last 2-3 minutes of mixing.
5. Serve immediately or place back in freezer for 15-30 minutes to harden up consistency.
6. Enjoy!
Go HERE to see all recipes on Addicted to Saving
The post Almond Joy Ice Cream Recipe appeared first on AddictedToSaving.com.
]]>The post Pecan Pie Larabar Recipe appeared first on AddictedToSaving.com.
]]>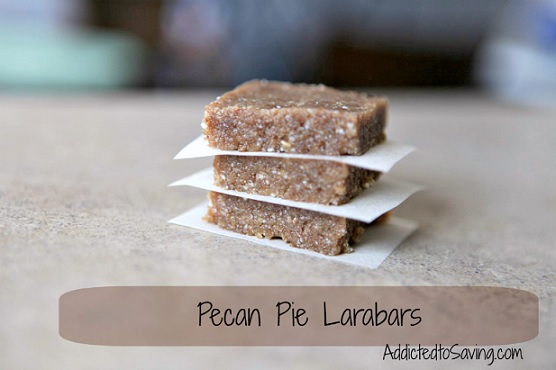

**Pin on Pinterest**
Larabars. You all know that I am fixated with them. Full of protein and fiber they are a satisfying snack that I love to have before I head out the door on long runs and also as snacks in the afternoon. I’ve posted copycat Larabar recipes before! Make sure you check out my Almond Joy Larabar Recipe and Copycat Cherry Pie Larabar Recipe.
This Pecan Pie Larabar Recipe is easy to make and has a tasty, nutty flavor that tastes so much like pecan pie! It involves just three ingredients – almonds, dates and pecans. Throw the ingredients in your food processor and you are good to go!
Pecan Pie Larabar Recipe
Ingredients
1 cup almonds
1 cup dates (pitted)
1 cup pecans
Directions
1. Chop up almonds and pecans in food processor first
2. Add dates and process until dough sticks together
3. There shouldn’t be a need to add liquid as the pecans will release their oils when heated, but if you need to add a little water, feel free.
4 .Place in a 8×8 baking dish and let chill in fridge until easy to cut (about 30 minutes – 1 hour).
5 .Cut and enjoy!
Go HERE to see all Recipes on Addicted to Saving
Recipe adapted from Running Upward
The post Pecan Pie Larabar Recipe appeared first on AddictedToSaving.com.
]]>The post Orzo with Peas, Tomatoes & Bacon Recipe appeared first on AddictedToSaving.com.
]]>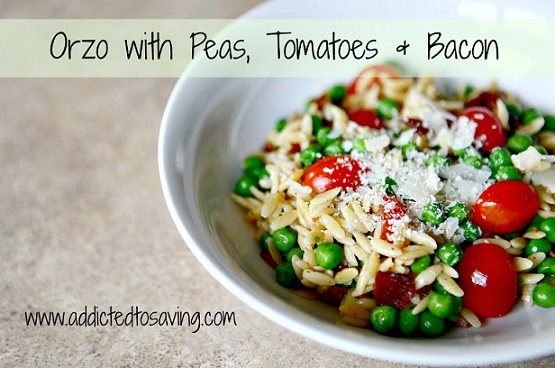

If you haven’t tried cooking with orzo, you should. Orzo is a tiny tiny pasta that looks like rice – but it isn’t rice, it is pasta. Orzo is a fun pasta to cook with because it absorbs flavor really well and it looks so good in a pasta dish like this!
Since I went gluten free, I haven’t cooked with orzo much as orzo does have wheat in it. I have a big container of dry orzo in my pantry so sometimes I will make orzo for hubby and then make rice for me. For this recipe, I would just separate the ingredients into two. Half of the ingredients would go with the orzo and the other half with rice. Win Win!
This Orzo with Peas, Tomatoes & Bacon recipe is light even though it has bacon in it. The main staples in this recipe are fresh cherry tomatoes, frozen green beans and bacon. All of the flavors blend together perfectly and the crispy bites of bacon are a salty surprise that goes so nicely with the sweet peas and tomatoes!
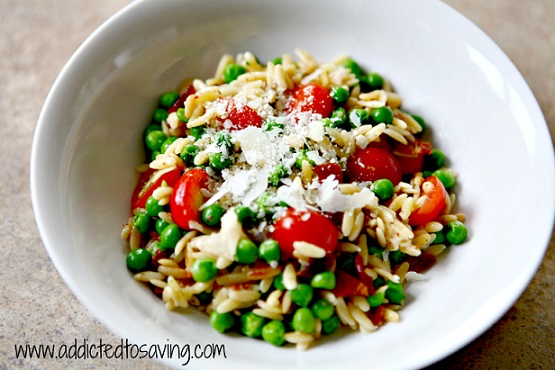

Orzo with peas, bacon, tomato and cheese
Ingredients
1 cup of cooked orzo
1 bag of frozen peas
6 strips of bacon, chopped (used turkey)
1 cup of grape tomatoes
¼ – ½ of grated Parmesan cheese
Directions
1. Cook orzo according to package directions, adding in frozen peas with about 5 minutes left.
2. In another skillet cook up the bacon until crisp then reserve 1 teaspoon of bacon fat while draining the rest.
3. Add the orzo and peas to the bacon skillet, mix in the bacon, cheese and tomatoes. Season with salt and/or pepper if desired.
4. Enjoy!
Go HERE to see all Recipes on Addicted to Saving
Recipe adapted from 80 Breakfasts
The post Orzo with Peas, Tomatoes & Bacon Recipe appeared first on AddictedToSaving.com.
]]>The post Strawberry Ice Cream Recipe appeared first on AddictedToSaving.com.
]]>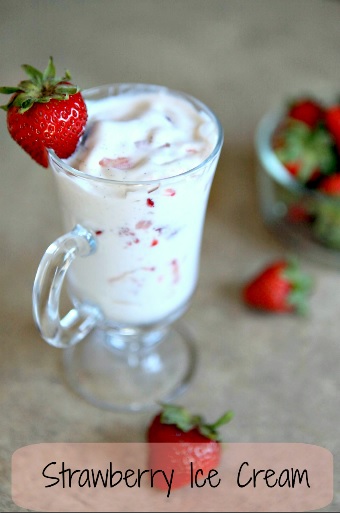 **Pin this Recipe**
While I could (and do) eat ice cream year round, there is something about eating ice cream in the summer that is magical. These hot and humid days are just screaming for ice cream to cool us down. A little over a year ago, I purchased a Cuisinart ice cream maker and to be honest this summer is the first time I’ve started experimenting with it. If you are fans of strawberry ice cream, you need to try this recipe out. This recipe is used with coconut milk instead of regular milk which I love. Including the coconut milk, this recipe requires just four ingredients!
If you make homemade ice cream, I would love to hear what kinds you have made and if you have any easy recipes! Please leave a comment with all of your ice cream making tips and tricks!

Strawberry ice cream goodness in the ice cream maker (Strawberry Ice Cream recipe is below)

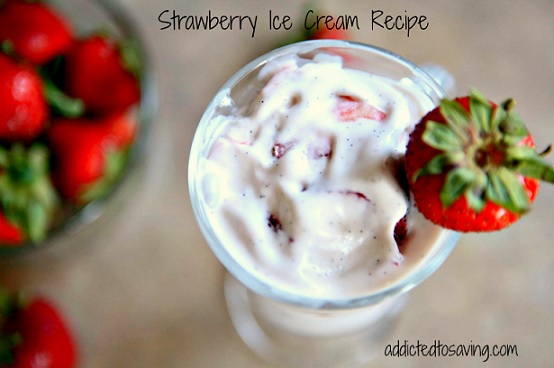
**Pin this Recipe**
Strawberry Ice Cream Recipe
Ingredients
1 cup of sliced strawberries
1 ½ vanilla beans or ground vanilla
1 can unsweetened coconut milk
2-3 tbsp of liquid sweetener (I used maple syrup)
Directions
1. Make sure ice cream bowl has been in freezer for at least 15-18 hours.
2. Mix all ingredients except strawberries in a bowl and then poor into ice cream bowl when ready.
3. Run ice cream machine until desired consistency occurs, usually about 15 minutes – will look like soft serve ice cream.
4. Add in strawberries for last 2-3 minutes of mixing.
5. Serve immediately or place back in freezer for 1-2 hours to harden up consistency.
Go HERE to see all Recipes on Addicted to Saving
This recipe is adapted from My Whole Food Life
The post Strawberry Ice Cream Recipe appeared first on AddictedToSaving.com.
]]>The post Rainbow Kool-Aid Cake Recipe appeared first on AddictedToSaving.com.
]]>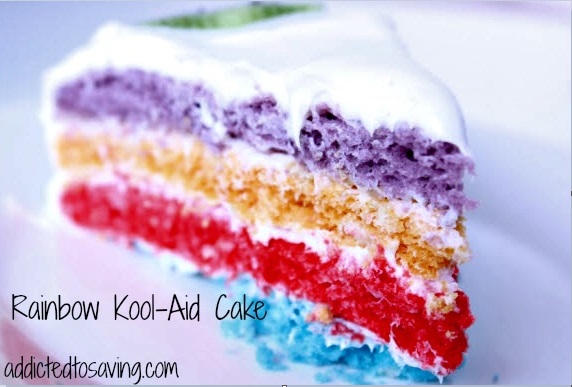
When I was given the opportunity to purchase Kool-Aid products at Walmart, I jumped at the chance. I honestly have not had Kool-Aid since I was a child. And when I told hubby about this opportunity, his face lit up. He had Kool-Aid a lot as a kid and he was excited knowing that this opportunity meant that he would get Kool-Aid to drink!
To see my story in pictures, check out my Google + album HERE.
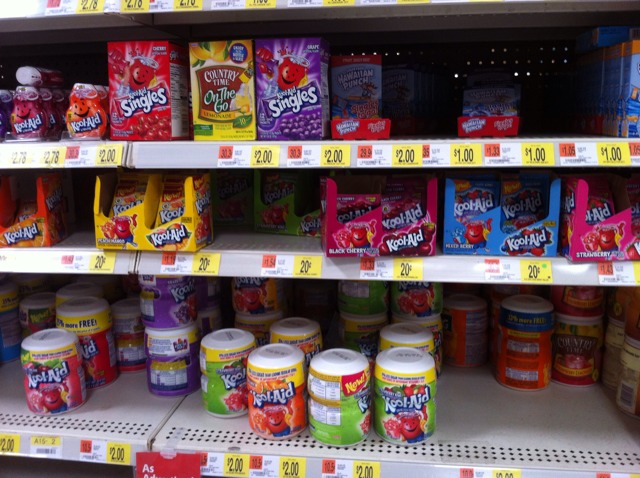
I headed to my local Walmart to purchase Kool-Aid. My goal was to purchase Kool-Aid to use in a new concoction. I wanted to make a colorful and flavorful cake using Kool-Aid and then enter the Kool-Aid Kool Creation contest! To enter the contest, you need to create something “Kool” with Kool-Aid. To enter, you will need to upload a picture of your creation and you will then be entered to win Meet & Greet passes and tickets to see BIG TIME RUSH . I’ve never used Kool-Aid to bake with and to be honest, I had no idea what to expect! But I knew I would have fun experimenting with Kool-Aid!

I purchased exactly $6.00 worth of Kool-Aid at Walmart. Why did I purchase $6.00 worth? Let me explain. Have you downloaded the phone app Shoparoo? Shoparoo is an iPhone and Android app that turns pictures of your shopping receipts into donations to the school or charity of your choice. So after I went shopping, I snapped a picture of my receipt and was able to help a nearby school.

Besides helping a local elementary school, I was able to save 50% on BIG TIME RUSH tickets! Kool Aid and BIG TIME RUSH have partnered up to give us a discount code for a Family 4 Pack of BIG TIME RUSH tickets. The four pack is regularly $100, but when you snap a picture of your Walmart receipt with at least $6.00 purchased of KOOL AID products, you will save 50% on your tickets making a family 4 pack only $50.00. Once you take a picture of your receipt with the Shoparoo app, Shoparoo will send you an email within 48 hours with your Ticketmaster discount code for a KOOL AID Family 4 Pack of tickets.
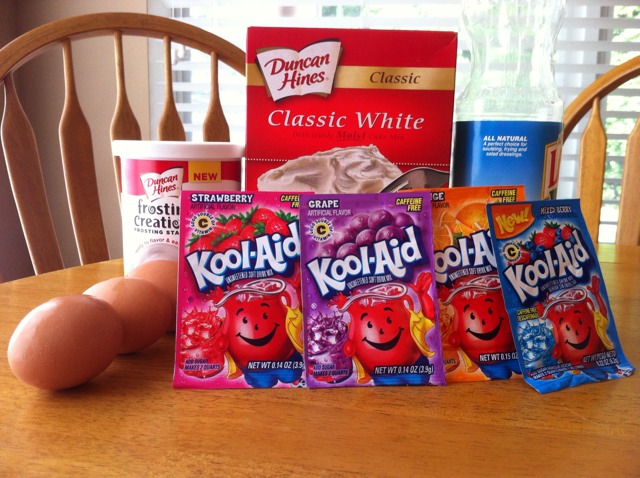
After I snapped a picture of my receipt and saved 50% on a a Family 4 Pack of BIG TIME RUSH tickets, I got to work on my cake. I had white cake mix and vanilla frosting stockpiled away in my pantry. So I decided, using four packets of Kool-Aid and one box of cake mix, to make a four layer Rainbow Kool-Aid cake. Each layer I would designate a different Kool-Aid flavor packet to to give my cake a variety of colors and flavors. I used the Kool-Aid flavors Strawberry, Grape, Orange and Mixed Berry.
I followed the directions on the box of cake mix. The only difference is that instead of adding 1 cup of water to the cake mix, I separated it into four. I mixed ¼ cup of water with 1 teaspoon of each packet of Kool-Aid. (see the recipe below)
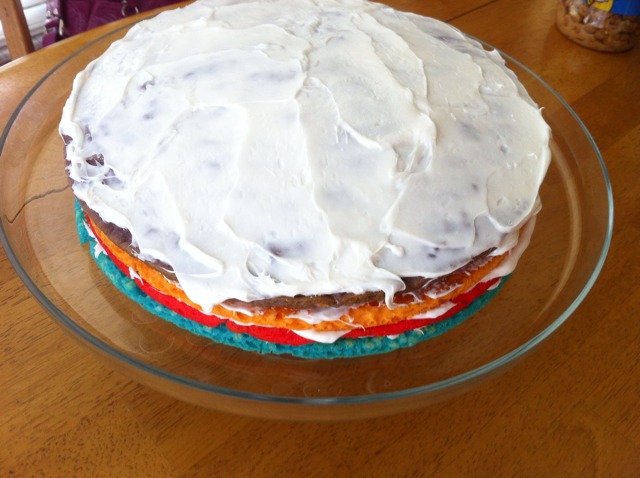
Because I divided one box of cake mix into four layers, the layers were extremely thin. You can easily make thicker layers by using two boxes of cake mix and dividing each box in half for each layer. Once my layers had cooled, I applied a thin layer of vanilla frosting in between each layer to hold them together. I then put a generous portion of frosting on the top and sides.
You can decorate your cake however you like. I went the “less is more” route and made my cake with a simple vanilla frosting and kiwi garnishes. If you wanted to, you could add Kool-aid to your frosting and add a colorful and flavorful touch to your frosting! The sky is the limit as to how you can decorate and flavor your cake.
If you decide to use Kool-Aid in a fun way (like my Rainbow Kool-Aid cake concoction), make sure you enter your creation into the Kool-Aid Kool Creation contest!
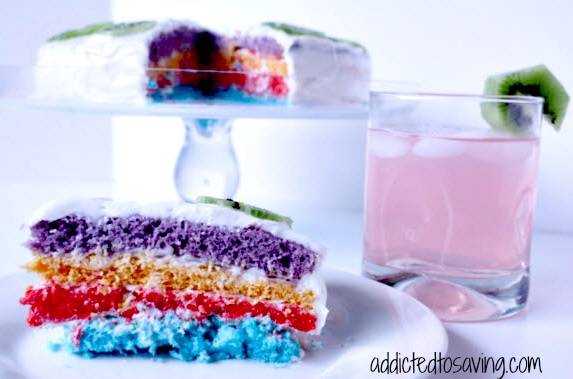
Rainbow Kool-Aid Cake Recipe
Ingredients
1 box White Cake Mix (or use two boxes if you prefer thicker layers of cake)
3 Egg Whites
1 cup Water (separated into 1/4 cups)
¼ cup Vegetable Oil
1 teaspoon of Kool-Aid from four different Kool-Aid Packets
(I used Strawberry, Grape, Orange & Mixed Berry)
1 and 1/2 tubs of Vanilla Frosting
Directions
1) Preheat oven to 325 degrees. Spray non-stick cooking spray to two (or four) 9 inch round cake pans.
2) In a large bowl, mix egg whites and vegetable oil.
3) Add box of cake mix to the liquids.
4) In four separate bowls, mix 1 teaspoon of Kool-Aid with ¼ cup water.
5) Add ¼ of the cake mix to each bowl of Kool-Aid water. Mix well.
6) Add each flavored cake mix to your cake pans.
7) Bake for approximately 13 minutes (or until knife comes out clean) (If you make thicker layers of Rainbow Kool-Aid cake, you will need to bake longer.)
8) Allow cake to cool. Once cooled, layer cake on cake dish. Top each layer with a thin coat of frosting. Top the cake and sides with a thick layer of frosting.
Serve with a glass of Kool-Aid and enjoy!
The post Rainbow Kool-Aid Cake Recipe appeared first on AddictedToSaving.com.
]]>The post Quinoa Black Bean and Corn Tacos Recipe appeared first on AddictedToSaving.com.
]]>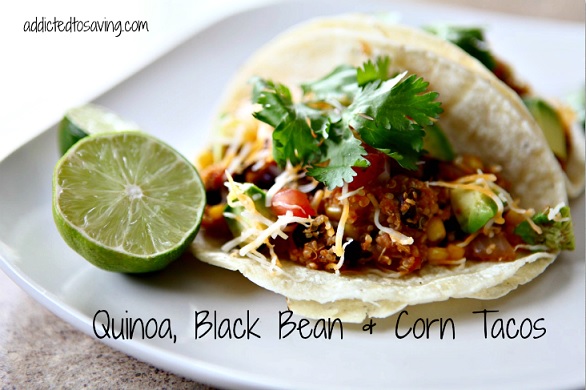

**Pin to Pinterest**
If you haven’t realized this already, I love quinoa. When I make quinoa, I will make enough for at least 3 meals. That way, when I am making a meal like Quinoa Black Bean and Corn Tacos, I already have the quinoa ready to go. Quinoa is a food that has very little flavor which I love. I can add quinoa to any type of food and it will take on the flavors of the ingredients I am using. If you are looking to add protein (whether you are a vegetarian or not) and fiber to your meals, quinoa is the perfect ingredient to use. Quinoa is a seed. Many people think that quinoa is a grain, but it is a seed that is gluten and wheat free. So if you have gluten allergies, this is an amazing food to add to your cooking repertoire. I started routinely cooking with quinoa this past January when I started eating gluten free. In fact, I have posted lots of Quinoa recipes here on Addicted to Saving. To see more Quinoa recipes I’ve posted, go HERE to my Pinterest Page devoted entirely to Quinoa!
This Quinoa Black Bean and Corn Tacos recipe is easy to make, super flavorful and is packed with fun flavors like lime, chili powder, cilantro, corn and more. This is a gluten free recipe. Just make sure you use corn soft tacos (I have flour tacos pictured and they are packed with gluten).
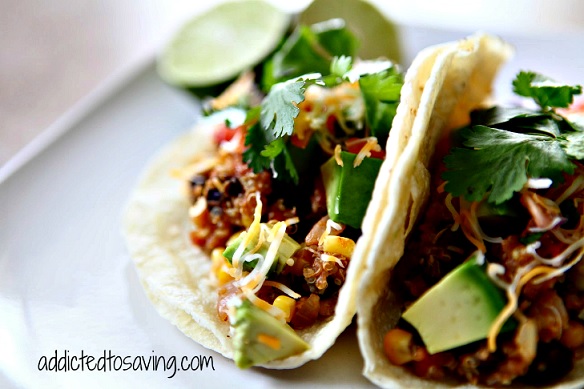

Like any tacos, add whatever toppings make you happy. I’m partial to avocado, cheese, cilantro and fresh tomatoes. Yum.


Quinoa, Black Bean and Corn Tacos Recipe
Ingredients
1 1/2 cups cooked quinoa
1 medium yellow onion, diced
3 cloves garlic, finely minced
1 1/4 cups vegetable broth or chicken broth
1 (14.5) oz can diced tomatoes with green chilis, undrained
1 1/2 tsp chili powder
1 tsp ground cumin
1/2 tsp paprika
1/4 – 1/2 tsp cayenne pepper
1/4 tsp ground coriander
Salt and freshly ground black pepper, to taste
1 1/2 cups frozen corn
2 (15 oz) cans black beans, drained and rinsed
juice of 1 lime
1/2 cup cilantro, chopped
Directions
1. Cook your quinoa
2. Heat some EVOO in a pan and sauté onion about 3-5 minutes, then add in garlic and sauté about 30 sec – 1 min longer. Keep an eye on the garlic so as not to burn it (it burns easily!).
3. Stir in broth, tomatoes, quinoa and spices (from chili powder through pepper).
4. Bring to a boil, then reduce heat, cover and simmer for about 20 minutes until thickened.
5. Stir in corn and black beans; cook uncovered for an additional 5-10 minutes.
6. Remove from heat and add lime juice and cilantro.
7. Serve with tacos and your desired toppings (avocado, cheese, lettuce, cabbage) and enjoy!
Go HERE to see all Recipes posted on Addicted to Saving
This recipe was adapted from Cooking Classy
The post Quinoa Black Bean and Corn Tacos Recipe appeared first on AddictedToSaving.com.
]]>The post Almond Joy Larabars Recipe appeared first on AddictedToSaving.com.
]]>

**Pin this Recipe**
Many of you may remember my Copycat Cherry Pie Larabars Recipe that I posted a couple of months ago. One of my favorite snacks or pre-long run snacks are Larabars. My problem is that they are pricey! So, making homemade Larabars is much more affordable AND I have complete control over the ingredients in my bars. My sister-in-law created this Almond Joy Larabars recipe. These bars are packed with protein and fiber. AND, they are gluten free!
If you make these bars – or a variation of these bars – I would love to hear your thoughts!


Almond Joy Larabars
Ingredients
1 cup almonds
1 ¼ cup dates
½ cup shredded coconuts
dash of salt
1-2 tsp of cocoa powder
2-3 tsp of coconut oil
a handful of chocolate chips
Directions
1. Place almonds in food processor and blend until finely chopped.
2. Add in all other ingredients and process until dough sticks together between fingers when pressed (about 3-5 minutes). If it doesn’t seem to stick, add a few more dates or coconut oil or water to help it stick.
3. Press in a 8×8 or 9×11 baking pan and place in fridge to set – about 30 minutes to 1 hour.
4. Cut and enjoy!
Go HERE to see all Recipes on Addicted to Saving
The post Almond Joy Larabars Recipe appeared first on AddictedToSaving.com.
]]>The post Raw Cookie Dough Bites Recipe appeared first on AddictedToSaving.com.
]]>
Pin This Recipe on Pinterest
I took a few weeks off of blogging about some of my favorite recipes but wanted to start up again this week! I like to post my favorite recipes every Monday, Wednesday and Friday. Most of my recipes have a little bit of a “healthy” twist to them – although every now and then, I’ll post a truly decadent recipe that has no nutritional value whatsoever.
If you liked my Edible Raw Cookie Dough Recipe, you will like this recipe! These Raw Cookie Dough Bites will satisfy your cravings for raw cookie dough and you won’t even realize that the bites have NO flour! Instead, the bites utilize oats and dates. Dates are one of my favorite super foods They are low-calorie and are packed with fiber. The Raw Cookie Dough Bites are soft and chewy and require no baking whatsoever. I can’t wait to hear what all of you think after you try this recipe!
Raw Cookie Dough Bites
Ingredients
1 cup almonds
1 cup oats (I used old-fashioned, instant)
25 pitted dates
1/3 cup water
¼ cup chocolate chips
1/8 – ¼ cup coconut (optional)
Directions
1. Blend together almonds and oats in food processor until fine powder
2. Add in dates and blend again for 2-3 minutes
3. Slowly add in water (anywhere between ¼ – ½ cup) until mix becomes a nicely moistened dough
4. Take out of food processor and put it to bowl and stir in mix ins (in this case, chocolate chips and shredded coconut)
5. Roll into balls on parchment paper and place in refrigerator to chill for 10-15 minutes
6. Enjoy!
Go HERE to see all Recipes posted on Addicted to Saving
Recipe adapted from My Whole Life Food
The post Raw Cookie Dough Bites Recipe appeared first on AddictedToSaving.com.
]]>The post Berry Cobbler with Whole Wheat Flour Recipe appeared first on AddictedToSaving.com.
]]>

**Pin this Recipe**
Before I started eating gluten free, when I baked desserts or breads, I would always add whole wheat flour to my recipes. I liked to use whole wheat flour because it usually has more fiber than traditional white flour. Some recipes I would switch out all of the white flour and just use whole wheat flour. Other recipes, are a bit more finicky and I would switch out just some of the white flour for whole wheat. (Like in this recipe below.)
Because it is summertime and because fresh berries are plentiful, I really wanted to post this recipe for all of you! This particular Berry Cobbler with Whole Wheat Flour recipe calls for two cups of blackberries and strawberries. However, you can easily substitute the blackberries or strawberries for blueberries or raspberries if you prefer.
The finished product is oh so good! The tartness of the berries mixed with the sugar and yummy topping is such an awesome combination. Have you made this before? Do you make any similar recipes to this? Please leave a comment as I would love to hear the cobbler variations you have made!
Berry Cobbler with Whole-Wheat Flour
Filling Ingredients:
1/8 cup whole-wheat flour
2 cups blackberries
2 cups strawberries
1/4 cups sugar
1 teaspoon lemon juice
Topping Ingredients:
1/4 cup all-purpose flour
1/4 cup whole-wheat flour
1/8 cup sugar
1/2 teaspoon baking powder
1/8 teaspoon baking soda
1/8 teaspoon salt
3 tablespoons chilled butter, cut into small pieces
1/3 cup low-fat buttermilk
Directions
1. Preheat oven to 400 degrees
2. For the Filling: Mix all ingredients and place in an greased 8×8 baking dish; let stand while preparing the topping
3. For the topping, mix both flours, sugar, baking powder, baking soda and salt in a bowl
4. Cut in chilled butter with a pastry blender or food processor until the mix is a fine mixture
5. Add in buttermilk just until moist
6. Drop by tablespoons onto fruit mixture (about 9 times) and sprinkle with sugar if desired
7. Bake at 400 until nice and bubbly, about 30-35 minutes
8. Let cool and enjoy! For an added indulgence, serve with whip cream or ice cream
Go HERE to see additional Recipes on Addicted to Saving
Recipe adapted from All Recipes
The post Berry Cobbler with Whole Wheat Flour Recipe appeared first on AddictedToSaving.com.
]]>The post Quinoa Breakfast With Fried Egg Recipe appeared first on AddictedToSaving.com.
]]>

**Pin this Recipe**
Today’s recipe carries on my love for all things quinoa. I have leftover quinoa in my fridge at all times so that I can easily cook up recipes like this one! I have been looking for new quinoa recipes and lately I have been trying out Quinoa breakfast recipes! To see more Quinoa recipes I’ve posted, go HERE to my Pinterest Page devoted entirely to Quinoa!
This recipe is beyond easy to create. You can cook up fresh quinoa or use leftover quinoa. Besides preparing the quinoa, all you need to do is cook the spinach and fry an egg. How simple is that?
If you have fun recipes that include quinoa, I would love to hear them! Leave a comment with your recipes!
Quinoa Breakfast with Fried egg
Ingredients 
1 egg
1/3 cup cooked quinoa
¼ cup diced carrot
½ tbsp butter
A handful of fresh spinach
¼ cup cucumber, peeled and chopped
1 tbsp EVOO
salt and pepper
Directions
1. Cook quinoa according to package
2. While quinoa is cooking dice carrot and cucumber
3. Add ½ tbsp. butter to skillet and melt on medium low
4. Add spinach and cook until wilted (2-3 minutes), then set aside
5. Add additional ½ tbsp. butter to skillet and melt on medium low
6. Crack egg in skillet and fry on each side (1-2 minutes per side)
7. Place cooked quinoa in bowl, and pour on EVOO and mix well.
8. Add spinach and then the egg to quinoa, then top with diced vegetables. Season with salt and pepper according to taste and enjoy!
Go HERE to see all Recipes posted on Addicted to Saving
Recipe adapted from Whole Living
The post Quinoa Breakfast With Fried Egg Recipe appeared first on AddictedToSaving.com.
]]>The post Chicken w/ Lemon and Asparagus Rice Recipe appeared first on AddictedToSaving.com.
]]>I am a member of the Collective Bias® Social Fabric® Community. This shop has been compensated as part of a social shopper insights study for Collective Bias® and Tyson. #cbias #SocialFabric #GrilledAndReady As always, all thoughts and opinions are 100% my own.


**Pin this Recipe to Pinterest**
Have you tried Tyson “Grilled and Ready” Chicken? I was given the opportunity to cook with Tyson “Grilled and Ready” chicken and to create a simple and yet healthy meal. I jumped at the challenge. Very seldom do I follow recipes 100%. In fact, when I have free time, one of my favorite things to do is to experiment and create healthier recipes in the kitchen. Eating and living healthy is important to my family so simple, fresh and healthy meals are a pivotal part of our lives.
To see my journey in photos, head to my Google+ Album HERE.

To prepare for this challenge, I headed to Walmart to purchase Tyson “Grilled and Ready” frozen chicken. I was impressed by the vast variety to choose from both in the refrigerated and frozen food sections. I opted to purchase the Tyson Fully Cooked Frozen Chicken Breast Fillets. I wanted to purchase full chicken breast fillets (versus chicken strips) because the fillets would be more versatile with my meal.
Once I headed home, I started thinking about an easy and yet healthy and summery meal I could create using my chicken. I decided to make Chicken with Lemon & Asparagus Rice. I know that both lemon and asparagus are plentiful in the summer and their flavors along with grilled chicken and rice would create a tasty and yet well rounded meal.
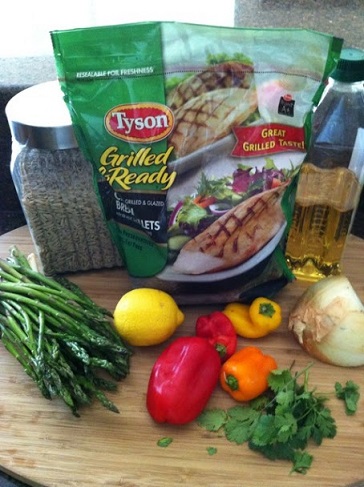
I gathered my ingredients for my meal. I prepared this recipe two ways – once with brown rice and once with whole grain orzo. My recipe below will be the same whether you use orzo or rice. If you are gluten free, make sure you use rice as orzo is actually a pasta and it includes gluten. (My pictures in this post show the orzo.)
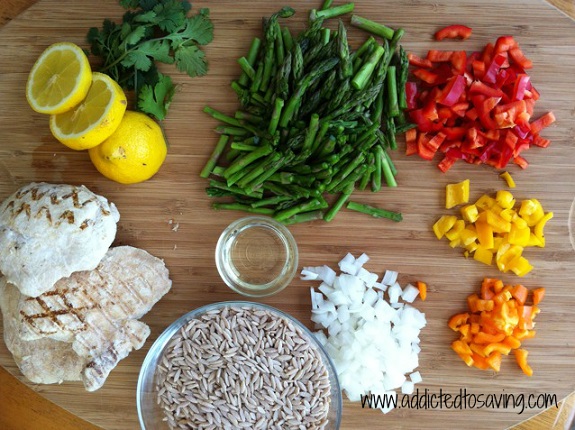
This recipe does not involve too much prep work. The most work you will have to do is chop your asparagus, onion, peppers and lemon. And while you are chopping, preheat the oven to 375 for your chicken. Once your oven is preheated, pop a cookie tray with your chicken into the oven.
Meanwhile, start sautéing your onion and peppers. Then, add your rice (or risotto) and toast the grains until they turn a little brighter in color. Add the water, butter and lemon and then simmer until it is cooked. Once it is finished, add your asparagus and a little salt and pepper to taste. Garnish with cilantro, and it is done!
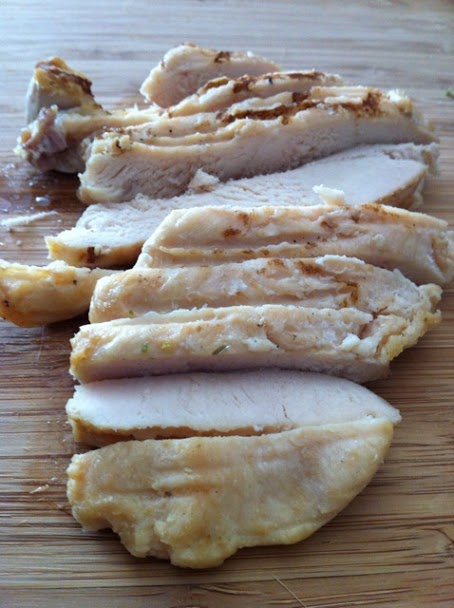
Once the chicken was finished cooking, I decided to chop the chicken into strips. However, you can keep the chicken in fillets as well. This is entirely up to you. I topped the Lemon & Asparagus Rice with the cut chicken strips.
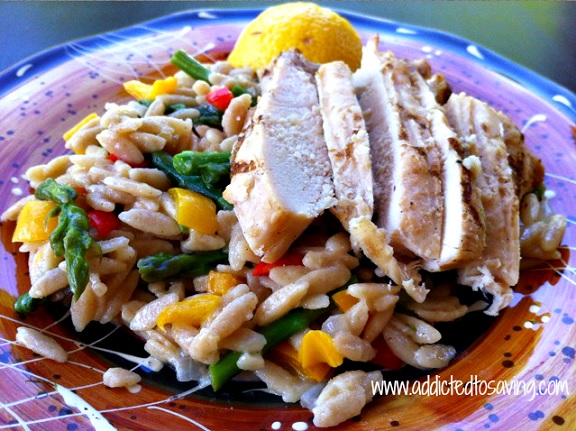
This meal came out excellent. The Tyson “Grilled and Ready” Chicken was moist and it was perfectly seasoned and tasted like it had been grilled and not baked in my oven. The chicken went perfectly with the lemon asparagus rice. The lemony flavor was not overpowering and gave the meal a much lighter flavor. This was a perfectly well rounded meal in that it has the protein from the chicken, carbs from the rice or risotto and vitamins and nutrients from the asparagus and peppers. This was a hit in my house!
Chicken with Lemon & Asparagus Rice Recipe
Ingredients
1 T olive oil
½ Onion Diced (approximately ½ a cup)
1 cup Peppers Diced (I used a combination of red, yellow and orange peppers)
1 1/2 cups Rice or Risotto
3 cups water
2 tablespoons unsalted butter
2 lemon slice (1 inch thick)
Lemon Zest
1 lb fresh asparagus (cut into thirds)
Salt & Pepper
Cilantro (for garnish)
Directions
1) Heat the oil in a saucepan. Saute onion and peppers until softened.
2) Add rice and toast for a couple of minutes.
3) Add water, butter and lemon slices and zest. Bring to a boil.
4) Reduce heat, simmer on low for approximately 25 minutes
5) In a separate pot (I often use a deep frying pan) steam asparagus in just a little water until the asparagus turns a brighter shade of green. (Approximately 4 minutes)
6) Drain asparagus once it is cooked.
7) When rice is completed cooking, season with salt & pepper, add cooked asparagus and garnish with cilantro.
8) Top rice with grilled chicken.
9) Enjoy!
Recipe adapted from Food Network.com
To stay up to date on new Tyson products, offers and more, follow Tyson Foods on Twitter at @TysonFoods and “like” Tyson on Facebook HERE.
I am a member of the Collective Bias® Social Fabric® Community. This shop has been compensated as part of a social shopper insights study for Collective Bias® and Tyson. #cbias #SocialFabric #GrilledAndReady” As always, all thoughts and opinions are 100% my own.
The post Chicken w/ Lemon and Asparagus Rice Recipe appeared first on AddictedToSaving.com.
]]>The post Kale Chips Recipe (3 Ingredients!) appeared first on AddictedToSaving.com.
]]>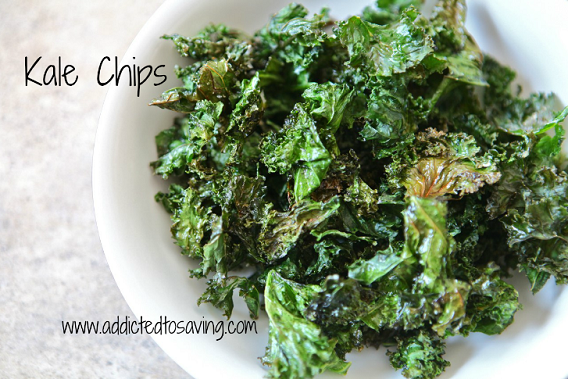
)
**Pin this Recipe to Pinterest**
If you are looking for quick snack that is SUPER healthy, you need to try making Kale Chips. The main ingredient is Kale and the two other ingredients you need you should have in your stockpile! Kale is an excellent source of vitamins and minerals like Vitamin K, Vitamin A, Vitamin B6, Folate, Potassium, Calcium and more. My husband and I first starting buying kale when we started a 10 day juice cleanse over a year ago. I have to admit that I am not a fan of Kale juiced (my hubby likes it). But I do like this recipe! The Kale chips are crispy and with the salt, they make a fabulous salty snack!
Kale Chips Recipe
Ingredients
Any amount of kale roughly chopped, with the big stem removed
EVOO
Salt
Directions
1. Preheat oven to 350 degrees
2. Chop kale then place in bowl and coat with EVOO
3. Mix well, place on parchment paper on baking sheet and sprinkle with salt
4. Bake for 12-14 minutes until leaves are browned
Go HERE to see additional Recipes on Addicted to Saving
The post Kale Chips Recipe (3 Ingredients!) appeared first on AddictedToSaving.com.
]]>The post Southwestern Chopped Salad w/ Cilantro Lime Dressing Recipe appeared first on AddictedToSaving.com.
]]>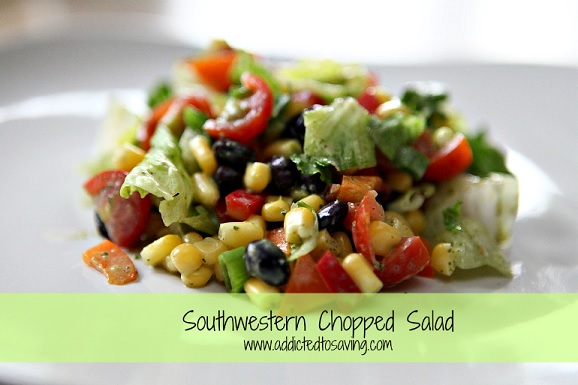

I love summertime. Well, I don’t love Florida humidity in the summertime… but I LOVE summertime fruits and veggies. Everything is ripe, so tasty and so good. One of the herbs I have been experimenting a lot with lately is cilantro. It seems like most people have very strong feelings for or against cilantro. People either love it or hate it. I developed an intense love for cilantro when I made my Cilantro & Honey Dressing. Since then, I’ve experimented with cilantro in so many different ways and have found that I really do love its flavor.
This Southwestern Chopped Salad with Cilantro Dressing recipe is oh so good. If you are not a fan of cilantro, you can very easily make this salad and substitute the Cilantro Lime Dressing for a different dressing. However, I highly recommend you try this recipe! The Greek Yogurt gives the recipe a creamy tanginess that is refreshing and light.
To begin making your salad, cut up your veggies. Remember that the more colors that you have on your plate, the more vitamins and nutrients you are nourishing your body with!
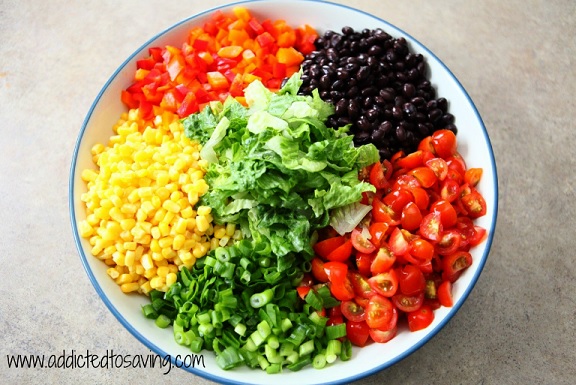

Prepare your Cilantro Lime Salad Dressing (recipe is below)
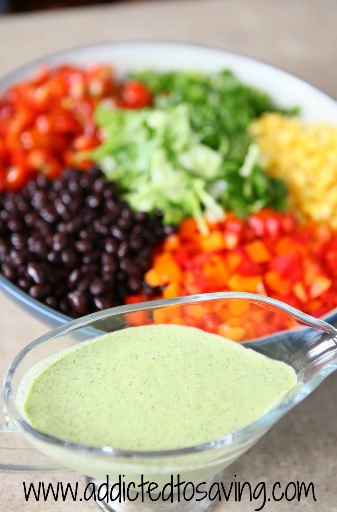
Plate your Southwestern Chopped Salad by itself or along with a lean meat or seafood for a healthy meal.
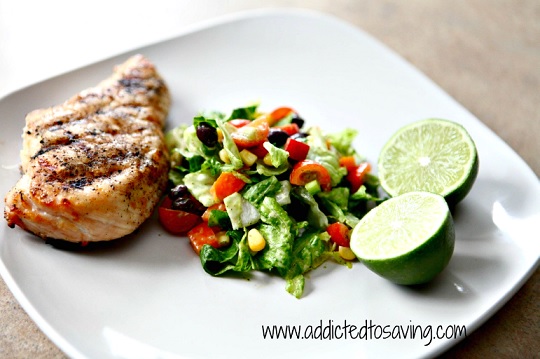
Southwestern Chopped Salad with Cilantro Lime Dressing
Salad Ingredients
1 head of romaine lettuce, finely chopped
1 pint of grape tomatoes, chopped into fourths
5-6 green onions, chopped
1-2 sweet peppers, chopped (I used orange and red)
1 can of black beans, rinsed and drained
2 cups of corn (I used frozen)
Salad Instructions
1. Chop all necessary ingredients (lettuce, tomatoes, green onions, peppers)
2. Place chopped ingredients along with beans and corn in a bowl and mix well
3. Dress with Cilantro-Lime dressing immediately before serving and enjoy!
4. If so desired, serve as a side along a piece of grilled chicken, or chop up the chicken and put it in the salad for an added bit of protein.
Cilantro Lime Dressing Ingredients
1 cup of cilantro (without the stems)
¼ cup of lime juice (about 2 limes)
¼ cup of EVOO
½ cup of plain Greek yogurt
1 ½ tsp of white vinegar
2-3 garlic cloves
¼ tsp of salt
1/8 tsp of pepper
Dressing Instructions
1. Place all ingredients into a food processor and blend away.
2. Adjust seasonings as needed according to taste preference.
Go HERE to see all recipes posted on Addicted to Saving
This recipe was adapted from The Garden Grazer
The post Southwestern Chopped Salad w/ Cilantro Lime Dressing Recipe appeared first on AddictedToSaving.com.
]]>The post Parmesan Zucchini Crisps Recipe with Kraft Fresh Take #FreshTake #cbias appeared first on AddictedToSaving.com.
]]>

**Pin on Pinterest**
I am a member of the Collective Bias® Social Fabric® Community. This shop has been compensated as part of a social shopper insights study for Collective Bias® and their client. As always, all thoughts and opinions are 100% my own.
Have you tried Kraft Fresh Take? I have used Kraft Fresh Take to create an easy dinner using it as a breading for chicken, ground beef and even fish. We love it. So when I was given the challenge to take Kraft Fresh Take and make a unique recipe for my family, I jumped at it.
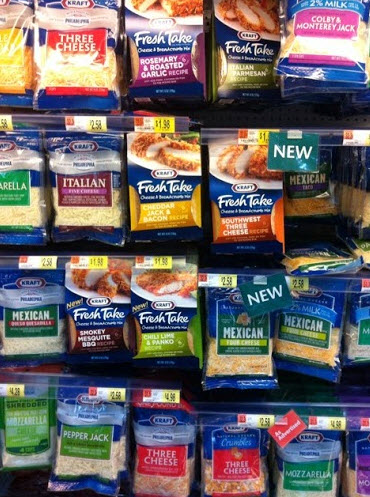
I headed to Walmart to purchase Kraft Fresh Take. I found it in the dairy section next to the Kraft Shredded Cheese. There were so many tasty flavor combinations to choose from. While you are at Walmart, between now and 7/31/13, be on the lookout for peelies aka immediately redeemable coupons found on chicken in Walmart’s meat department. The coupon will take $1.00 off the price of one chicken item when you buy one Kraft Fresh Take!
Kraft Fresh Take is a meal kit that provides us with a “fresh take” on any meal. Half of the Kraft Fresh Take is the breadcrumb mix and the other half is the cheese mix. I love how the mixes are perfectly portioned and kept in separate bags so as to prevent moisture from damaging the crunch of the breadcrumbs.

For my recipe, I decided to make an appetizer using Kraft Fresh Take. I wanted my appetizer to be family friendly and to also have a healthy spin on it. One vegetable that I love cooking with is zucchini. I love it baked, roasted, sautéed, steamed and grilled. While I love zucchini in all of its forms, I know that many kids don’t like it. So my goal was to take the splendid crunchiness and cheesiness of Kraft Fresh Take and combine it with zucchini to make a family favorite appetizer.
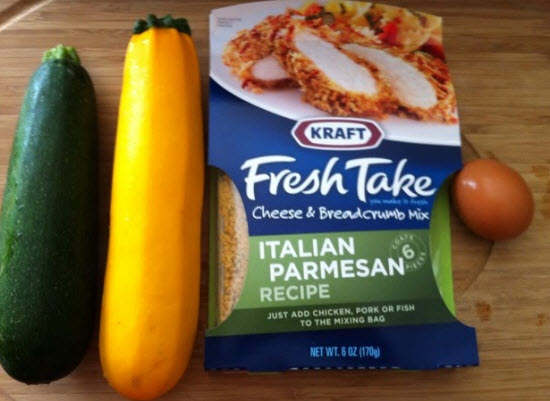
To make my Parmesan Zucchini Crisps, you will need just three ingredients (well, if you use two types of squash like I did, you will actually need four ingredients). You need one package of Kraft Fresh Take Italian Parmesan, one egg and squash. I used one yellow squash and one zucchini.
To prepare this appetizer, pour the breadcrumbs, cheese and cracked egg into three separate bowls. Beat the egg with a fork until fluffly. Cut the zucchini into ¼ inch rounds. Do your best to cut the zucchini into same sizes to insure that they bake evenly.
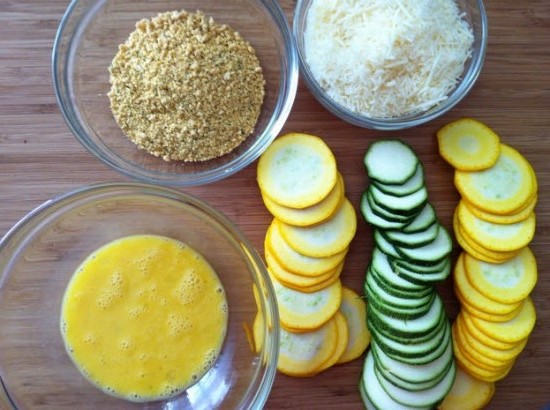
Dip the sliced zucchini into the egg and then into the Kraft Fresh Take breadcrumbs. Place onto a greased cookie sheet.

Place in oven at 450 degrees. Set timer for 15 minutes. After 15 minutes, take the cookie sheet out and top each baked zucchini with the parmesan cheese from your Kraft Fresh Take package. Place the cookie sheet back into the oven for five more minutes or until cheese is melted.

Once cheese is melted, take the Parmesan Zucchini Crisps out of the oven and enjoy. You will love the crunchy goodness that each flavorful bite has. You can eat these bites as is, or you can dip into marinara sauce. I took my Parmesan Zucchini Crisps and shared them with one of my favorite kiddos who also happens to be my next door neighbor. He self admittedly had never had zucchini before trying my Parmesan Zucchini Crisps. He loved them. In fact, he asked for seconds and then thirds. (See my Google Plus album for proof! :))

Using Kraft Fresh Take saved me lots of time when making this recipe. I didn’t have to use any additional seasoning as the Kraft Fresh Take had wonderful flavor. I never would have been able to make Parmesan Zucchini Crisps with just 3 ingredients if it wasn’t for using Kraft Fresh Take!
Go HERE to view my Google + Album documenting my entire experience shopping for and cooking with Kraft Fresh Take!
Parmesan Zucchini Crisps
Ingredients
1 pkg Kraft Fresh Take Italian Parmesan
1 pound Zucchini
1 egg
Directions
1. Preheat oven to 450 degrees
2. Slice zucchini into ¼ inch zucchini rounds
3. With a fork beat egg until fluffy.
4. Pour Kraft Fresh Take’s cheese into one bowl and breadcrumbs into a second bowl.
5. Dip zucchini rounds into egg. Coat both sides with egg.
6. Dip zucchini into breadcrumbs and coat both sides.
7. Place zucchini onto a greased cookie sheet.
8. Place in oven for 15 minutes.
9. Take cookie sheet out and top each zucchini round with parmesan cheese. Return to oven for another 5 minutes (or until top has browned slightly).
10. Serve and enjoy!
Right now, watch for the Kraft Fresh Possibilities Tour truck. The tour truck is making stops across the country from now through the end of July! To see if they are making a stop in your town you can check out the Fresh Possibilities Tour website HERE
Also, make sure you check out Live SoFab Summer Digital Magazine to get great ideas for summer while using Kraft Fresh Take.
I am a member of the Collective Bias® Social Fabric® Community. This shop has been compensated as part of a social shopper insights study for Collective Bias® and their client. As always, all thoughts and opinions are 100% my own.
The post Parmesan Zucchini Crisps Recipe with Kraft Fresh Take #FreshTake #cbias appeared first on AddictedToSaving.com.
]]>The post This Week’s Recipe Recap appeared first on AddictedToSaving.com.
]]>
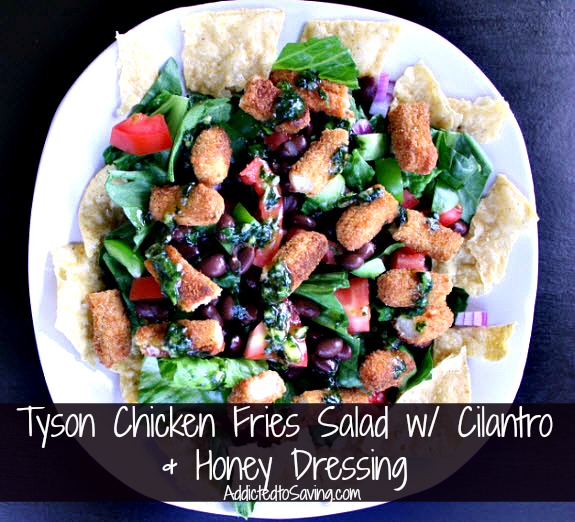
Tyson Chicken Fries Salad with Cilantro & Honey Dressing Recipe
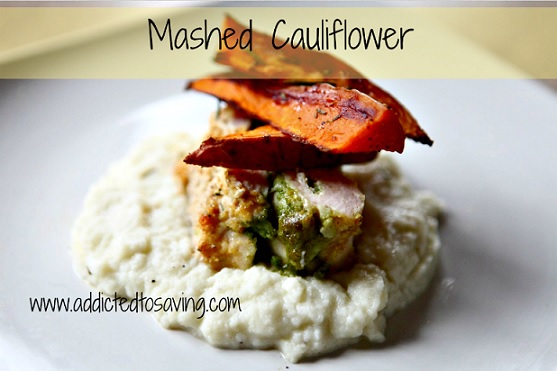
Mashed Cauliflower Recipe
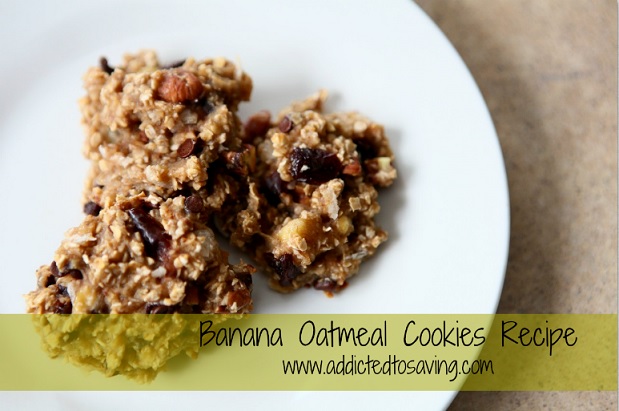
Banana Oatmeal Cookies Recipe
Barbecue Chicken Quinoa Salad Recipe
White Bean Stuffed Peppers Recipe
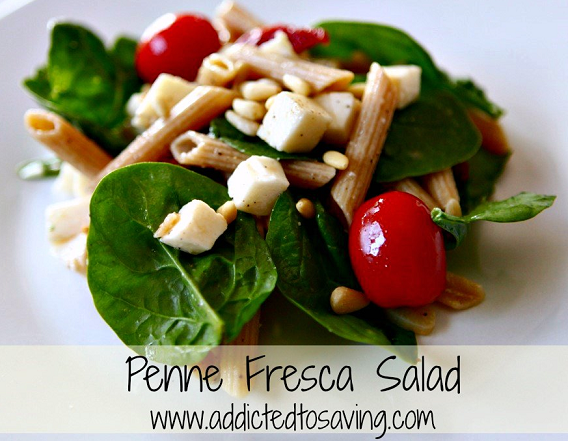
Penne Fresca Salad Recipe
The post This Week’s Recipe Recap appeared first on AddictedToSaving.com.
]]>The post Penne Fresca Salad Recipe appeared first on AddictedToSaving.com.
]]>
**Pin on Pinterest**
One of my favorite side dishes (and even main dishes) in the summer is pasta salads. While I enjoy creamy salads, I love lighter salads that focus on fresh flavors and locally grown veggies. This Penne Fresca Salad is so so good and so very easy to make. In Italian, Fresca means “cool” or “fresh”. So for “fresca recipes”, the ingredients are typically not cooked and are ready to serve. And that is what makes this recipe so simple to make.
If you are gluten free, like me, this recipe is easily adapted into a gluten free meal by using gluten free pasta. While I haven’t tasted a plain gluten free pasta that I fully love, I’ve found that as long as my sauce and foods on my pasta are flavorful, I don’t realize that my pasta is no longer wheat based.
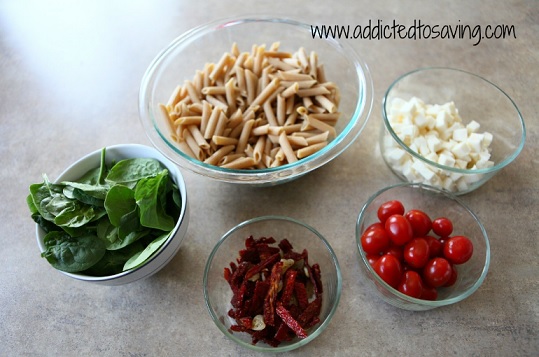
The ingredients in this recipe are reliant on fresh spinach and cherry tomatoes. If you don’t have cherry tomatoes, you can always substitute larger tomatoes that you cut into bite sized pieces. You will want to deseed and remove the middle juices if you do use larger tomatoes to prevent your salad from getting too watered down. This recipe also requires fresh mozzarella which is just so so good. If you want to add a Greek twist to this recipe, you can substitute feta cheese for the mozzarella cheese. If you make any variations of this recipe, I would love to hear what you did and how your salad turned out!

Penne Tomato Salad
Ingredients 
8 ounces cooked penne
½ pint grape tomatoes
8 ounces fresh mozzarella cubed
½ cup sun-dried tomatoes, slivered
2 garlic cloves, sliced or minced
1-2 cups of fresh spinach or arugula
salt and pepper
about ¼ cup of EVOO
juice from one lemon
Directions
1. Cook the penne according to package, then rinse in cold water and place into large bowl.
2. Saute garlic cloves in EVOO until lightly browned, then add in sun-dried tomatoes and cook about 1-2 more minutes; season with salt and pepper. Remove to a plate and let cool to room temperature (to speed up the process you can put it in the fridge or freezer).
3. Once room temperature, add sautéed mix to penne and drizzle with EVOO until lightly coated, then add in tomatoes and mozzarella.
4. Season mix with salt and pepper, add in spinach, drizzle with lemon juice, then mix well one last time.
5. Place on plate and top with nuts if desired (toasted pine nuts give nice texture) and enjoy!
Go HERE to see additional Recipes on Addicted to Saving
This recipe is adapted from Recipe International
The post Penne Fresca Salad Recipe appeared first on AddictedToSaving.com.
]]>The post Banana Oatmeal Cookies Recipe appeared first on AddictedToSaving.com.
]]>)
**Pin This Recipe**
If you are looking for a simple cookie recipe, this is it. This Banana Oatmeal Cookies Recipe can be made with as little as two ingredients. No, that isn’t a typo – two ingredients! You don’t have to add oil or butter to make these easy cookies making these cookies so much healthier than typical cookie recipes! The base of these Banana Oatmeal Cookies are fresh, ripe bananas and quick oats! And, if you eat gluten free, you can very easily make these cookies gluten free! Just make sure you use Gluten Free Quick Oats!
Once you have your base for your cookies, you can either make your cookies, or you can add in mix-ins! The mix-ins can be any ingredients you enjoy in cookies. White or regular chocolate chips, dried fruit and/or coconut would make excellent fillers! (See the recipe below for the ingredients in my pictured cookies!)
To start, mash you ripe bananas with the oats. (recipe is below)

Add the mix-ins you are interested in (recipe is below)
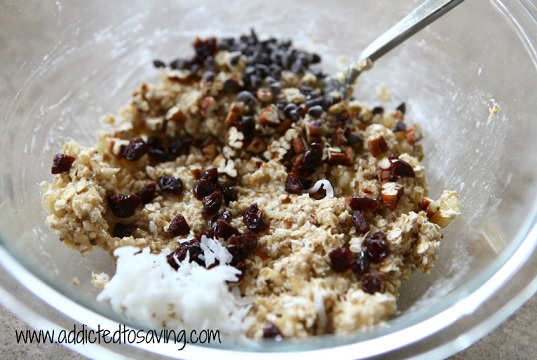 Place spoonfuls of cookie dough on a greased cookie sheet (recipe is below)

Banana-Oatmeal Cookies
Ingredients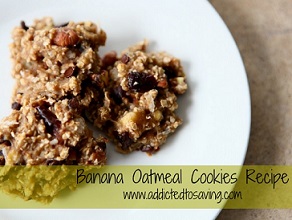
2 large older bananas
1 cup of quick oats
Mix-ins of your choice
(My pictured cookies have – a handful of chopped pecans, a handful of chopped dried cherries, a handful of coconut, a handful of mini chocolate chips, and about 1 tsp of cinnamon)
Directions
1. Preheat oven to 350 degrees
2. Place bananas and quick oats in a bowl and mash together until oats are completed sticking to bananas
3. Mix-in whatever ingredients you would like! Just don’t go too crazy that the base is unable to stick together
4. Place by spoonfuls onto a GREASED cookie sheet
5. Bake for 15 minutes at 350 degrees
6. Let cool and enjoy!
Go HERE to see all Recipes posted on Addicted to Saving
Recipe adapted from Recipe by Photo
The post Banana Oatmeal Cookies Recipe appeared first on AddictedToSaving.com.
]]>The post Mashed Cauliflower Recipe appeared first on AddictedToSaving.com.
]]>

I absolutely love this recipe. I know that within the past year, I would see a plethora of pureed and mashed cauliflower recipes online and on pinterest. I never tried any of them until this past winter when I had cauliflower in my fruit & veggie coop bin. I knew right away I wanted to try using cauliflower in different ways than typical steamed or roasted cauliflower. (In fact, go HERE to see my Cauliflower Pizza Crust Recipe!) For the mashed cauliflower above, I didn’t follow any recipes. Instead, I pretty much followed the same steps as making regular mashed potatoes except alternated the potatoes for cauliflower! Pictured above is the Mashed Cauliflower topped with my Sweet Potato Wedges Recipe and Pesto & Cheese Stuffed Chicken Recipe. YUMMO.
Below is a picture of the cauliflower as it was pureed in the food processor. (recipe is below)
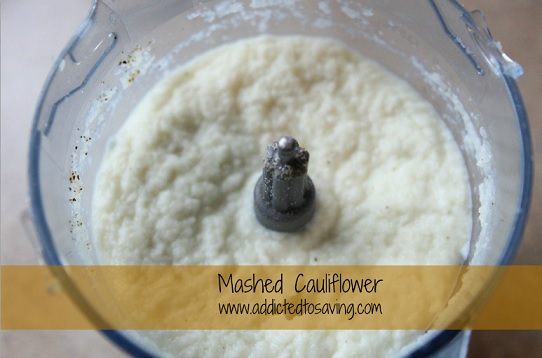
Finished Mashed Cauliflower pictured below
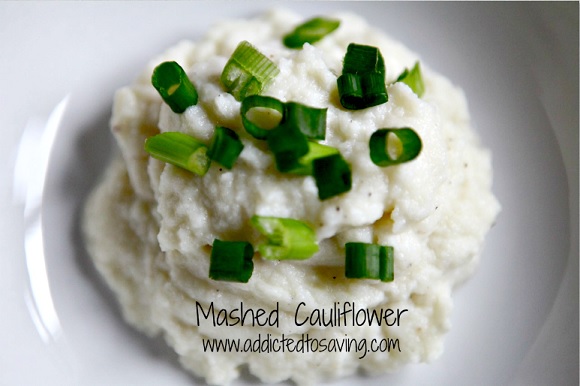
Mashed Cauliflower Recipe
Ingredients
1 head of cauliflower, chopped
1 ½ tbsp. of butter
¼ cup of milk
1/3 cup of grated parmesan cheese
salt and pepper to taste
green onions for garnish
Directions
1. Chop cauliflower into small chunks and place in boiling water for 8 minutes
2. Drain cauliflower well, then place in a food processor and run for 1-2 minutes
3. Add in butter, milk, cheese and process again until at desired consistency (2-3 minutes)
4. Add in salt and pepper and process one last time
5. Remove and add green onions on top for garnish before serving
Enjoy!
Go HERE to see all Recipes posted on Addicted to Saving
The post Mashed Cauliflower Recipe appeared first on AddictedToSaving.com.
]]>The post Tyson Chicken Fries Salad with Cilantro & Honey Dressing Recipe #cbias #ChickenFryTime appeared first on AddictedToSaving.com.
]]>

I am a member of the Collective Bias® Social Fabric® Community. This shop has been compensated as part of a social shopper insights study for Collective Bias® and Tyson. As always, all thoughts and opinions are 100% my own. #cbias #SocialFabric
One of my favorite things to do is cook. While I like to follow recipes, I LOVE to create my own concoctions. In fact, if I am following a recipe, about 99% of the time, I am altering it. When I was given the opportunity to head to Sam’s Club and attend an in-store demonstration of Tyson Chicken Fries and then create a meal incorporating Tyson Chicken Fries, I jumped at it!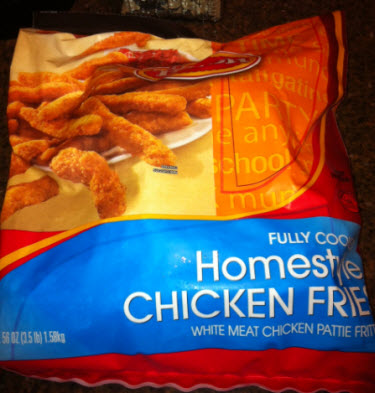
When I was at Sam’s Club, I immediately saw that they have a huge selection of Tyson products to choose from. There are cases and cases of Tyson Chicken Nuggets, Tyson Chicken Patties, Tyson Any’tizers and more.

The in-store Tyson Chicken Fries demonstration was held at the end of the aisle near the end cap and that is where I found the bags of Tyson Chicken Fries. It was obvious that Tyson Chicken Fries are popular because as you can see, the Tyson Chicken Fries were picked over!

I gave myself a personal challenge to create a meal using Tyson Chicken Fries that was quick, fresh and satisfying. In fact, I wanted to be able to make this entire meal during the time it took to cook the Chicken Fries (they take 12-15 minutes to cook)!
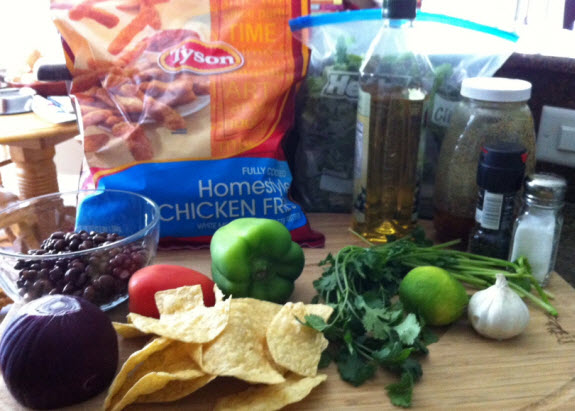
One of the ways my husband and I will try to eat healthy is by eating salads. I decided that utilizing my Tyson Chicken Fries, I would make a Chicken Salad with a Cilantro & Honey Dressing. I wanted the salad to have a Mexican twist and also utilize all of the fresh produce in my fridge.
I gathered all of my ingredients and preheat the oven at 400 degrees. During the time it took to preheat the oven, I was able to put my Tyson Chicken Fries on the cookie tray, wash my produce and begin cutting and putting the salad dressing ingredients into my food processor. (See below for the recipe.) At that point, the buzzer went off telling me my oven was preheated.

I popped the tray of Chicken Fries into the oven, finished putting the dressing ingredients into the food processor and pureed my Cilantro & Honey Salad Dressing. I taste tested the dressing and realized it was AMAZING. Originally I was going to add vinegar to the dressing but I realized it was perfect just the way it was. I still had 8 minutes left before the chicken was finished cooking. For the salad, I then finished chopping the onions, tomatoes and green peppers, crushed the tortilla chips and drained and rinsed the black beans.
When the timer went off for the Tyson Chicken Fries, the dressing was complete and the salad ingredients were chopped. All I had to do was cut the chicken (I cut the fries into thirds) and plate the salad.

This salad was SO SO good. In fact, as soon as I finished snapping pictures of it, my husband grabbed the plate and devoured it within minutes. The Cilantro & Honey Salad Dressing perfectly complimented the Tyson Chicken Fries. (The dressing tasted like one of my favorite salad dressings at Cheesecake Factory.) In fact, if you wanted to make the dressing and use it as a dip for the chicken fries without the salad, that would work too.
I was really excited to see the meal that I was able to create. I would eat this once a day – it was just that good.
Cilantro & Honey Salad Dressing & Dip
Ingredients
1/2 cup extra virgin olive oil
1 big handful of Cilantro (around 1/3 cup)
1 clove garlic
Juice of one Lime
Zest of one Lime (I used the zest of about 1/3 of a Lime)
1 T honey
Salt & Pepper – (approximately 1/4 teaspoon – as needed)
Directions
1) Place all ingredients in a food processor.
2) Puree until smooth.
3) Enjoy!
I would buy Tyson Chicken Fries again in a heartbeat. The sky is the limit when it comes to meals I could create showcasing these Tyson Chicken Fries. I could create chicken salads with blue cheese dressing, chicken salads with ranch dressing, Asian chicken salads, Chicken Wraps, etc etc. Have you tried Tyson Chicken Fries? Have you made any fun meals with them? I would love to hear!
Make sure you “like” Club Tyson on Facebook. Soon, they will be holding a Six Flags ticket giveaway! Go HERE to like Club Tyson.
I am a member of the Collective Bias® Social Fabric® Community. This shop has been compensated as part of a social shopper insights study for Collective Bias® and Tyson. As always, all thoughts and opinions are 100% my own. #cbias #SocialFabric
The post Tyson Chicken Fries Salad with Cilantro & Honey Dressing Recipe #cbias #ChickenFryTime appeared first on AddictedToSaving.com.
]]>The post Quinoa Tabbouleh Salad Recipe appeared first on AddictedToSaving.com.
]]>

**Pin This Recipe**
If I could eat quinoa every day of the week, I would. I love the fact that Quinoa blends so nicely with a multitude of flavors. It doesn’t matter if I’m making Mexican food, Italian food, cookies or salads, the quinoa absorbs flavors very nicely and works well with different spices, oils, vinegars and veggies. Of course, I love that it packs a nutritional punch giving us 8 grams of protein per serving!
This salad relies on two fresh herbs from your garden – mint and parsley. And it relies on fresh tomatoes, cucumber and lemons. All of these ingredients are plentiful AND inexpensive in the summer so this makes a perfect side dish or main meal! Of course, I love this recipe because it is gluten free and perfect if you are a vegetarian or limiting your meat intake!
Below are the ingredients to the Quinoa Tabbouleh Salad
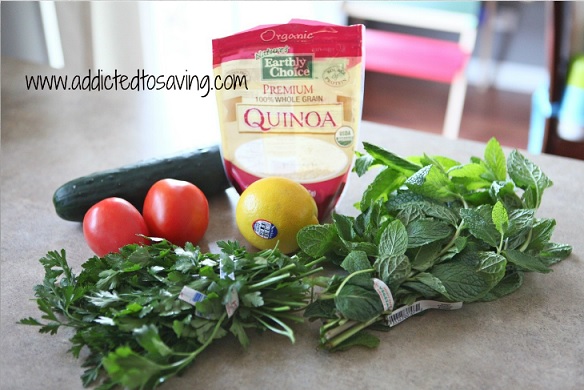
Mix the cooked quinoa with the remaining ingredients as shown below.
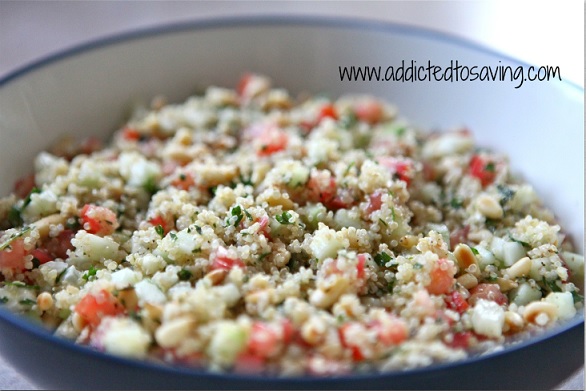
Quinoa Tabbouleh Salad Recipe
Ingredients
1 ½ cups of pre-cooked quinoa
1 cup of finely diced tomatoes, with seeds removed (about 2 tomatoes)
1 cup of finely diced cucumbers (about 1 cucumber)
A handful of fresh mint, finely chopped
A handful of fresh parsley, finely chopped
Juice from one lemon
EVOO, salt and pepper
½ – ¼ cup of toasted pine nuts (optional)
Directions
1. Cook your quinoa (2 parts water to 1 part quinoa), then set aside in a bowl and let cool. I like to cook my quinoa in my rice cooker – just make sure to watch it towards the end so it doesn’t burn.
2. While quinoa is cooking, chop up tomatoes, cucumbers, mint and parsley. I usually use a food processor to chop the mint and parsley together.
3. Add mint and parsley to cooked quinoa and stir to distribute, then add in tomatoes and cucumbers and do the same.
4. After ingredients are mixed, add in the lemon juice, EVOO, salt and pepper (adjust amount to taste) and chill in the fridge for 30 minutes.
5. Add in toasted pine nuts (toast in skillet on low for 10 minutes, stirring occasionally) and mix one last time.
6. Serve with crackers, pita bread, or pita chips. Enjoy!
Go HERE to see additional Recipes posted on Addicted to Saving
Additional Quinoa Recipes
Quinoa Summer Salad Recipe
Apple Quinoa Bites Recipe
Quinoa with Roasted Brussels Sprouts & Red Onion Recipe (Gluten-Free)
The post Quinoa Tabbouleh Salad Recipe appeared first on AddictedToSaving.com.
]]>The post Coconut Mango Bars Recipe appeared first on AddictedToSaving.com.
]]>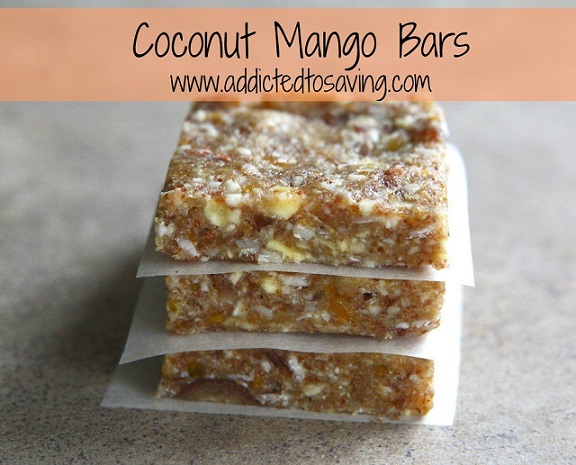

**Pin This Recipe**
I am always looking for healthy, energy packed snacks that will carry me through the afternoon lull. I love this snack because it is gluten-free and so easy to make! You need only 5 ingredient and a food processor. The almonds provide protein and the dried dates and fruits provide fiber! These bars are so much healthier than purchasing prepackaged bars because you know each and every ingredient going into these bars!
My sister-in-law created this recipe with dried mango and coconut. If you prefer different flavors, you can totally switch out the mango or coconut with raisins, craisins, dried apricots, etc. The opportunities are endless for this recipe! And, if you follow the recipe below, taste your mixture after it is processed in the food processor. If you prefer for your bars to have a stronger mango or coconut flavor, you can always add more of that particular ingredient! This is a very forgiving recipe that is hard to mess up!
Once you have mixed and processed the ingredients, gently spread them and press them in a pan (see below for recipe)
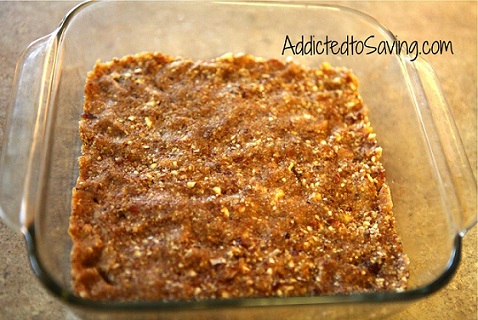
Coconut Mango Bars Recipe
Ingredients 
1 – 1 ¼ cup raw almonds
1 – 1 ¼ cup pitted dates
1 cup dried mango
½ cup coconut (sweetened or unsweetened should work)
¾ – 1 tablespoon of coconut oil
Directions
1. Chop up the almonds in a food processor
2. Add in all other ingredients* and pulse a few times to blend, then let food processor run for 1-4minutes, depending on food processor power**
3. Spread out in an 8×8 or 9×9*** pan and let chill in fridge for 1-2 hours.
4. Slice and enjoy!
Go HERE to see additional Recipes posted on Addicted to Saving
The post Coconut Mango Bars Recipe appeared first on AddictedToSaving.com.
]]>The post Tyson Chicken Nuggets Bumblebees in Springtime #SpringtimeNuggets appeared first on AddictedToSaving.com.
]]>I am a member of the Collective Bias® Social Fabric® Community. This shop has been compensated as part of a social shopper insights study for Collective Bias® and Tyson. #cbias #SocialFabric #SpringtimeNuggets”. As always, all thoughts and opinions are 100% my own.


**Pin this on Pinterest**
When I was given the opportunity to participate in decorating Tyson Chicken Nuggets with a springtime theme, I jumped at it. Since my husband and I are adopting internationally, we realize that by the time our kiddo comes home to us, we will be through much (if not most) of their baby stage and we will be headfirst into parenting a toddler. My goal as a parent will be to create fun and yet nutritious meals for my kiddos that they will enjoy eating. So my brain was spinning when it came time to putting together a Springtime Tyson Chicken Nuggets meal! I was able to get lots of fun decorating ideas on Club Tyson’s Facebook page HERE and I also went to Walmart for additional ideas.

I headed to Walmart to attend their Tyson Chicken Nuggets Springtime Demo. I was able to see ideas of how to make plates of Tyson Chicken Nuggets into smiley faces, rainbows, flowers and more.

While at Walmart, I picked up a bag of Tyson Chicken Nuggets, some ketchup, mustard, barbecue sauce and two potatoes. And yes, of course I used a $0.75 Tyson Chicken Nuggets coupon on my bag of nuggets!
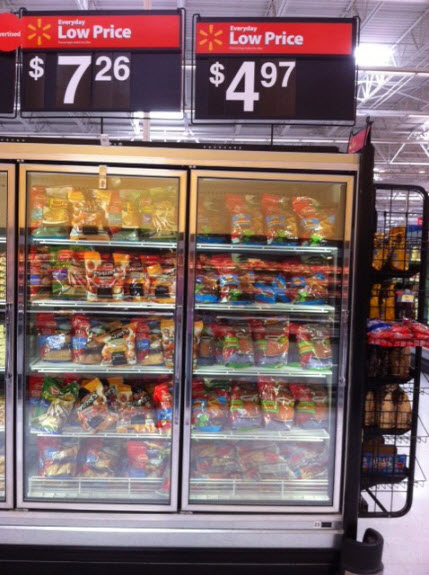
Once I got home, it was time to put my plan into action. My goal was to make an easy meal using my Tyson Chicken Nuggets that was both fun and nutritious. I had a bag of fresh spinach and some celery in my fridge. I also had fresh cornbread muffins and leftover cooked red quinoa that I was planning on using in my meal.
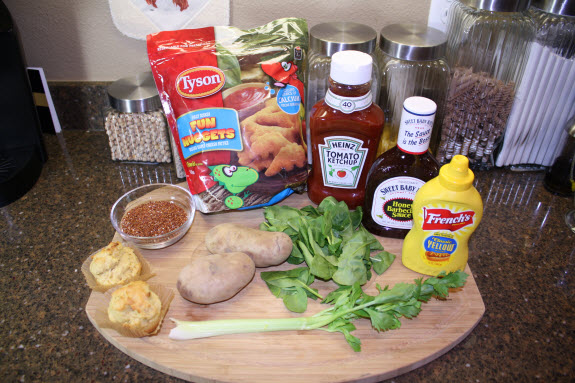
I popped a cookie sheet with Tyson chicken nuggets into the oven.

Meanwhile I boiled & mashed two potatoes and in a separate pot made red quinoa. I took a cornbread muffin that I had made earlier in the day and frosted it with my mashed potatoes. I dipped the frosted muffin into the cooked red quinoa. I chose to use red quinoa because it is so good for you and it looks like fresh soil.
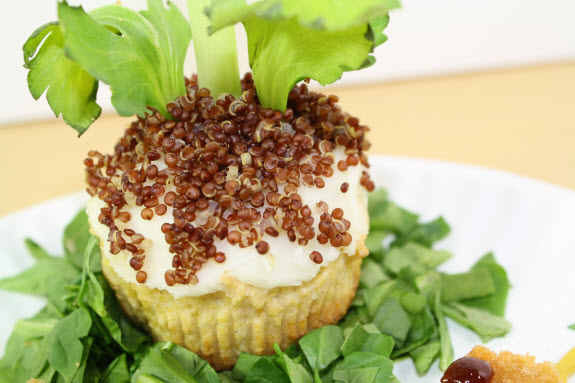
On a cutting board, I placed the cooked Tyson Chicken Nuggets, celery stalk and fresh spinach. I cut the fresh spinach into grass-like strands and the celery I cut into my flower stalk. The celery had to be thick enough to support my chicken-nugget tulip and also stay in the corn muffin base. (And yes, I did use a Mickey Mouse cookie cutter to aid in cutting the chicken nuggets into bee shapes!) I thought I was going to use a carrot (as pictured below) but then decided to stick with celery. You could very easily substitute carrot sticks for celery sticks though!
The really fun part of preparing this meal was when it was time to “paint” the Tyson Chicken Nuggets with condiments like ketchup, mustard and barbecue sauce. The ketchup went onto the nugget that my tulip. The mustard went onto the nugget bumble bees. And the barbecue sauce was the stripes and eyes of the bumble bees.


My finished product with three bumble bees flying to my red tulip!
**Pin this on Pinterest**
I was really pleased with this Tyson Chicken Nuggets Springtime meal! Not only is it colorful and fun, but I was able to sneak some veggies and quinoa into the meal! And don’t worry, just because I don’t have any kiddos yet, the food didn’t go to waste! Hubby enjoyed every last bite!
For more info on Tyson Foods, follow Tyson on Twitter @ClubTysonLive and “like” Tyson Chicken Nuggets on Facebook!
I am a member of the Collective Bias® Social Fabric® Community. This shop has been compensated as part of a social shopper insights study for Collective Bias® and Tyson. #cbias #SocialFabric #SpringtimeNuggets”. As always, all thoughts and opinions are 100% my own.
The post Tyson Chicken Nuggets Bumblebees in Springtime #SpringtimeNuggets appeared first on AddictedToSaving.com.
]]>The post Sweet Potato Wedges Recipe appeared first on AddictedToSaving.com.
]]>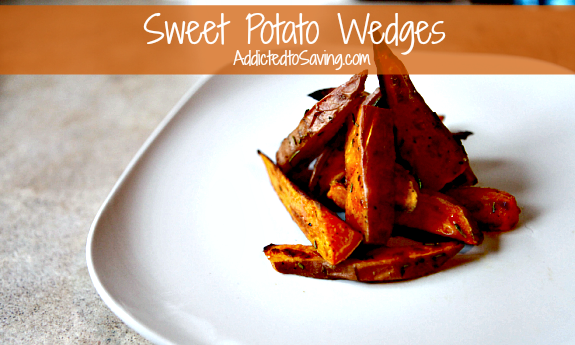

**Pin This Recipe**
One vegetable that I typically don’t purchase a lot of is sweet potatoes. It’s not that I don’t like sweet potatoes, but sweet potatoes haven’t been one of those vegetables that I crave. Every year for holidays, I will make my Sweet Potato Casserole. But besides that, I haven’t played with sweet potato recipes that much. Until my coop. This year, our coop has given us lots of sweet potatoes in our produce bins. I’ve learned that sweet potatoes go excellent in soups, in my black bean sweet potato hash and as Sweet Potato Wedges!
Sweet Potato Wedges are basically thicker sweet potato fries. If you like really crispy fries, you can follow the recipe below but just slice your sweet potatoes into thinner strips. I will usually eat my sweet potato wedges without any dipping sauces but hubby will usually use barbecue sauce or spicy mustard. Sometimes I will make these as as an afternoon snack and other times I will use them as my carb for dinner. I will also switch up the spices below. So, if you are not a fan of rosemary, try making these wedges with cayenne pepper (for a little kick) or brown sugar (for sweetness). I would love to hear how you make your Sweet Potato Wedges! What spices do you use?
Below is the sweet potato cut and mixed with seasoning (recipe is below)
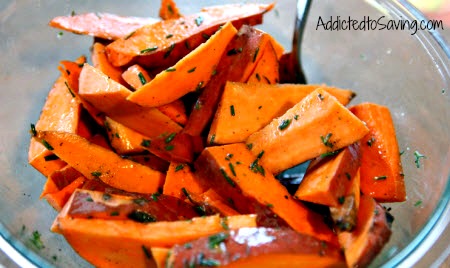
Once sweet potato is covered with oil and seasoning, spread on a cookie tray (recipe is below)
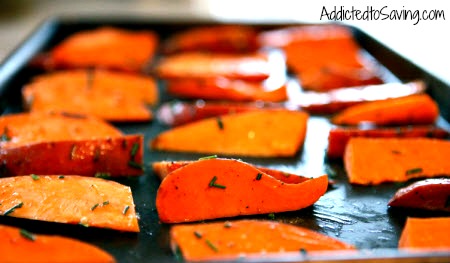
Finished Product


Sweet Potato Wedges
Ingredients
2 sweet potatoes, cut into wedges
1.5 tbsp butter
1.5 tbsp olive oil
1 tbsp or fresh rosemary, chopped (or 2 tsp dried)
salt and pepper to taste
Directions
1. Preheat oven to 450 degrees
2. Cut sweet potatoes into wedges and place in a large bowl. **You can bake them with or without peels. If you keep the peels on, make sure you clean them really well.
3. Melt butter and oil on stove, then add in rosemary, salt and pepper
4. Mix stove ingredients well, then poor over sweet potatoes and stir until evenly coated
5. Place sweet potatoes on cookie sheet, with no overlapping (might need 2 cookie sheets)
6. Bake on top rack (very important! Potatoes will burn if placed on bottom rack). Bake for 20 minutes, turning potatoes over at the 10 minute mark.
7. Remove from cookie sheet and enjoy!
Go HERE to see additional Recipes posted on Addicted to Saving
This recipe was adapted from Women’s Health Magazine
The post Sweet Potato Wedges Recipe appeared first on AddictedToSaving.com.
]]>The post Month of April’s Recipe Recap appeared first on AddictedToSaving.com.
]]>
Caprese Salad Recipe
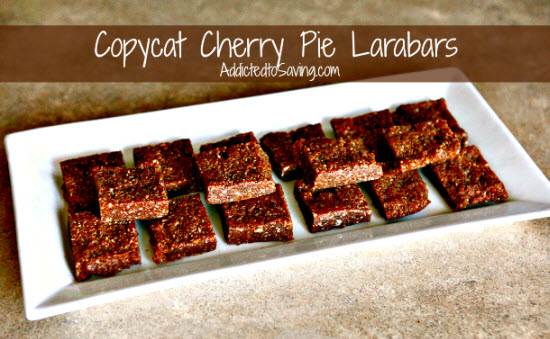
Copycat Cherry Pie Larabars Recipe
Honey Roasted Chickpeas Recipe
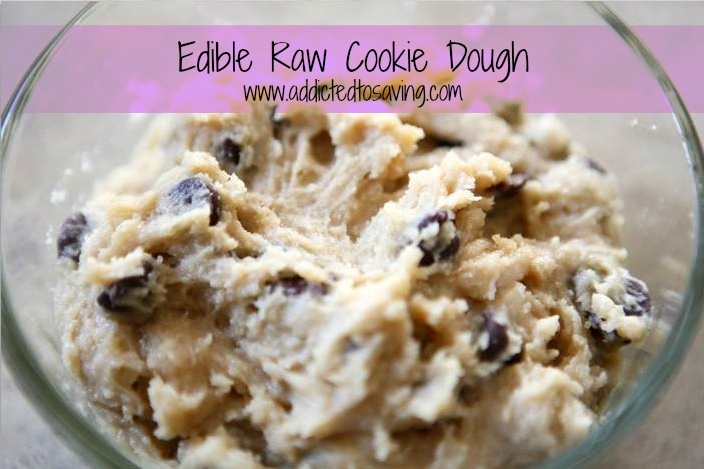
Edible Raw Cookie Dough Recipe
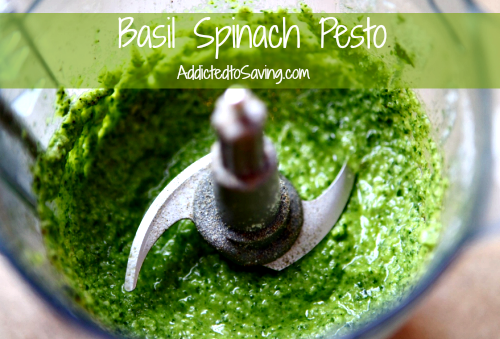
Basil Spinach Pesto Recipe
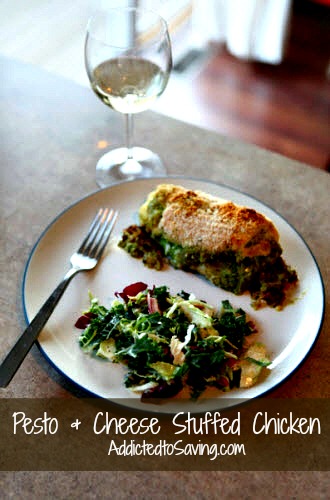
Pesto & Cheese Stuffed Chicken Recipe
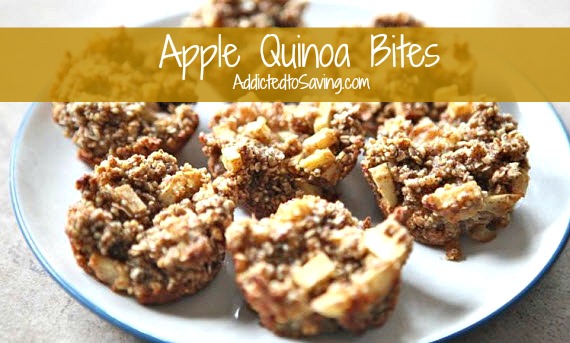
Apple Quinoa Bites Recipe
Homemade Chicken Noodle Soup Recipe
Quinoa Summer Salad Recipe

Cauliflower Pizza Crust Recipe (Gluten-Free)
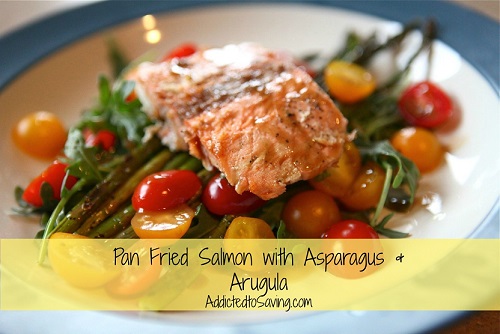
Pan Fried Salmon with Asparagus & Arugula Recipe
The post Month of April’s Recipe Recap appeared first on AddictedToSaving.com.
]]>The post Pan Fried Salmon with Asparagus & Arugula Recipe appeared first on AddictedToSaving.com.
]]>
I could eat salmon every day of the week. I started eating seafood when hubby and I moved to Florida over 9 years ago. Before then, I never ate it. But now, I can’t get enough of it. Especially salmon. Salmon is high in protein and full of heart healthy omega-3 fatty acids. And, it is so easy to prepare. I love to grill it, pan fry it, broil it, bake it, you name it, I’ve done it.
This Pan Fried Salmon recipe is extremely easy to make and was inspired by Houlihan’s. Hubby and I used to go out to eat at Houlihan’s when we lived in Illinois. This recipe is made with asparagus, arugula and tomatoes but you can really substitute the vegetables with whatever you have in your fridge. Try it with broccoli or green beans and regular salad greens and you will have a very similar meal with amazing flavor!
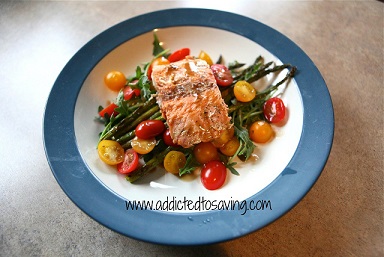
Pan Fried Salmon with Asparagus & Arugula Recipe
Ingredients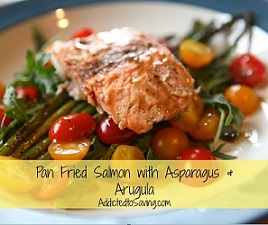
2 6oz filets of salmon
10-15 spears of asparagus
10-15 cherry tomatoes, halved
A handful of arugula
Balsamic Vinaigrette Ingredients
1/4 cup balsamic vinegar
1 teaspoon chives, minced
1 teaspoon parsley, finely chopped
1 1/2 teaspoons mayonnaise
1 teaspoon Dijon mustard
1 teaspoon sugar
3/4 cup olive oil, extra virgin
salt
fresh ground black pepper
Directions
1. Preheat the oven to 400 degrees
2. Drizzle the prepared asparagus with olive oil, spread in a single layer on a baking sheet and sprinkle with salt and pepper; bake for 25 minutes, turning once halfway through.
3. Heat a skillet with olive oil until pan is hot, then place salmon in and cook for about 3-4 minutes on each side, depending on thickness. Salmon should easily flake with a fork when done.
4. In a glass bowl, mix all of the Balsamic Vinaigrette ingredients
4. Place a handful of arugula on plate, top with 5-6 asparagus spears and 5-6 tomatoes. Place salmon on top of salad and drizzle with balsamic vinaigrette.
Enjoy
Balsamic Vinaigrette recipe was taken from Food.com
Go HERE to see all Recipes posted on Addicted to Saving
The post Pan Fried Salmon with Asparagus & Arugula Recipe appeared first on AddictedToSaving.com.
]]>The post Cauliflower Pizza Crust Recipe (Gluten-Free) appeared first on AddictedToSaving.com.
]]>)
**Pin This Recipe**
I am constantly looking for healthy recipes that are outside the box and a good way to make use of the fresh produce in my refrigerator. After going gluten free this past January, one of the meals I’ve missed is pizza. I’ve tried a couple of gluten-free crust mixes as well as Domino’s Gluten Free pizza, but as of yet, I haven’t found one that I really like. So when I saw that I could make cauliflower pizza crust that is gluten-free, I was intrigued! The main component of this cauliflower pizza crust recipe is cauliflower, cheese and eggs. The rest of the ingredients are spices! (And pizza toppings)
This recipe is much easier to make than you would expect! The main tool you need is a food processor. And, while this is not a necessity, if you have a pizza stone to bake your pizza on, it will create a crispier crust, which is good because the cauliflower crust doesn’t quite stay together quite like a flour dough crust would.
To make the crust, pulse chopped cauliflower in your food processor until it looks like a grain (recipe is below)
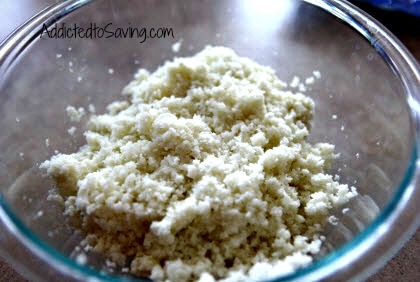
Place the combined cauliflower “dough” mixture on a sprayed cookie sheet, parchment paper or a pizza stone and spread out to a thin layer. (Recipe is below)

Bake cauliflower dough for 15-20 minutes until top is slightly browned. (recipe is below)

Cauliflower Pizza Crust Recipe
Ingredients 
1 cauliflower head
2 cups of shredded mozzarella
2 eggs, lightly whisked
2 tsp dried oregano
1 tsp dried basil
½ – ¾ tsp garlic powder (or 2 garlic cloves)
¾ – 1 tsp garlic salt
EVOO
Pizza sauce, cheese and toppings
Directions
1. “Rice” the cauliflower. Chop it in to chunks, and then pulse it in your food processor until it looks like a grain (be careful not to go for too long, as it will become a puree rather quickly). You can also use a cheese grater if you don’t have a food processor.
2. Preheat the oven to 450 degrees.
3. Cook the riced cauliflower in the microwave for 8 minutes
4. Add in the whisked eggs until well mixed, then mix in mozzarella, oregano, basil, garlic powder and garlic salt.
5. Divide the mixture in to 2 equal parts, and you have two pizza crusts.
6. Place on a sprayed cookie sheet, parchment paper or a pizza stone and spread out to a thin layer as you would a dough.
7. Brush “dough” with a layer of EVOO to allow browning to occur when cooking.
8. Cook in oven for 15-20 minutes. Crust should be browned, if it seems too wet, put it back in and check every 2-3 minute
9. Remove when done and spread on desired sauce and toppings – make sure topping are pre-cooked as you are only broiling them for a short time
10. Place back in the oven and broil for 4-5 minutes (to melt cheese, but watch that the crust doesn’t burn too badly)
11. Cut and enjoy!
**Pizza Pictured on the left has a combination of tomato sauce and bbq sauce, a little cheese, bbq chicken and sauteed red onions
**Pizza pictured on the right has pesto sauce (using the Basil Spinach Pesto recipe), a little cheese, tomato and sauteed red onion and fresh arugula
Go HERE to see all Recipes posted on Addicted to Saving
Recipe Inspired from Healthy Tasty Eats
The post Cauliflower Pizza Crust Recipe (Gluten-Free) appeared first on AddictedToSaving.com.
]]>The post Apple Quinoa Bites Recipe appeared first on AddictedToSaving.com.
]]>
{Pin This Recipe}
This past winter, I started cooking with quinoa. After removing gluten from my diet, I started looking for alternate grains to cook with. And while quinoa isn’t a grain (it is a seed), it is very easy to cook with AND bake with! Besides this recipe, I HIGHLY recommend you check out my Quinoa with Roasted Brussel Sprouts & Red Onion recipe. It is one of my favorite meals to make!
These Apple Quinoa Bites make for an excellent breakfast, snack or pre-run meal! I have two nephews that are under the age of 3 and they love this meal! I’m also thinking these would freeze well although I haven’t tried freezing them.
To make these bites, mix the ingredients together (recipe is below)
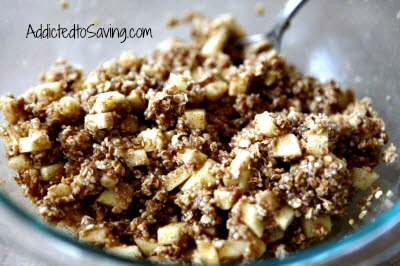
Once mixed, spoon mixture into 12 muffin cups. (recipe is below)
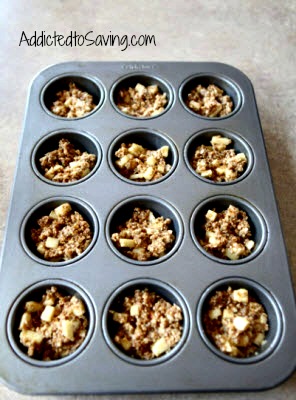
Quinoa Apple Bites

(45 min)
Ingredients
1 cup cooked quinoa
1 cup quick oats **if you are Gluten-free check to make sure your oats are G-free. Not all are.
1 tsp cinnamon
¼ tsp nutmeg (a little goes a long way, I’ve found!)
¼ cup of brown sugar
1 TBSP white sugar
1 TBSP maple syrup
1 cup finely chopped apples
2 eggs lightly beaten
Caramel for drizzling atop (optional)
Direction
1. Preheat oven to 350 degrees
2. Cook your quinoa (2 parts water to 1 part quinoa), then set aside in a bowl and let cool. I like to cook my quinoa in my rice cooker – just make sure to watch it towards the end so it doesn’t burn.
3. Add the cup of quick oats to the quinoa and mix well.
4. In a small bowl mix together cinnamon, nutmeg, brown sugar and white sugar, and then add it to the quinoa/quick oats mixture.
5. Lastly add in maple syrup, chopped apples and eggs and mix lightly until loosely combined.
6. Spray 12 muffin cups with nonstick cooking spray, then fill the cups until they are about ¾ full.
7. Bake for 20-25 minutes. **If so desired, for an indulgent twist, add a drizzle of caramel on top of these delicious treats.
Enjoy!
Go HERE to see all recipes posted on Addicted to Saving
This recipe has been adapted from And They Cooked Happily Ever After
The post Apple Quinoa Bites Recipe appeared first on AddictedToSaving.com.
]]>The post Pesto & Cheese Stuffed Chicken Recipe appeared first on AddictedToSaving.com.
]]>
**Pin This Recipe**

One of my favorite herbs is basil. I love the way it smells when I cut it from my garden, I love the way it goes perfectly with tomatoes and mozzarella, I love it in a pesto sauce, the list goes on and on. One of my favorite ways to cook with basil is in my Basil Spinach Pesto. This pesto can be used in so many different ways and one great way is this Pesto & Cheese Stuffed Chicken recipe. One of my hubby’s annual Valentine’s Day tradition is to cook me dinner (versus going out and dealing with the crowds & busy restaurants). One year, hubby made stuffed chicken breasts for me. I was so impressed because I never tackled making stuffed chicken breasts before thinking that it was a difficult recipe. This Pesto & Cheese Stuffed Chicken recipe is easy to make. Don’t be like I was and let the thought of making stuffed chicken overwhelm you – it really is easy!
The main ingredients of this recipe are your chicken and your pesto. Once you have your ingredients ready to go, flatten your chicken with a meat mallet and spread the pesto and cheese mixture on it (see recipe and directions below).
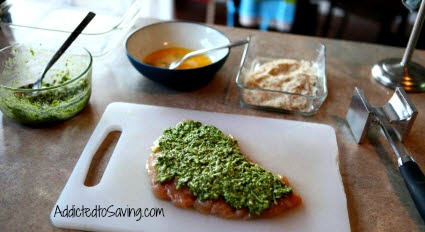
Then roll your chicken, dip it in egg and coat with the bread crumb mixture, place it in the baking sheet and bake for 30-35 minutes. Serve with a simple salad, and you have a well rounded meal! How easy is that? (See below for the recipe ingredients and directions.)
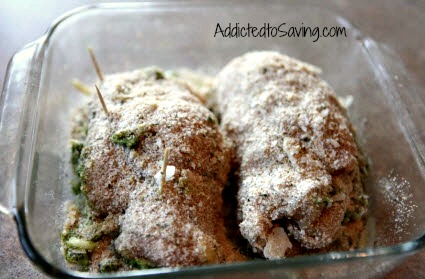
Pesto & Cheese Stuffed Chicken Recipe
Ingredients
2 chicken breasts
¼ cup of pesto
¼ cup of shredded mozzarella
1 egg
½ cup bread crumbs
1/3 cup shredded parmesan cheese
salt
pepper
Directions
1. Preheat oven to 375 degrees and lightly coat an 8×8 baking dish
2. In a small bowl mix together pesto and mozzarella, salt and pepper
3. In another bowl, whisk egg with 1 tsp. of water
4. In a 3rd bowl, mix bread crumbs and parmesan cheese
5. Flatten chicken with a meat mallet
6. Spread pesto/cheese mix on chicken
7. Roll chicken up and secure with toothpicks (it might be messy at this point, and that’s okay!)
8. Dip chicken in egg, making sure it’s fully coated
9. Transfer chicken to bread crumb mixture and fully coat
10. Place chicken in baking dish and repeat with 2nd piece
11. Bake chicken for 30-35 minutes at 375 (chicken should be firm to the touch)
Enjoy!
Go HERE to see additional Recipes posted on Addicted to Saving
This recipe is adapted from Kalyn’s Kitchen
The post Pesto & Cheese Stuffed Chicken Recipe appeared first on AddictedToSaving.com.
]]>The post Basil Spinach Pesto Recipe appeared first on AddictedToSaving.com.
]]>
Belonging to a fruit & veggie coop, I get really excited every Wednesday. Wednesdays are the day that we go to pick up our produce bin. The way our coop works, we don’t have control over what fruits & veggies we get each week. Instead, each week there is a huge variety of in-season produce overflowing in our bins. Hubby loves it because he juices pretty much every fruit & veggie and I love it because I can cook to my heart’s desire and experiment with new recipes and concoctions.
One week we received a huge bag of Basil as well as a huge bag of fresh spinach from our coop. Immediately I knew that I wanted to make pesto. But I wanted to add some additional nutrients into the pesto. I found a recipe for Basil Pesto and it was one of those moments where I heard angels singing from heaven when I realized we could add spinach to it. Basil is full of Vitamin A, K and folate and spinach is chock full of Iron, Vitamin C, Vitamin K, Folate and Beta-Carotene so I figured combining the two greens would give hubby and I lots of vitamins and nutrients in just one meal!
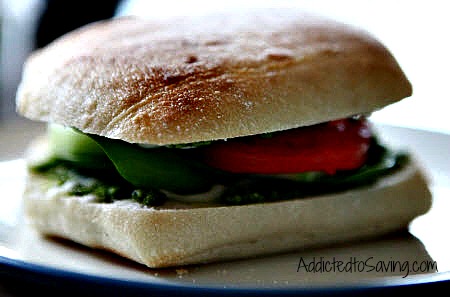

The pesto recipe below goes perfectly on pasta, stuffed in chicken (make sure you see my upcoming recipe for this!), on sandwiches, pizzas, and so much more! Picture above is a veggie sandwich that is SO tasty and easy to make. Spread the pesto on both slices of bread, add any fresh veggies you like (pictured is fresh spinach, tomatoes & cucumbers), add mozzarella cheese and voila. A super easy vegetarian sandwich that is tasty and good for you!
Basil Spinach Pesto Recipe
(estimated 30 min to prepare)
Ingredients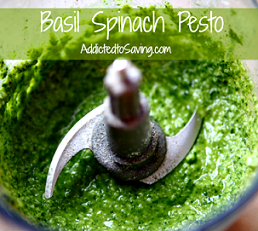
1 cup of basil, packed
1 cup of spinach, packed
4 cloves of garlic
½ cup of pine nuts
1/2 cup of extra virgin olive oil
Salt to taste
Pepper to taste
¼ cup of lemon juice
Directions
1. Place all ingredients in to a food processor
2. Process to desired consistency. You may need to scrape the sides of the food processor to insure that everything gets chopped nicely.
3. Store in a glass jar
Enjoy!
Go HERE to see additional Recipes posted on Addicted to Saving
This recipe is adapted from Kalyn’s Kitchen
The post Basil Spinach Pesto Recipe appeared first on AddictedToSaving.com.
]]>The post Copycat Cherry Pie Larabars Recipe appeared first on AddictedToSaving.com.
]]>
)
I LOVE this recipe! One of my favorite snack bars to eat before going out on a long run are Larabars. They have just the right amount of protein and carbs to keep my body fueled when I’m out burning calories running. Even if you don’t like to run, this recipe would make a great snack for yourself or your kiddos. This recipe is healthy, simple AND you need just three ingredients. And, for those of you who don’t eat gluten, this recipe is gluten-free! Just make sure the dates you use are not dusted in wheat as many are.
If you don’t like cherries, you can substitute other dried fruits. I’m thinking that dried apricots or cranberries would be really good as well!

Copycat Cherry Pie Larabars
Ingredients 
¾ cup of raw almonds
1 cup dried cherries
1 cup dates
Directions
1. Chop the almonds in a food processor
2. Add the cherries and dates to the food processor
3. Pulse the ingredients until well-blended. Run for an additional 1-2 minutes.
4. Spread ingredients in an 8×8 or 9×9 pan and let chill in fridge for 1-2 hours.
5. Slice and enjoy!
This recipe was inspired by Food.com
The post Copycat Cherry Pie Larabars Recipe appeared first on AddictedToSaving.com.
]]>The post Quinoa with Roasted Brussels Sprouts & Red Onion Recipe (Gluten-Free) appeared first on AddictedToSaving.com.
]]>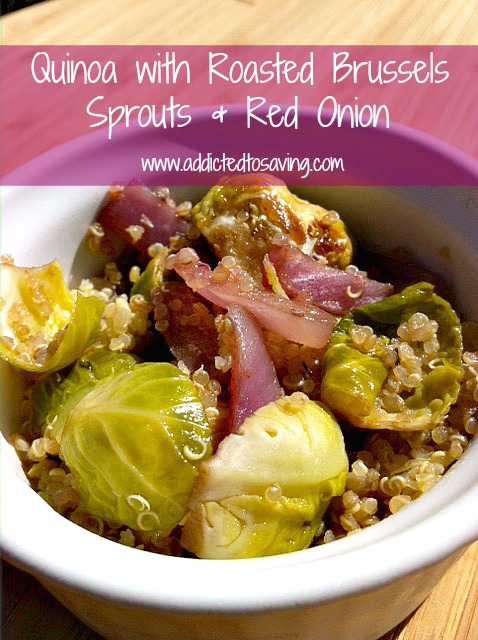

Many of you know that starting in January, I went gluten-free. I never got tested for Celiac disease so I don’t know for certain that I have it. But I do know that I have a major gluten intolerance and I’m suspecting gluten has been wreaking havoc on a lot of health conditions I’ve been living with for years and years. So I’ve been trying to branch out and find recipes that are not only gluten-free but tasty! If you are looking for quinoa gluten free recipes, this is a great one. One of my FAVORITE foods that I’ve been making on a weekly basis is quinoa. Not only is it gluten-free but it is jam packed with nutrients. Another food that I’ve been making every week is Brussels Sprouts. I have to be honest… I didn’t know that I liked brussels sprouts. I vaguely remember having them as a child and I know that I wasn’t a fan. Over Christmas, however, my brother-in-law made an awesome brussels sprouts side dish and I became a huge fan. I can honestly say that I could eat brussels sprouts at least 3 or 4 times a week and I would never get sick of them. They are that good!
This dish is so easy to make, very versatile (you can add other veggies to this dish – I love to add red peppers) and is super healthy. If you are trying to eat clean, this is a great recipe for you. Also – this recipe calls for balsamic vinegar which I absolutely adore. Hubby, however, doesn’t love it as much as me. I’ve made this recipe without balsamic vinegar and it is so good that way as well. Feel free to adjust the recipe below to your liking. When you are in the kitchen, have fun with your recipes and adapt them to fit your likes and dislikes
Frugal Tips
- I haven’t been able to score as good of deals on quinoa as rice or pasta. But I was able to get it for 50% off at a local grocery store that was going out of business. I also have purchased it online on Amazon or Vitacost.com. Usually I compare the cost on these two sites and order whichever is cheaper. The good thing about Quinoa is that a little goes a long way.
- Watch your store’s pricing on brussels sprouts and stock up on them when they go on sale. I am fortunate because the coop I belong to gives us brussels sprouts every few weeks.
Healthy Tips
- Quinoa is a seed but yet cooks like most grains. And, one serving of quinoa typically has one serving of protein! So if you are vegan or vegetarian, this is an awesome source of protein for your diet.
- Brussels sprouts are low calorie (1/2 cup has approximately 30 calories), is packed with 20 essential vitamins and minerals (including vitamin C, folate, vitamin K and more) and contain Isothiocyanates which may prevent cancer and heart attacks! (resource: Livestrong.com)
Quinoa with Roasted Brussels Sprouts & Red Onion
Ingredients 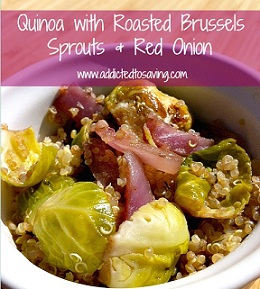
1 cup Quinoa
2 cups Water
1 cup Red Onion, diced
1 lb Brussels Sprouts, washed, halved (remove any yellowed outside leaves)
2 – 3 Garlic Cloves, minced
3 T Extra Virgin Olive Oil
2 T Balsamic Vinegar
2 teaspoons Dried Dill
Ground Pepper, to taste
Instructions
1) Preheat oven to 400
2) Add Quinoa, Water and Sea Salt to pot. Bring to a boil. Once boiling, reduce heat and cook quinoa until water is absorbed and quinoa fluffs up. Once done, set aside.
3) In a mixing bowl, mix red onion, Brussels sprouts, garlic, EVOO, dill and sea salt.
4) Pour brussels sprouts mixture into casserole dish. Roast for 20 – 25 minutes until sprouts are tender and a bit browned. Stir every 8 minutes or so.
5) Combine cooked brussels sprouts & quinoa. Drizzle with a little EVOO and balsamic vinegar. Add a bit of Sea Salt and black pepper (as desired).
Enjoy!
To see additional recipes posted on Addicted to Saving, go HERE
This recipe was adapted from Gluten-Free Goddess
The post Quinoa with Roasted Brussels Sprouts & Red Onion Recipe (Gluten-Free) appeared first on AddictedToSaving.com.
]]>The post Vegetarian Chili in a Crockpot Recipe appeared first on AddictedToSaving.com.
]]>
)
One of my favorite comfort foods is chili. Especially on cold winter days. Chili has this magical ability of warming my bones while at the same time transporting me back to my childhood. I love loading my crockpot with the ingredients and letting it cook all day. Many of you know that I’ve been eating gluten-free for almost two months now. I was excited because this is a crockpot chili recipe I made before my G-free days and I didn’t have to do anything special to adapt it to my life now. If you eat G-free, just make sure that your cans of diced tomatoes, corn and tomato sauce do not include any gluten.
Frugal Tips
- Because this is a meat-less dish, you are immediately saving money. Canned and dried beans are very frugal ingredients. The recipe I make uses four cans of beans but you could very easily substitute dried beans for them. Just make sure you soak your beans prior to putting them in the crockpot. My stockpile price for canned beans is $0.50/can or less. In fact, the beans in this recipe cost around $0.42 a can.
- Diced tomatoes and cans of tomato sauce are also very affordable ingredients. When your local grocery store has them on sale, match the sale with a coupon to get a great price. My stockpile price on canned tomatoes is around $0.40/can or less.
Healthy Tips
- This recipe immediately has less fat because there is no ground beef.
- This is a high fiber crockpot chili recipe. Who would have thought that getting enough fiber in your diet helps prevent heart disease, cancer, diabetes, Diverticular disease and more! (source ehealthmd.com)
- Always rinse & drain your canned beans. Canned beans are often packed with a salty liquid that not only increases your sodium intake, but also changes the taste of your recipe.
- This crockpot chili recipe is great because you can add even more vegetables to it than the recipe calls for. I will often go through my refrigerator and throw in green beans, celery, asparagus and fresh corn to this recipe. Anything goes with this chili.
Vegetarian Chili in a Crock Pot
Ingredients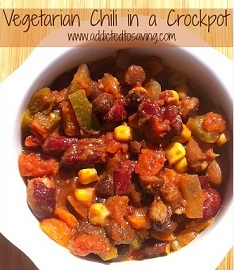
1 can Black Beans, 19 oz (rinsed & drained)
1 can Kidney Beans, 15 oz (rinsed & drained)
1 can Garbanzo Beans, 15 oz (rinsed & drained)
1 can Pinto Beans, 15 oz (rinsed & drained)
1 can Diced Tomatoes, 28 oz
1 can Corn, whole kernel (rinsed & drained) **I’ve also used leftover fresh corn in lieu of canned
1 can Tomato Sauce or Puree **this is different from jarred pasta sauce. I like to use Muir Glen Organic Tomato Sauce.
1 Large Onion, chopped & diced
2 Green Bell Pepper, chopped & diced
1 Red Bell Pepper, chopped & diced
2 Jalapenos, chopped & diced **for less spicy chili, remove seeds from jalapenos. I usually leave the seeds and add more jalapenos
6 Garlic Cloves
4 T Chili Powder
2 T Chipotle Powder
1 t Salt
Black Pepper
Directions
1) Place onion, peppers, garlic cloves in bottom of crock pot. (I do not saute them prior.)
2) Add drained & rinsed beans and corn.
3) Add diced tomatoes & tomato sauce.
4) Add spices & garlic
5) Stir.
6) Cook on high for 3 – 4 hours or cook on low for 6-8 hours. **I like to let this cook as long as possible. The longer it cooks, the more the flavors merge
Enjoy!
To see additional recipes posted on Addicted to Saving, go HERE
The post Vegetarian Chili in a Crockpot Recipe appeared first on AddictedToSaving.com.
]]>The post Sweet Pepper & Asparagus Black Bean Soup with Hurst Family Harvest Beans & $25.00 Publix Gift Card Giveaway appeared first on AddictedToSaving.com.
]]> I was given the opportunity to try out Hurst Family Harvest Bean Soups and of course I jumped at the chance! If you have followed Addicted to Saving, you know that I LOVE cooking with beans. They are low fat, high fiber and high protein. AND, Hurst Family Harvest Soups are Gluten-Free which makes me VERY happy!
Hurst Family Harvest has seven different soup mixes to choose from. They are sold at Publix, Whole Foods, Food Lion, MARSH, ingles and more! If you shop at Publix, they are usually priced around $2.99/soup mix. The Chipotle Lime Black Bean Soup (see below for the recipe) has 10 servings. Awesome deal!


Sweet Pepper & Asparagus Black Bean Soup Recipe
**I altered the recipe on the back of the Hurst Family Harvest Chipotle Lime Black Bean Soup to make it vegetarian. Their recipe calls for smoked sausage which sounds amazing! You could very easily alter my recipe below to add either different vegetables, smoked sausage or another type of meat! I love Hurst Family Harvest soups because they are easy to adapt to your eating preferences!
Ingredients
1 Package Chipotle Lime Black Bean Soup
1/2 Green Bell Pepper (diced)
1/2 Red Bell Pepper (diced)
1/2 lb Asparagus (diced)
1 cup Onion (diced)
2 T Extra Virgin Olive Oil
2 Cloves Garlic
1 teaspoon Chili Pepper (if desired)
Directions
1) Rinse and sort through the beans. Pour beans into a large bowl or pot and cover with 2 inches of warm water. Soak 4 hours or overnight.
2) Drain and rinse beans and discard water.
3) In a soup pot, saute peppers, asparagus and onion in olive oil.
4) Once vegetables are softened, add 7 cups of water and beans. Turn heat to high and bring to a boil. Stir periodically.
5) Reduce the heat to low and cover the pot. With pot cover, simmer for 60 minutes – stir periodically.
6) Uncover and simmer uncovered for an additional 15 minutes.
7) Once beans are fully tender, add seasoning packet. Simmer for an additional 10 minutes.
Serve & Enjoy
And now for the giveaway!One lucky Addicted to Saving reader will win a $25.00 Publix gift card! (Just think of all of the Hurst Family Harvest Soup mixes you can get with $25.00!!)
How to Enter:
1)**Mandatory Entry** Leave your first comment on this post stating which Hurst Family Harvest Soup you would most like to try.
2)**Optional entry** Go HERE to follow Addicted to Saving on Pinterest. Leave a second comment on this post stating whether you are a new or existing follower.
2)**Optional entry** Go HERE to sign up to receive Addicted to Saving’s free Daily Email that is sent out every day around 4:00 pm. Leave a third comment on this post stating whether you are a new or existing subscriber. **Remember by doing so you are automatically entered into a monthly drawing for a $50 Target or Walmart gift card.
**Giveaway ends on or after Sunday, January 13th, 2013 at or after 8 pm EST**
Disclosure: This giveaway is sponsored by Hurst Family Harvest. As always, all thoughts and opinions are my own!
The post Sweet Pepper & Asparagus Black Bean Soup with Hurst Family Harvest Beans & $25.00 Publix Gift Card Giveaway appeared first on AddictedToSaving.com.
]]>The post Holiday Side Dishes Recipe Recap: Corn Pudding, Tangy Broccoli Salad, Paula’s Mashed Potatoes and more appeared first on AddictedToSaving.com.
]]>In case you missed my Holiday Side Dish recipes that I’ve been posting the past week, below are just a few of the dishes I will be indulging in this Thanksgiving. What dishes do you make on Thanksgiving?
Holiday Side Dish Recipes: Corn Pudding
Holiday Side Dish Recipes: Tangy Broccoli Salad
Holiday Side Dish Recipes: Crispy Veggie Casserole
Holiday Side Dish Recipes: Sweet Potato Casserole
Holiday Side Dish Recipes: Paula’s Loaded Mashed Potatoes
The post Holiday Side Dishes Recipe Recap: Corn Pudding, Tangy Broccoli Salad, Paula’s Mashed Potatoes and more appeared first on AddictedToSaving.com.
]]>The post Easy Salsa Recipe appeared first on AddictedToSaving.com.
]]>
So, I’ve already told you that I have awesome readers. But besides that, I have awesome friends. Two of my friends went and picked tomatoes at Hunsader Farms in Bradenton (you can score 25 lbs of tomatoes for $1.00 right now – read my post HERE). They brought me back somewhere between 10-15 lbs of tomatoes so I’m in the midst of figuring out recipes to use these tomatoes in! Well – I found an Emeril Lagasse recipe for Pico de Gallo and it had my name all over it! It was simple and super healthy. This was the first time I’ve made salsa and I have to say that it was SO easy and this is 100% better than any jarred salsa I’ve purchased! I altered his recipe quite a bit and I also used the food processor to chop up the tomatoes and to make the pico into a salsa. If you would prefer pico de gallo, just use the ingredients below and chop them with a sharp knife into small pieces. Mix together and voila

Easy Salsa Recipe
Ingredients 
2 Large Tomatoes (seeded)
1/4 Large Red Onion
1/2 Jalapeno (remove seeds for less “heat” – I kept the heat in. Give is quite a kick!)
2 Large Cloves Garlic
Juice of 1 Lime
4 T Cilantro
Salt and pepper
Directions
Cut all of the ingredients into large chunks.
Place in food processor (if making salsa).
Squeeze juice of Lime into food processor.
Process until you reach the consistency you want. Otherwise – if you want Pico de Gallo, dice all of the ingredients and mix in a bowl.
Serve and enjoy.
The post Easy Salsa Recipe appeared first on AddictedToSaving.com.
]]>The post Crock Pot Recipe – Low Fat Mexican Fiesta Chicken appeared first on AddictedToSaving.com.
]]>
So I told many of you on Addicted to Saving’s Facebook page that my crock pot broke. My crock pot was a wedding present and thus 10.5+ years old. I realized something was wrong with it when it cracked my zodiac countertop. (A nice 10 inch long crack, I should add.) So after I realized it cracked my countertop, I would place my crock pot on newspapers and cloth towels to prevent it from cracking my countertop anymore. Well – after doing this a couple of times, it started burning holes in my cloth towels. I decided it was time to toss it.

Thanks to free Amazon gift cards I got from Hamilton Beach 33967 Set ‘n Forget 6-Quart Programmable Slow Cooker

Now – back to the recipe!
Low Fat Mexican Fiesta Chicken
Ingredients
2 lb Chicken Breasts
1 Package Taco Seasoning
2 Tablespoons Extra Virgin Olive Oil
2 Tablespoons Apple Cider Vinegar
1/4 cup Water
1 Can Diced Tomatoes (I used Rotel)
1 Can Whole Kernel Corn (drained)
1 Can Black Beans (drained and rinsed)
1 Cup Quick Cooking Brown Rice
Directions
1) Rinse chicken and place in slow cooker
2) Mix taco seasoning, EVOO, Apple Cider Vinegar and water.
3) Pour over chicken.
4) Cook on high for 3 1/2 hours (or low for 5 hours)
5) Shred chicken. Add Tomatoes, drained corn, drained beans and rice. stir.
6) Cook 30 minutes on low. (You may have to cook longer until the rice is tender.)
7) Serve on rice, on salad, in tacos, on chips, etc.
The post Crock Pot Recipe – Low Fat Mexican Fiesta Chicken appeared first on AddictedToSaving.com.
]]>The post Homemade Thin Mints Cookie Recipe appeared first on AddictedToSaving.com.
]]>
I am a huge fan of Thin Mints cookies. I can eat a whole sleeve of Girl Scout Thin Mint cookies in less then a day! So, when I found this recipe, I was so excited to try it and then share it with you! I made these cookies last night and myself and my husband LOVE them. Honestly, they taste just like the real thing! And, I also love that they are frugal in that they only include 3 ingredients!!
Ingredients
1 package chocolate chips 12 oz
2-3 drops Peppermint Extract
40-60 Ritz crackers
Directions
1) Melt chocolate chips in glass bowl in microwave. Stir.
2) Once melted, add 2 drops Peppermint Extract. Taste test. Add more extract as needed.
3) Dip Ritz crackers into chocolate.
4) Place cookies on wax paper or cooling rack. Refrigerate cookies until chocolate has hardened.
Eat and Enjoy!
The post Homemade Thin Mints Cookie Recipe appeared first on AddictedToSaving.com.
]]>